Issues are tickets in Relay. These can be concerns, questions, work orders, installations or trainings/activations that Customers or the Relay Proactive network monitoring device submit for Relay agents to resolve.
Learn more about Issues in the sections below.
Issue details

- Source: Issues can come to Relay from many sources—anywhere from phone and online chat (webConnect) to Relay Proactive and online Schedulers. Relay displays Issue source icons on Issue cards in the inbox, list, and kanban. It allows agents to easily identify how the Issue was added to Relay and prioritize the Issues accordingly. For example, SMS Issues can take priority over email Issues, as it is likely that the merchant texting with their Issue needs a quicker answer than a merchant emailing. Learn about Issue source icons here.
- Type: Issues come in a variety of types, depending on what the Customer needs help with. The most common Issue type is support—support Issues can be about technological errors or simply account, how-to, or setting configuration questions. These Issues can be created automatically through, for example, webConnect, or added manually by agents. Issues of other types can also come in from sources such as online Schedulers and Relay Proactive. You can easily determine the Issue type by hovering over the colored bar on the left side of the Issue card in the Issues list. Learn more about Issue types here.
- Status: Issues go through the workflow from Preparing to Closed (or Canceled), and change statuses in between. Depending on the Issue type, the Issue workflows differ. For example, only Issues of types Work Order and Training can have the statuses of Scheduling, Scheduled, In Progress, and Pending Close. Learn more about Issue statuses here.
- Category: Issue category tags (configured at the Organization level) describe the merchant's Issue in more detail. For example, you can select Windows Error and Account Update as category tags on the same Issue.
- Reference ID: the unique 6-character identifier for the Issue. You can search for an Issue using its RefID or give the RefID to the Customer for them to be able to identify their Issue to you later.
Viewing Issues
Relay provides three main ways to view groups of Issues—inbox, list, and kanban.
Issues inbox
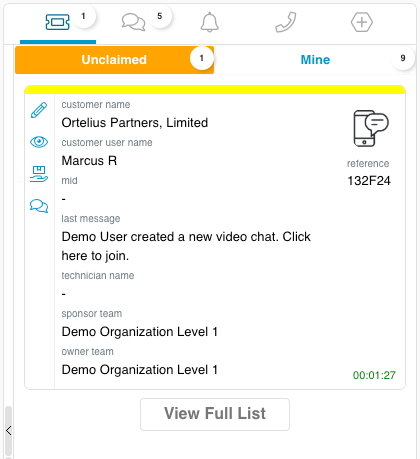
Located on on the right side of the Relay window, the inbox is a convenient place for agents to view and claim Issues. It displays unresolved Issues in real time from all sources.
The inbox consists of two queues—Unclaimed and Mine. In the Unclaimed queue are all Issues submitted to the Teams you are assigned to that do not yet have a primary owner. In the Mine queue are Issues for which you are the primary owner or collaborating user. You may limit the number of simultaneous Issue cards shown in the agents' Mine inboxes.
Issues in the inbox are displayed as individual Issue cards. These cards can be sorted by Issue updated times and Customer Issue priority. The information displayed on the cards can also be easily customized for your Organization, agents, and yourself.
Issues list
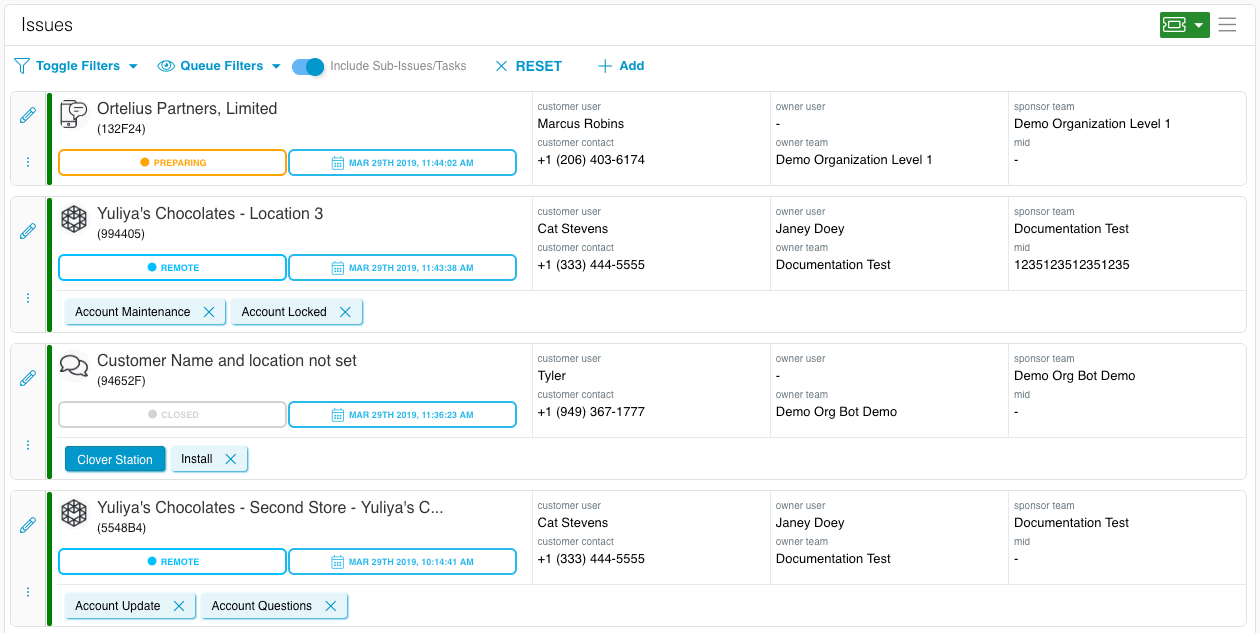
Accessed by going to Issues → List, this list displays all incoming, ongoing, and past Issues from an agent's Team(s). The list consists of Issue cards that show important issue information, such as Issue type, source, status, category, date created, and Customer and Organization details.
For your convenience, the Issues list can be filtered by type & status, Team, Owner User, and inbox queue status (e.g. unclaimed or mine).
Issues kanban
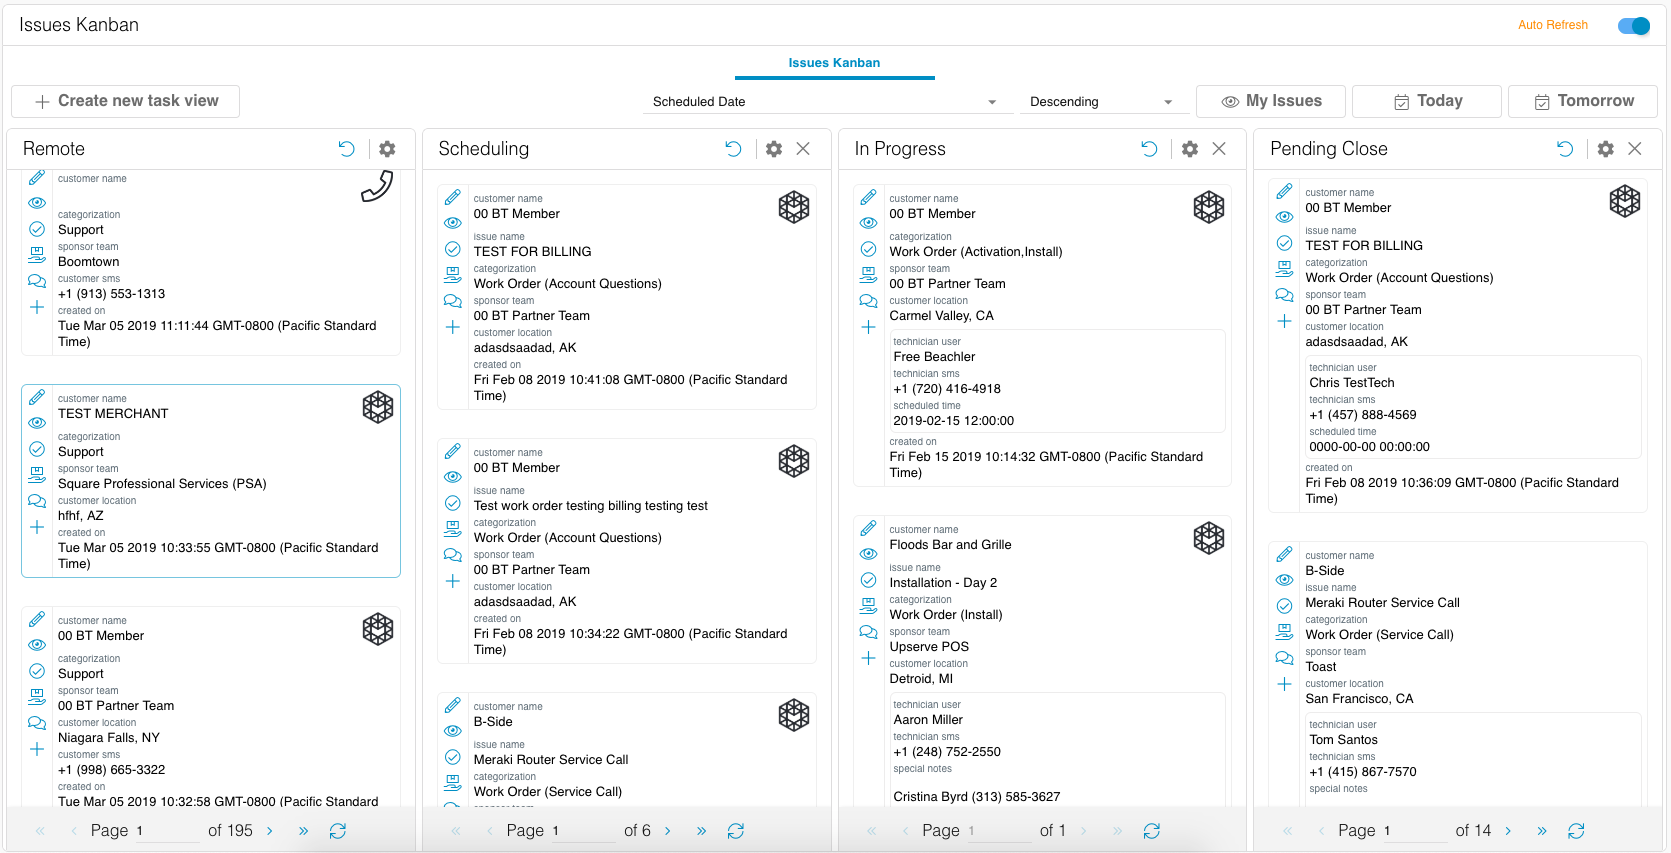
Accessed by going to Issues → Kanban, the kanban (or task view) is a project management dashboard that allows agents to conveniently display their current Issues moving through the workflow and changing statuses. Agents can view their current Issues separated by status to quickly identify where each Issue is in its workflow and what are the next steps to take on that Issue.
The kanban consists of columns that typically have Issues filtered by status. You can edit the filters on these columns or create additional kanbans customized to your needs.
Issues in the kanban are displayed in the columns as individual Issue cards. These cards are similar to the Issues inbox cards, but vary slightly by information and action buttons displayed.
Working on an Issue
Issue actions
- Add: although many Issues are created automatically when they come in through channels such as email, webConnect, online Schedulers, or Relay Proactive, agents can also manually add Issues to Relay for both new and existing Customers. These Issues will have the Relay logo as their source icon.
- Assign: you may assign a new Owner User, including yourself, to an Issue at any point before its resolution. The Owner User is the agent who will follow the Issue to resolution and perform all the necessary intermediate actions.
- Escalate/de-escalate: you can escalate Issues internally or to other Organizations to bring attention to a specific Issue and make sure it gets to the right Teams. Relay makes it easy to escalate Issues for tracking and oversight, and notifying the right Teams or individuals that need to be involved.
- Snooze: the snooze functionality allows support agents to temporarily remove an Issue from their inbox. Snoozed Issues are those that do not need to be addressed immediately. For example, an agent may leave the Customer a voicemail and snooze the Issue to check in with the Customer at a later time. Snoozing Issues is also helpful for administrators who may want to check the snooze reasons for why an Issue is taking longer to resolve.
- Resolve: after the Customer's concerns have been address and/or the work order/training has been completed, you may resolve the Issue. You can also email the Customer a feedback survey upon resolution.
- Claim: claiming an Issue means assigning yourself as the Owner User. You can easily claim an Issue directly from the Issues inbox or assign it to yourself through the Issues list. Additionally, if you manually add an Issue, you will automatically be assigned as its Owner User (but can reassign the Owner later).
- Add collaborating users: collaborating users are able to view an Issue workflow and receive relevant alerts to stay up to date on the Issue, but aren't expected to see the Issue to resolution and cannot perform actions such as resolve or escalate. You can add yourself as a collaborating User on an Issue by clicking on the Watch button on the Issue inbox card in the Unclaimed Issues inbox queue.
- Change Customer assignment: you can assign a new Customer to an existing Issue while it has a Remote, Preparing, or Scheduling status. This will also change the Customer Location and Customer User on the Issue.
Issue modal (window)
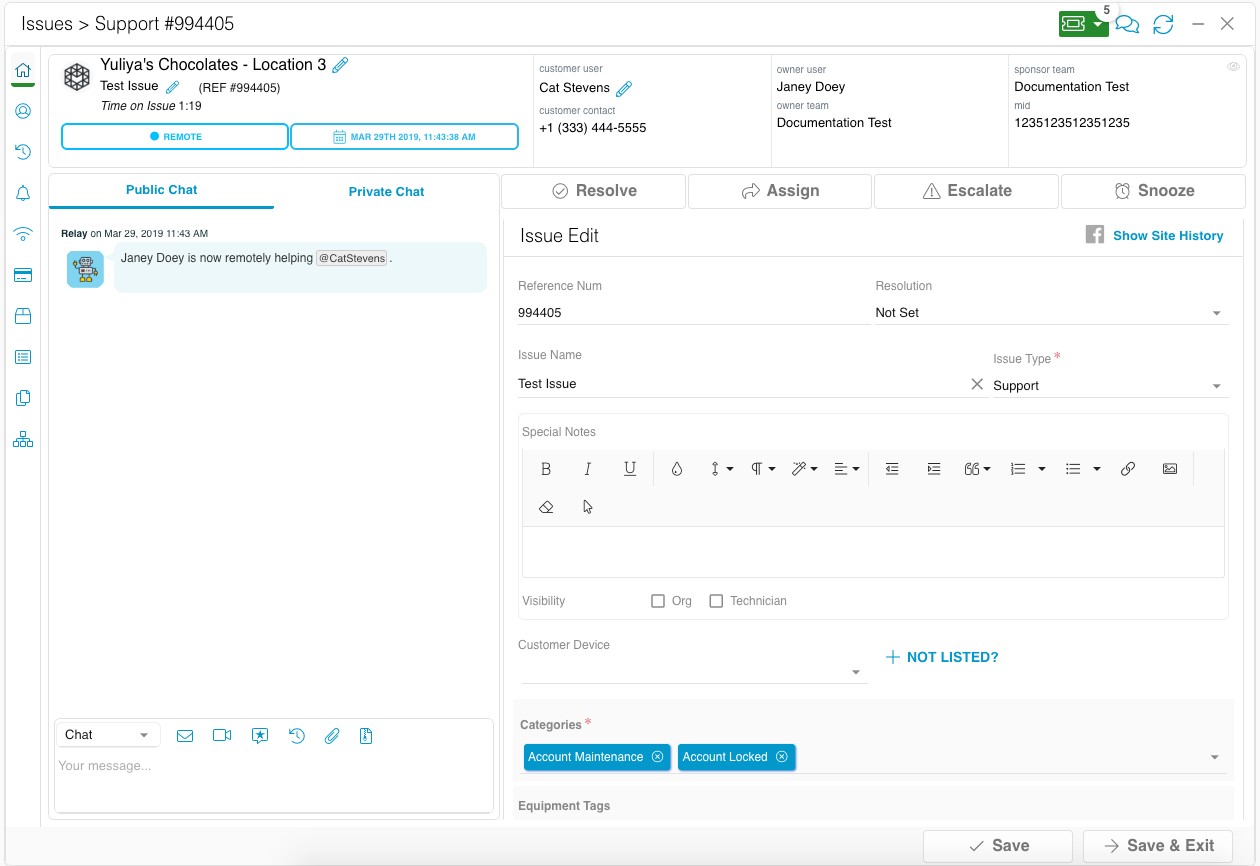
The Issue modal provides a convenient way for agents to take the Issue from submission to resolution. It allows agents to perform all the necessary steps, such as communicating with the Customer or escalating and resolving an Issue—all from the same window. This is where you can get details on an issue, communicate with a merchant, and perform Issue actions such as snooze or resolve.
The modal also includes Issue chatrooms, which allow agents to interact with Customers and colleagues through multiple channels, such as chat, SMS, email, or video call—all in the same chat window.
Issue history
Logs
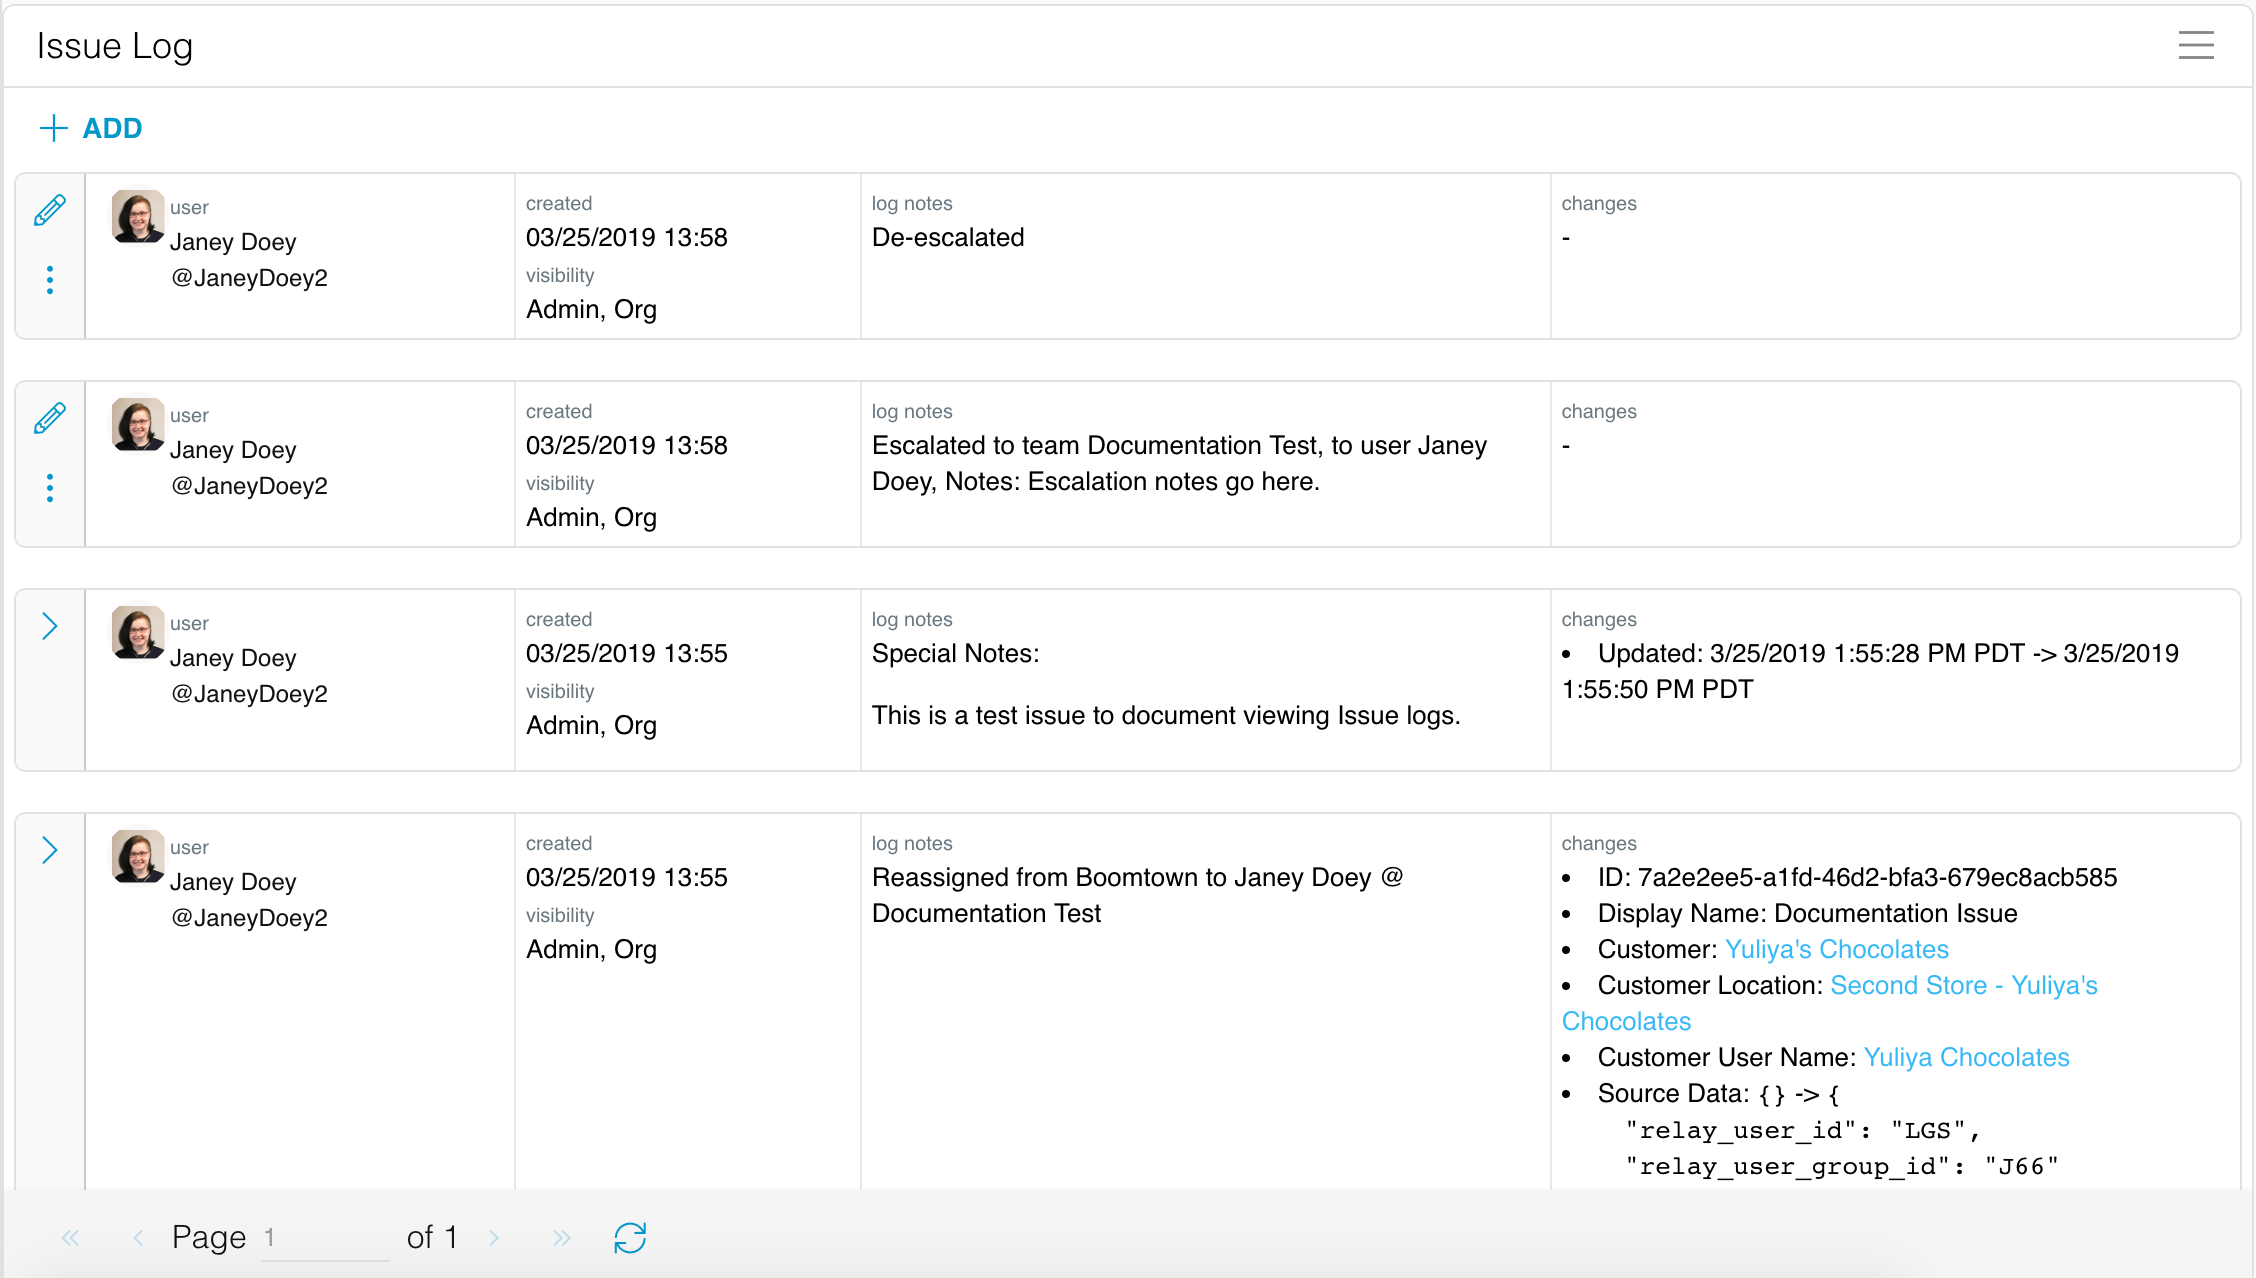
- Issue log: a historical record of everything that has happened related to the Issue. Here, you can find Issue notes, updates, escalation information and notes, and other steps taken on an issue. You can also edit some of the log entries.
- Notifications log: contains information about all Relay-generated notifications that were sent in the context of the Issue across all communication channels. This includes records of push notifications, SMS, emails and Relay notifications that were sent from this Issue to different customers, agents, and technicians. The notification logs make it easy to reference every communication that occurred with a customer, whether you sent it or not.

Customer Location Issue history
Agents can easily view Issue history at each Customer Location to understand the Location's patterns of activity and better diagnose the Issue or proactively reach out to Customers about a frequently malfunctioning device or recurring network issues. You can access site history directly from and Issue's modal or from the Customer Location record.
Issues dashboards and reports
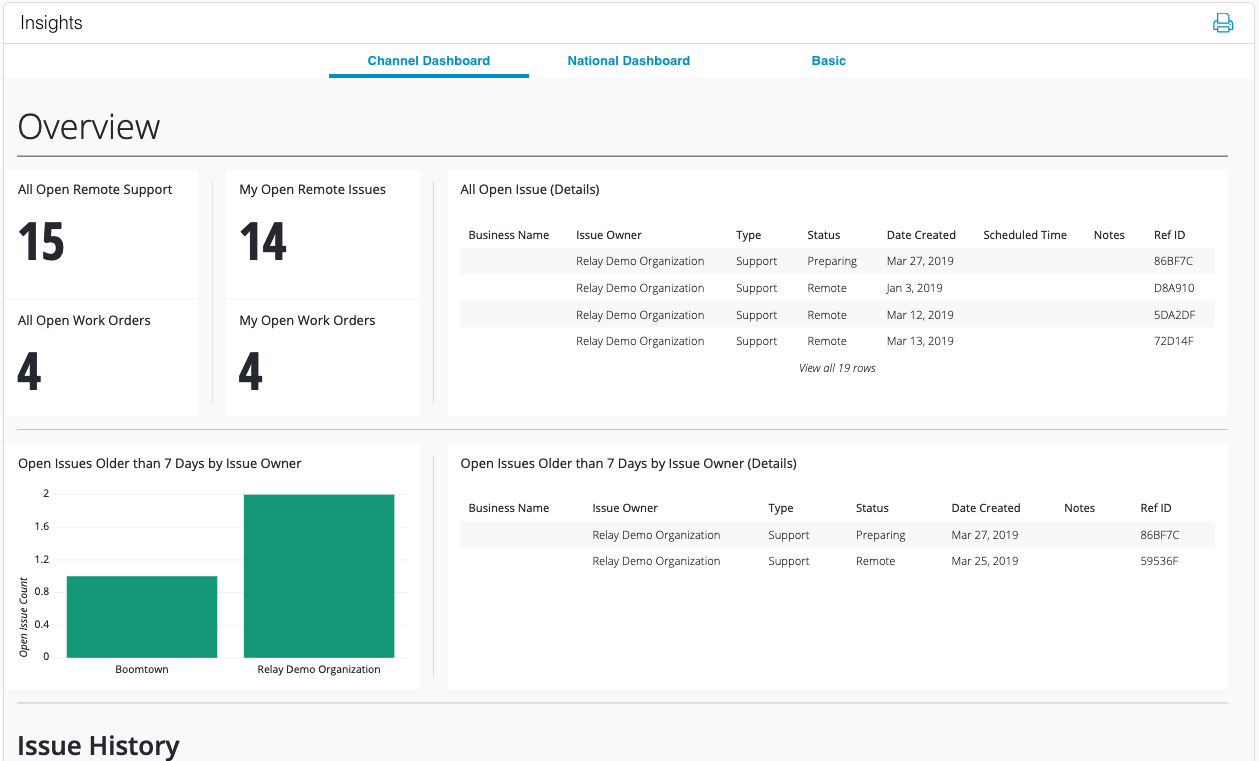
Your Organization's dashboard(s) provide a comprehensive overview of the Issue history for all your Teams. Here, you can view information about Issue history by type and location, as well as export the Issues details report.
You can also collect information about the Customers' experiences by emailing them customizable feedback surveys at the end of each Issue interaction.
