You will be provided with a default Issues Kanban but can create additional Kanbans based on your needs—for example, a Kanban with columns for each type of Issue. You can easily toggle between multiple Kanbans at the top of the Issues Kanban modal.

- Go to Issues → Kanban.
- In the top left corner of the Issues Kanban modal, click on
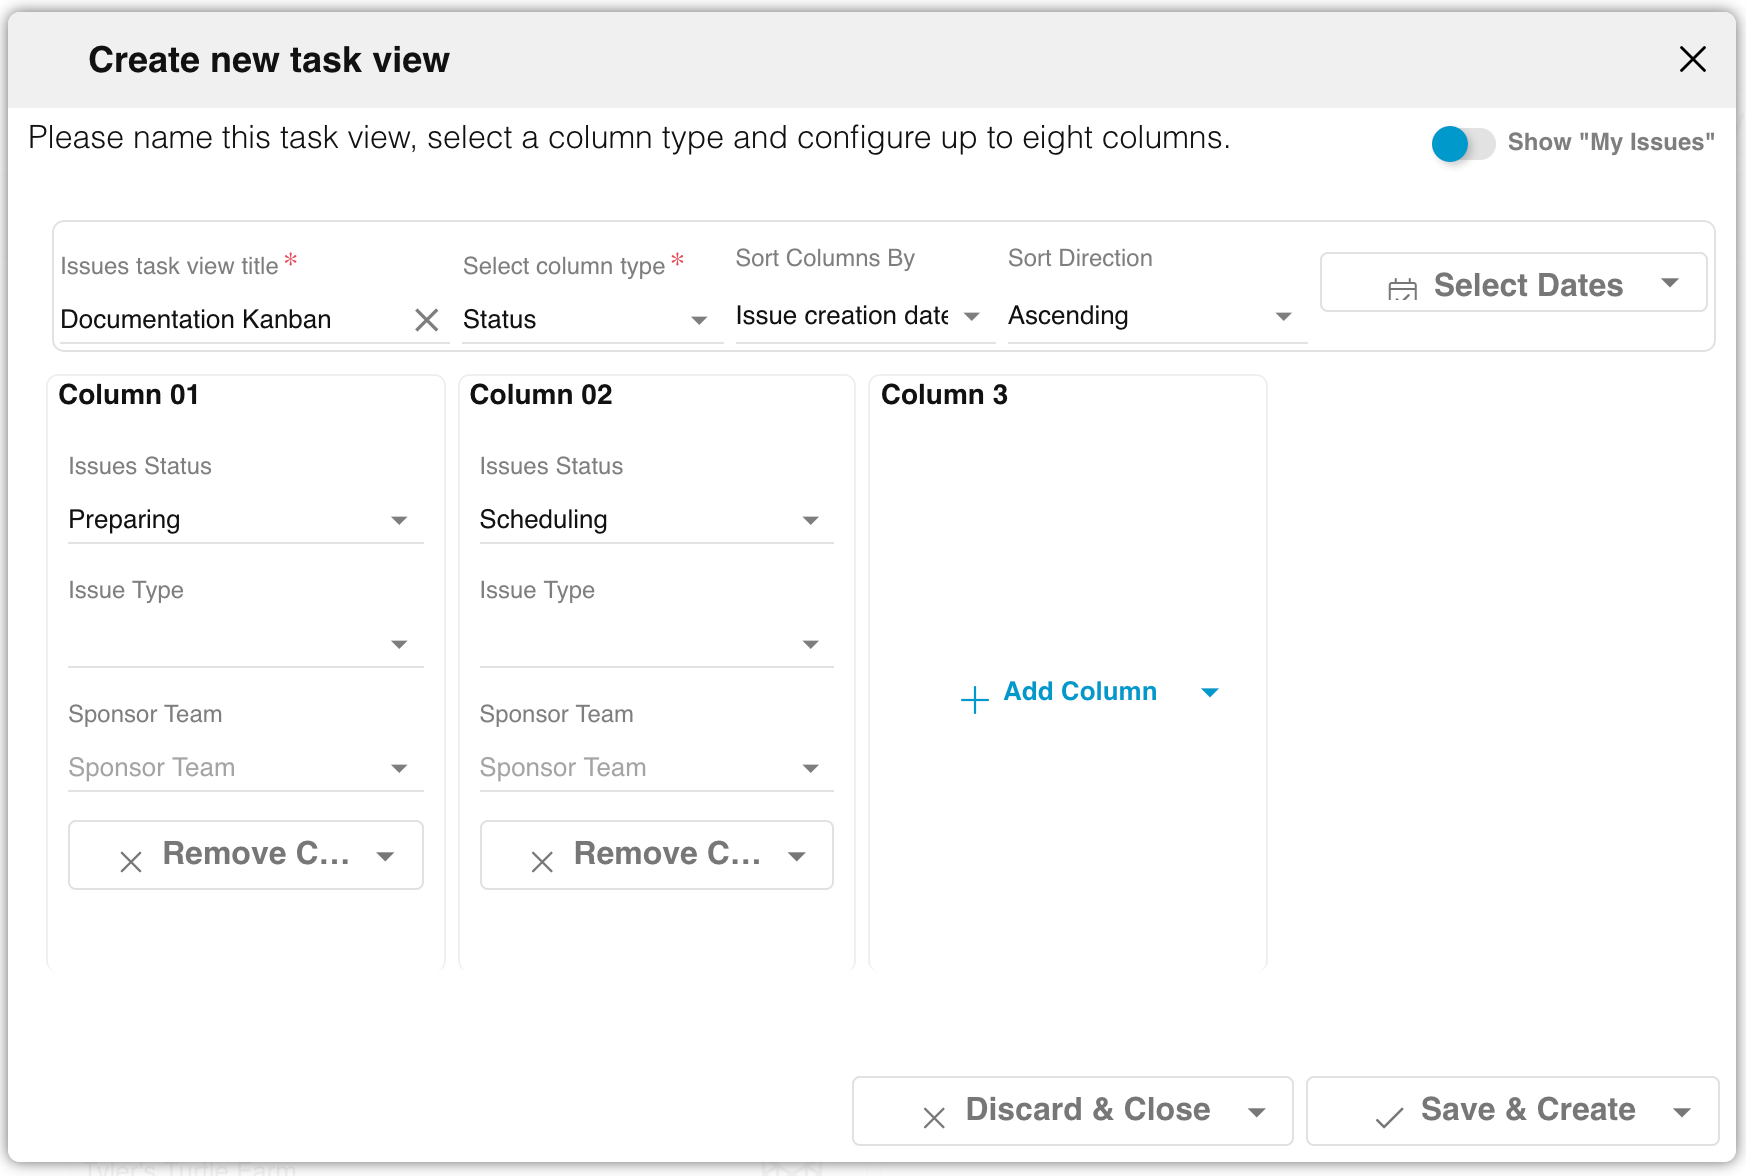
 . A Create new task view window will pop up.
 - Fill out the following Kanban profile fields:
- Show "My Issues": toggle on if you would like only Issues assigned to or claimed by you to be displayed in this Kanban.
- Issues task view title: name your Kanban.
- Select column type: choose between Status, Type, and Team, depending on how you would like the Issues to be filtered in your columns. You will later be able to add additional filters to each column.
- Status: Issues of the specified status will be grouped in one column.
- Type: Issues of the specified type will be grouped in one column.
- Team: Issues assigned to the specified Sponsor Team will be grouped in one column.
- Sort Columns By: select between Issue creation date and (for work orders, trainings, and activations only) Job scheduled time.
- Sort Direction: choose between Ascending and Descending order, based on what you sorted the columns by.
- (optional) Select Dates: filter each column by date
- Issue creation start date: only Issues created on or after this date will be shown.
- Issue creation end date: only Issues created on or before this date will be shown.
- Job scheduled date: (for work orders, trainings, and activations only; Scheduled Issue status only) only Issues with jobs scheduled for this date will be shown.
- Add new column(s): you can have between 1-8 column in your Kanban. NOTE: you will be able to add new columns after you create the Kanban and edit the filters on all columns.
- Edit Column 01: (NOTE: you must fill in at least one filter field for each column—the filter corresponding to your selection in Select column type.)
- Issues Status: only Issues with this status will be displayed in this column.
- Issue Type: only Issues of this type will be displayed in this column.
- Sponsor Team: only Issues assigned to this Sponsor Team will be shown.
- (optional) Click on + Add Column. Repeat step 1 for each new column.
- Edit Column 01: (NOTE: you must fill in at least one filter field for each column—the filter corresponding to your selection in Select column type.)
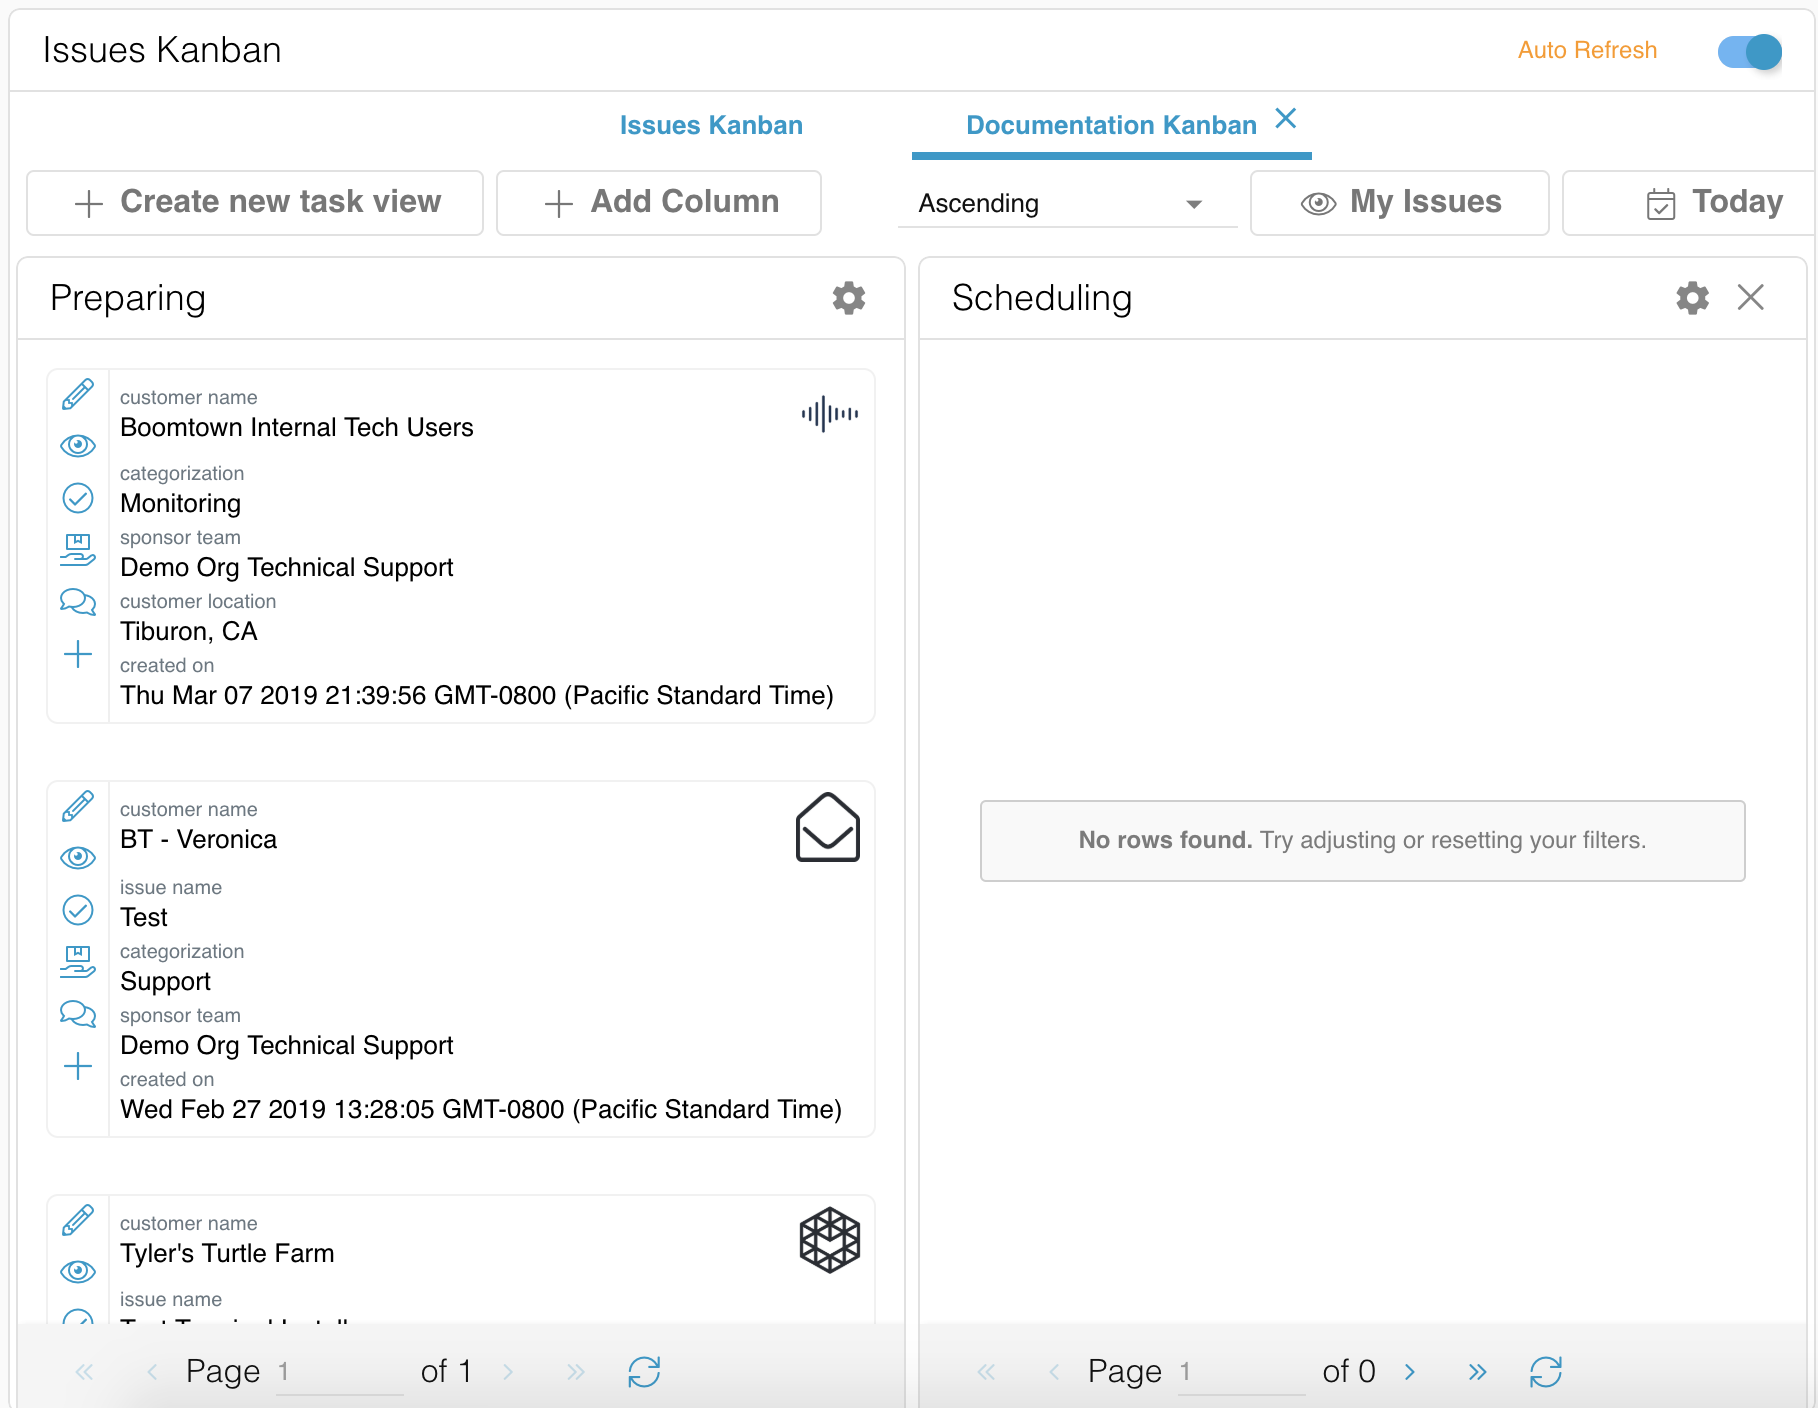
- Hit Save & Create. The screenshots below show an example of a Kanban produced from the specified settings.

