- From the main navigation menu on the left, go to Knowledge Base.
- Click on
 (Settings) on the left navigation bar of the Knowledge Base modal.
 - (optional) Fill out the following fields:
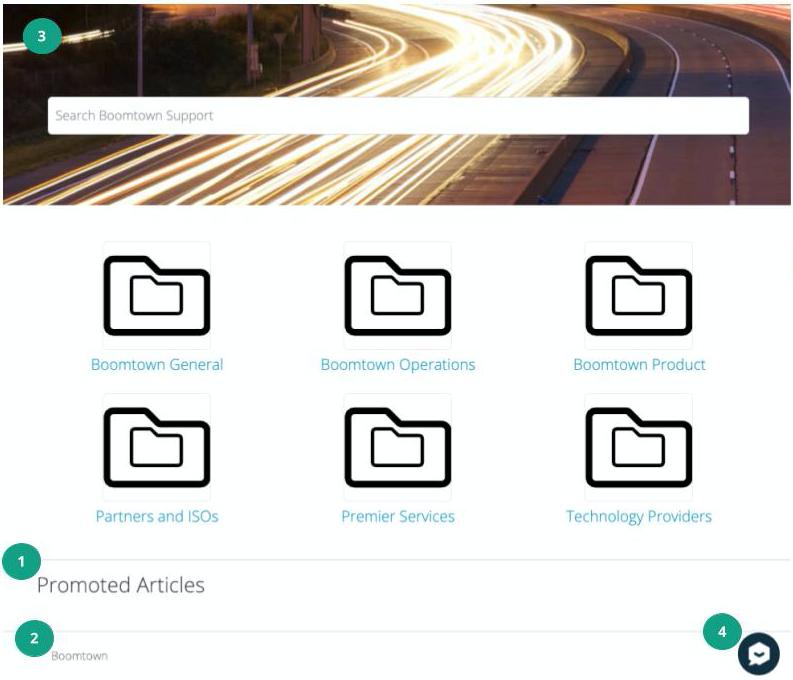
- Promoted Articles: select one or more articles that will show at the bottom of your KB home page. See label 1 in screenshot above.
- Footer: type and format the footer text. See label 2 in screenshot above.

- Upload KB Favicon: learn how to add a tab icon to your KB pages here. NOTE: by default, your tab icon will be the Relay logo.
- Upload KB Banner: learn how to upload a banner here. See label 3 in top screenshot. NOTE: by default, you will be provided with a placeholder banner, as seen in the top screenshot.
- webConnect Integration: choose whether you would like to add a webConnect chat option to your KB home page. The chat window will pop up in the bottom right corner. See label 4 in top screenshot.
- Hit Save.