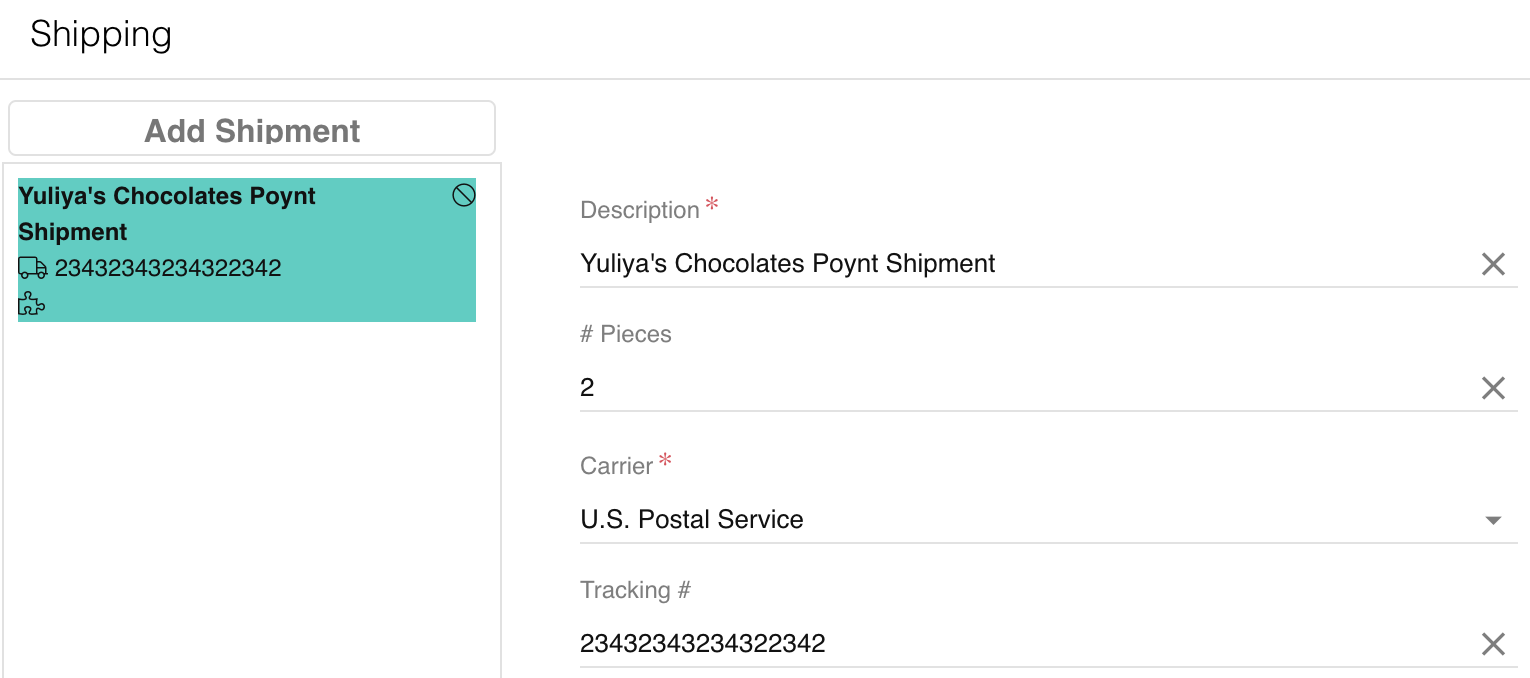
Relay allows agents to easily track device shipments related to Issues. Agents can also select whether they or a Customer User will receive shipment notifications.
- Open the Issue you want to add the shipment(s) to.
- Click on
 (Shipments) on the left navigation bar of the Issues modal.
 - On the left side of the Shipping screen, select
 .
. - Fill out the following fields:
- Description: name your shipment. A recommended format is "[Customer Location] [Device name]" (e.g. "Yuliya's Chocolates Poynt Shipment").
- # Pieces: number of devices shipped to the Location.
- Carrier: select between U.S. Postal Service (USPS), United Parcel Service (UPS), and Federal Express (FedEx).
- Tracking #: type the tracking number of your shipment.
- Contact Group: select User or Customer User. If you select User, a Relay user (agent) will receive shipment updates. If you select Customer User, a Customer User from the Location with the Issue will receive the updates.
- Contact Person: select the specific User/Customer User who will receive shipment updates from the dropdown.
- Hit Save. You may now view the shipment in the Issue modal or by going to Shipments → Track.
- Update shipment information by going back to the shipment record, editing it, and clicking
 at the bottom of the screen.
