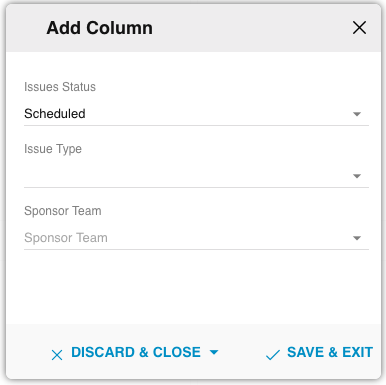
After you have created your new Kanban, you can customize it by adding new columns, for a maximum of eight columns. NOTE: you may not add columns to the default Issues Kanban.
- Go to Issues → Kanban.
- Select the Kanban you would like to add columns to at the top of the Issue Kanban modal.

- In the top left corner of the Issues Kanban modal, click on
 . An Add Column window will pop up.
 - Fill out the following fields: (NOTE: you must fill out at least one field—the one corresponding to the column type you chose when creating your Kanban.)
- Issues Status: only Issues with this status will be displayed in the new column.
- Issue Type: only Issues of this type will be displayed in the new column.
- Sponsor Team: only Issues assigned to this Sponsor Team will be shown.
- Hit Save & Exit. You will now see the new column to the right of the original columns. In the example screenshot below, the new column will display all scheduled Issues.
