This article details the checks related to Relay Proactive (RPA), formerly known as Onsite Agent and Relay Sense.
In summary, you will herein find information revolving around the following subjects:
- Printer Checks
- Support Bundle Check
- the user-editable Check Configuration & Thresholds thereof
- Proactive Cloud Scans
Printer Checks
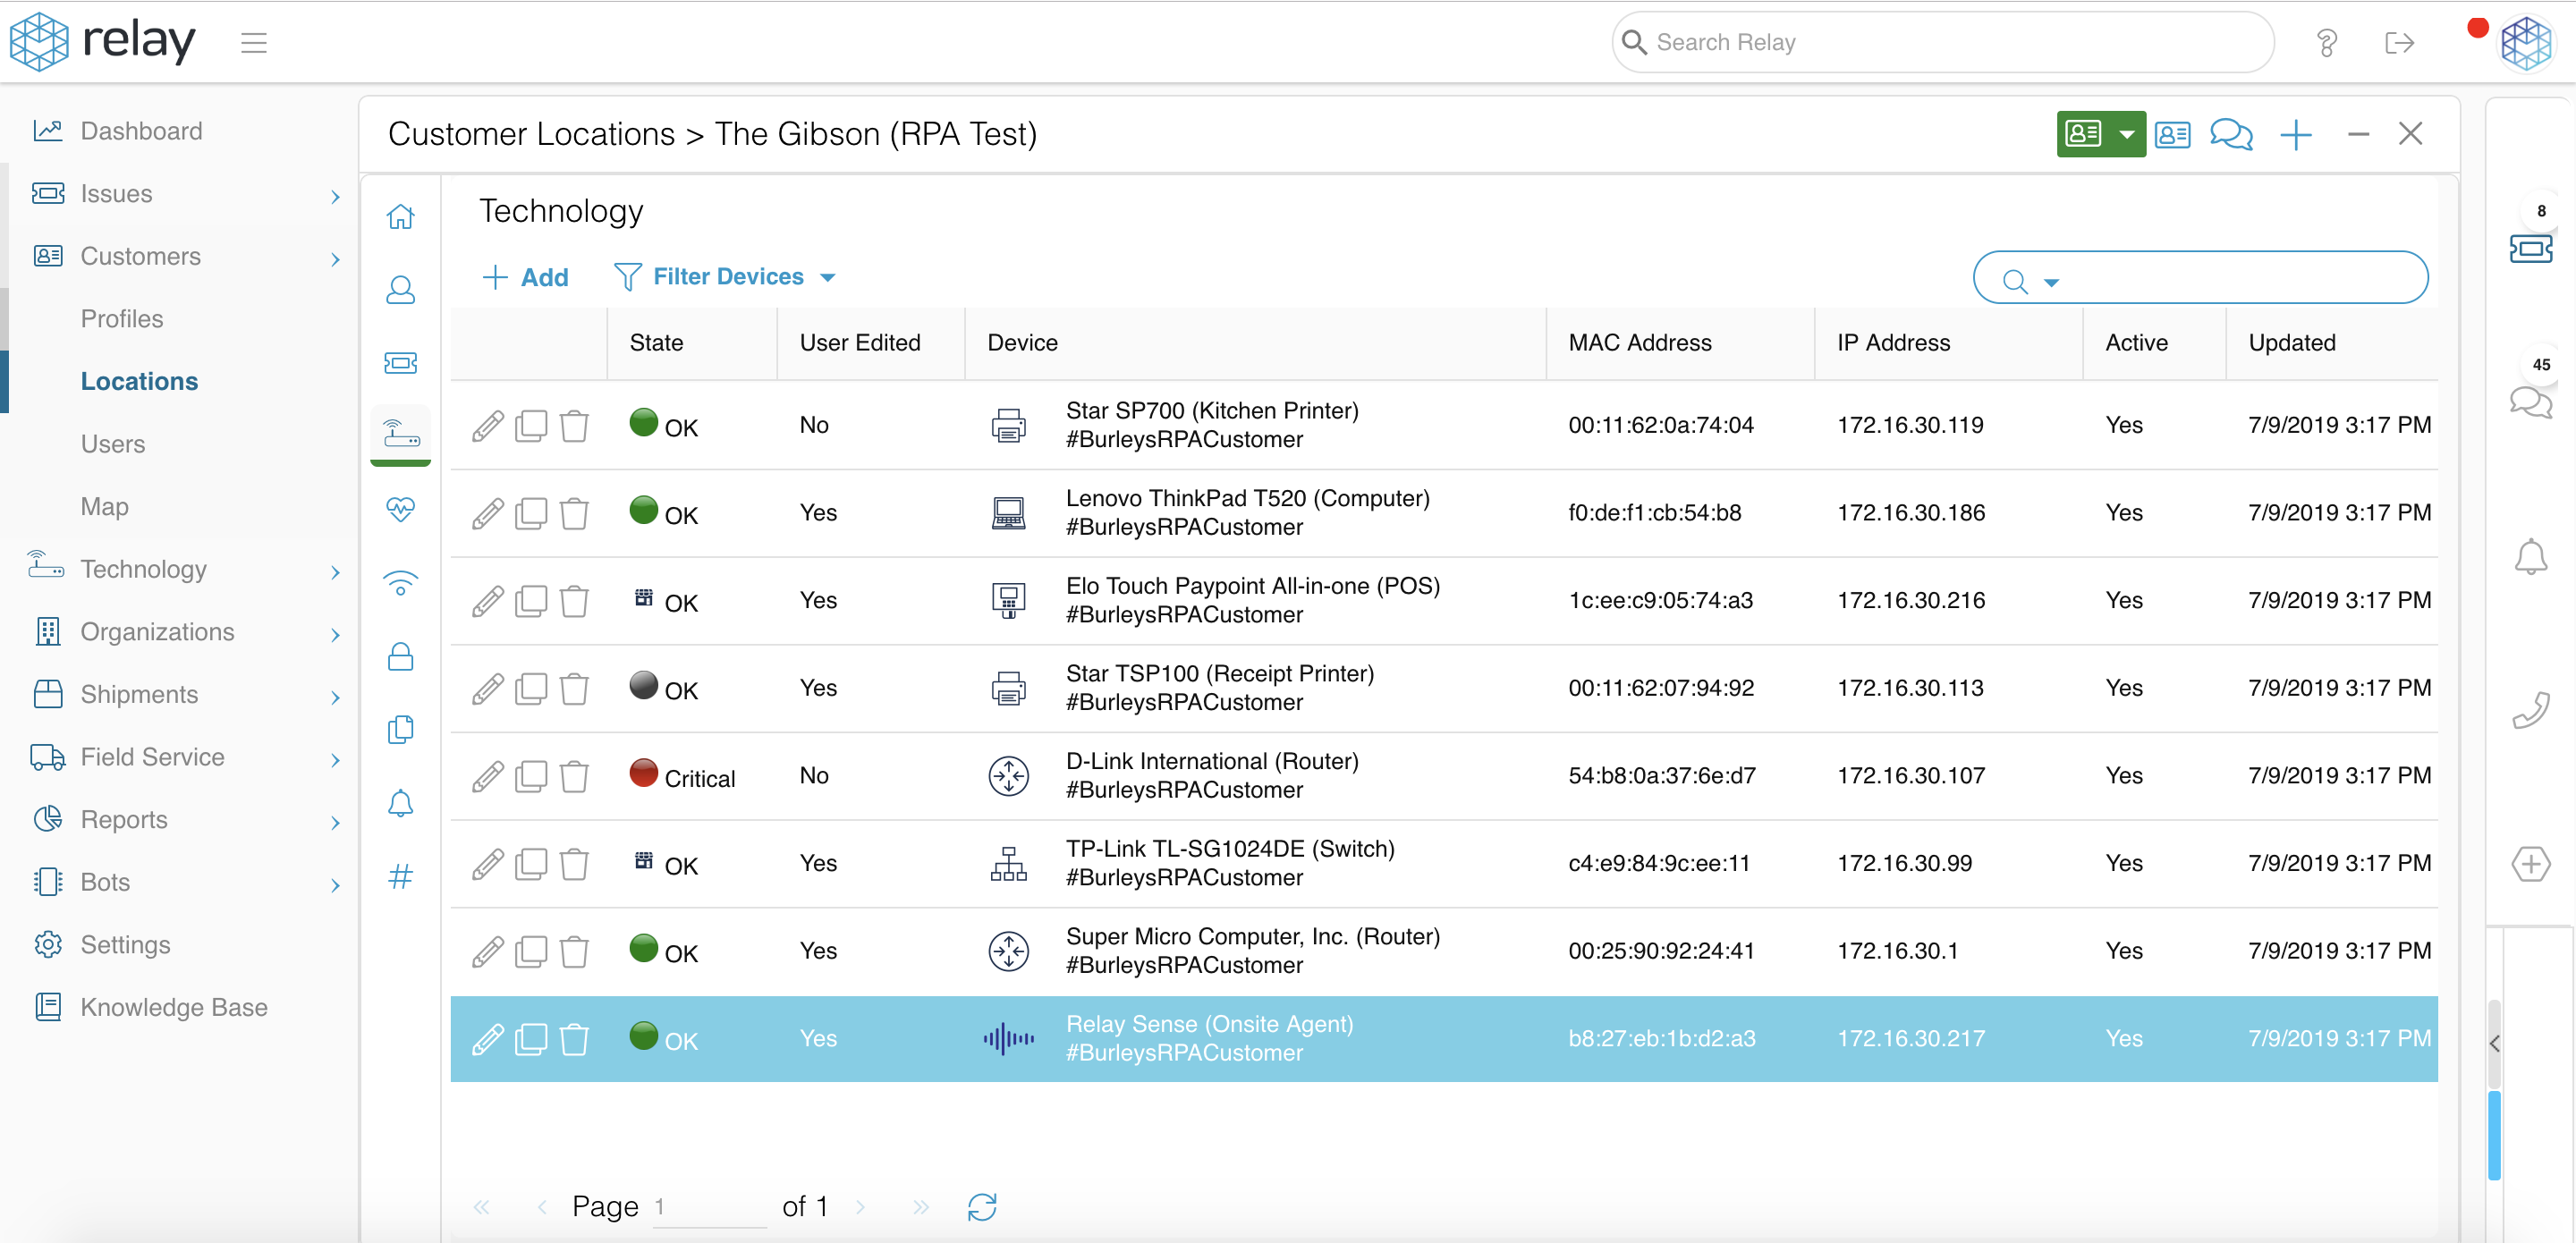
How do I view the printer checks?
- Go to Customers > Locations.
- Locate the customer location of interest (via scroll/page or search bar).
- Click the Edit button
 .
. - Click on the Technology button
 (fourth icon from the top).
 - Select the RPA device of interest by double-clicking it or clicking on the Edit button
 .
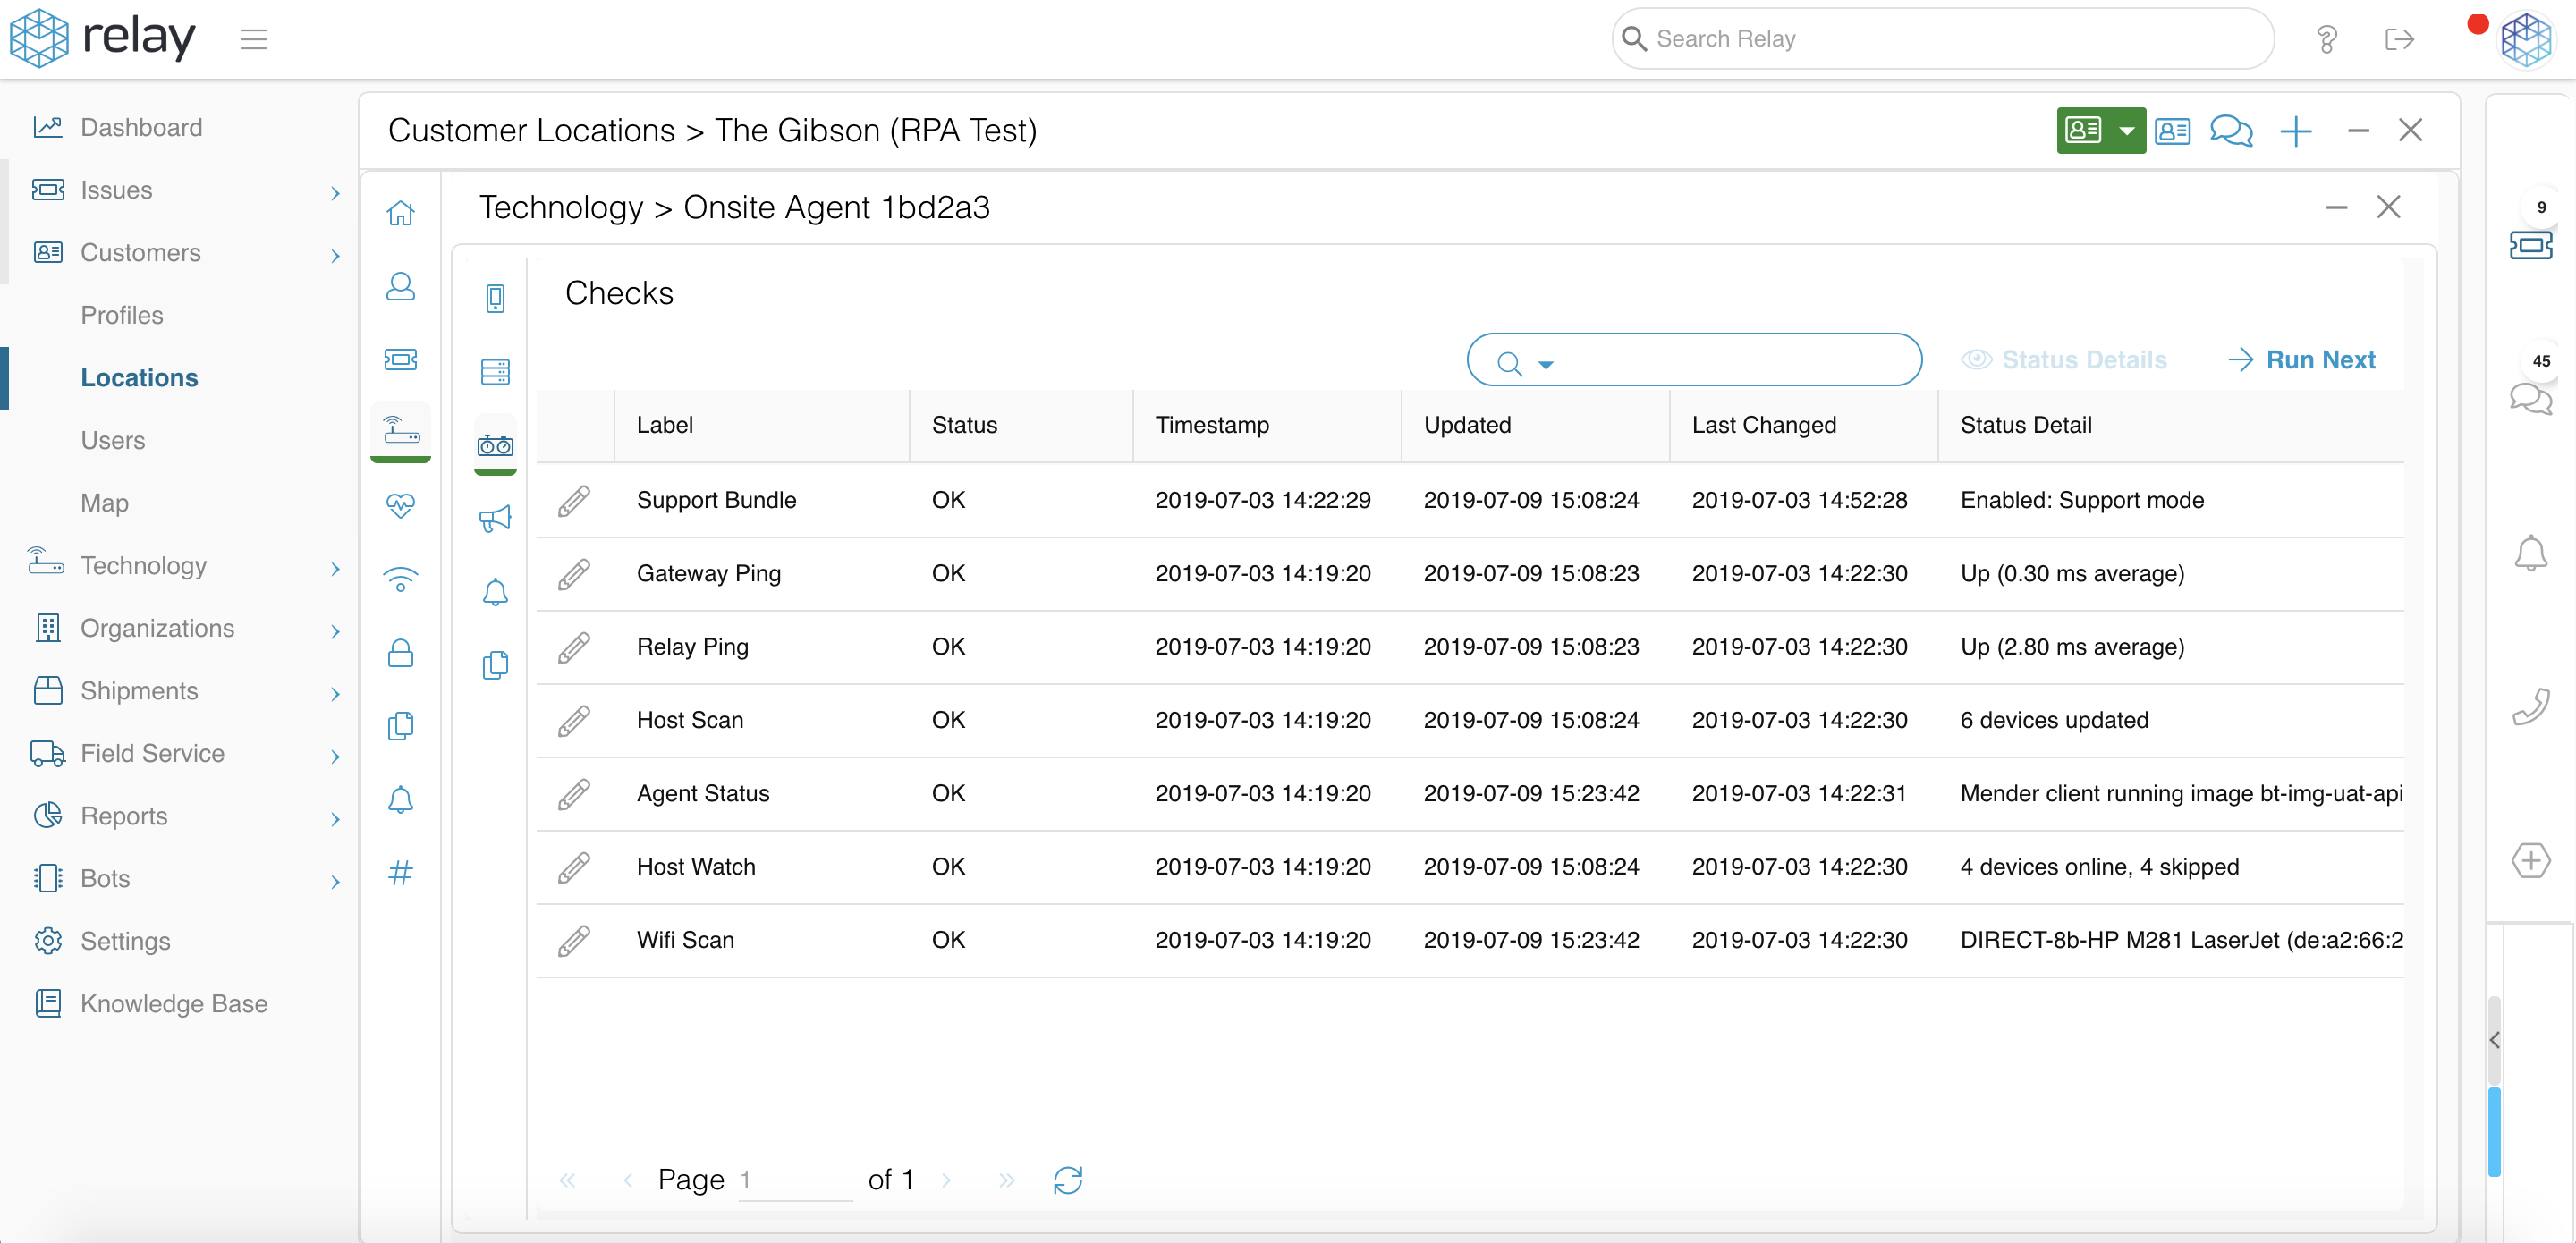
. - Click the Checks button (third icon from the top)
 .
.


Support Bundle Check
The Support Bundle check was added to the RPA Agent device type (i.e. "Onsite Agent") to provide Relay users (with the Proactive package) both the ability to toggle the remote agent's log level and to retrieve a remote agent's logs.
These logs provide valuable insight on the health of the remotely deployed agent and the network on which the agent is deployed. This allows support teams to initiate solutions to incidents before they become problems.
Support Bundle check requires that the RPA Agent be running version 3.0.0 or greater.
How do I view the support bundle check?
- Go to Customer > Locations.
- Locate the customer location of interest (via scroll/page or search bar).
- Click the Edit button
 .
. - Click on the Technology button (fourth icon from the top)
 .
. - Select the RPA device of interest by double-clicking it or clicking on the Edit button
 .
. - Click the Checks button (third icon from the top)
 .
. - Select Support Bundle by double-clicking it or clicking on the Edit button
 .
.

What are the configuration options for the support bundle check?
- Debug Mode (Disabled): The agent’s log-level is set to the default level, which will only include INFO, WARN, and ERROR events.
- Debug Mode (Enabled): Enabling the Debug Mode will set the agent’s log-level to Debug, which will include a much more detailed level of logging that includes TRACE, DEBUG, INFO, WARN, and ERROR events.
- Support Mode (Disabled): The agent will continue to log events based on the current Debug Mode configuration; however, the log files will not be uploaded to Relay desktop.
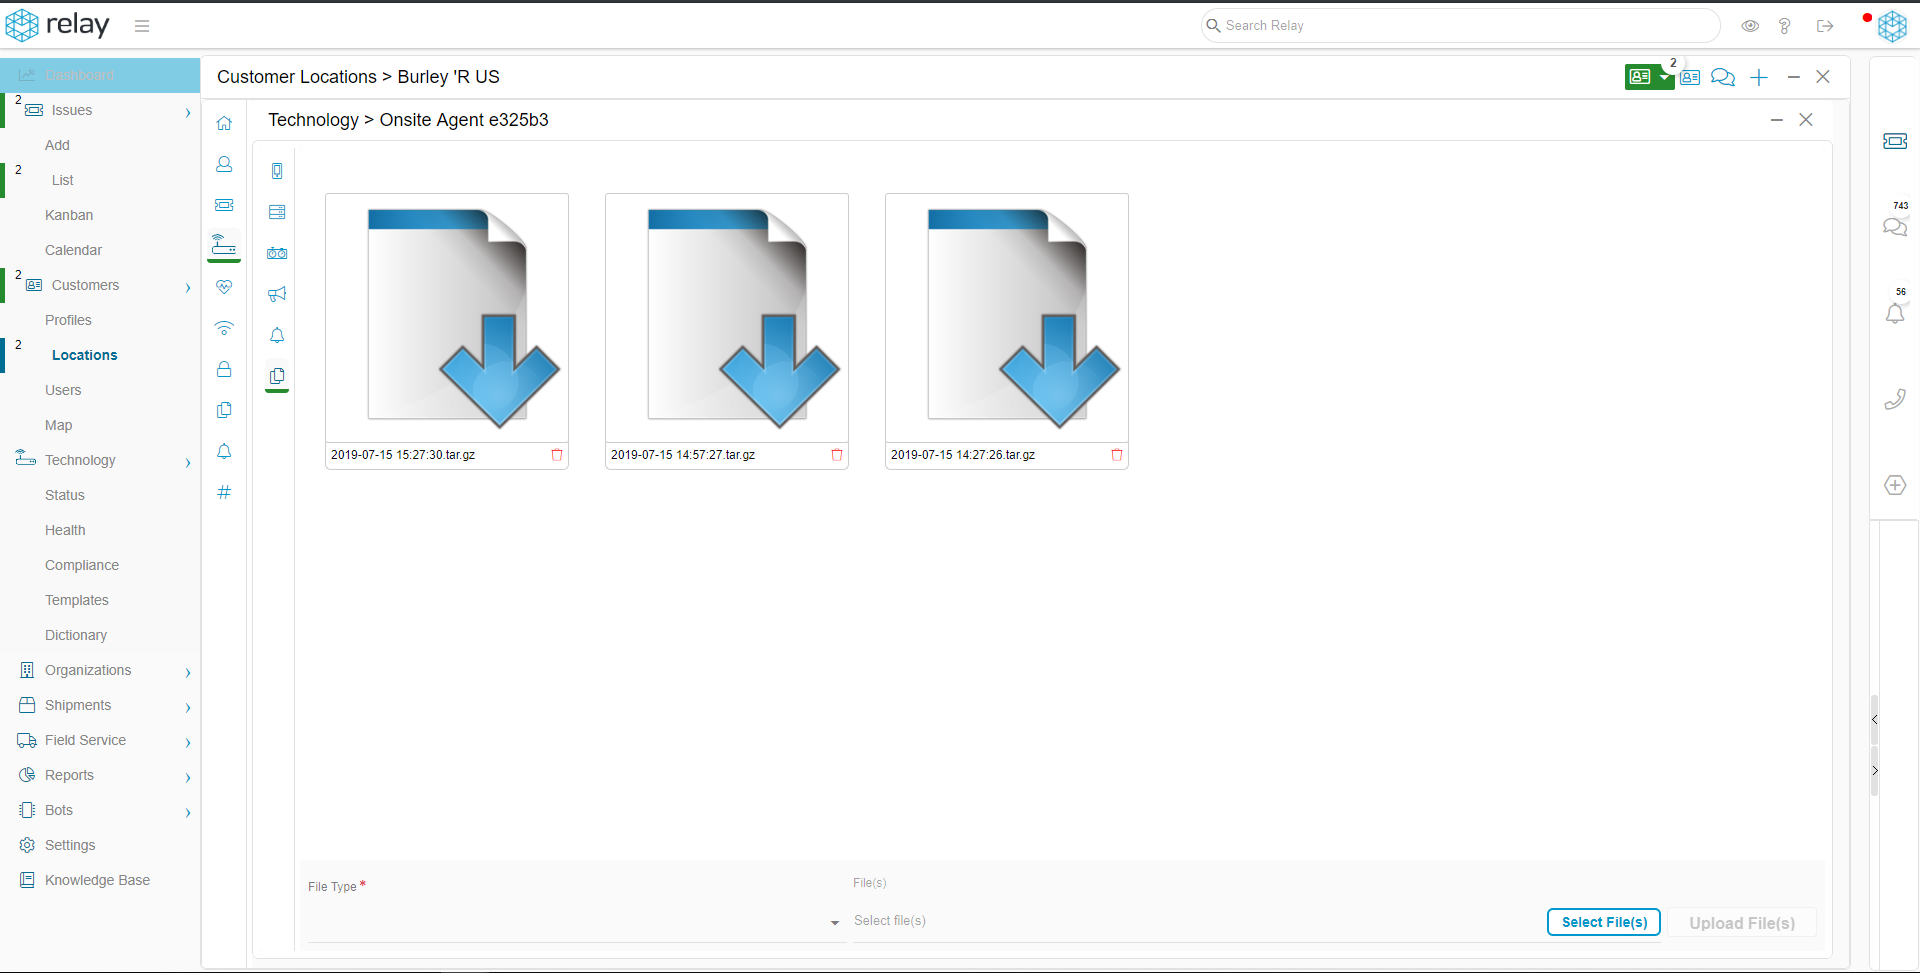
- Support Mode (Enabled): The RPA agent’s log file(s) will be uploaded as part of a TGZ (i.e. “.tar.gz") compressed file and attached to the RPA Agent at Customer > Locations > Technology > Onsite Agent [Relay Proactive (RPA)] > Edit > Files.
Files included in the uploaded Support Bundle TGZ attachment include:
- ‘monitoring-agent.log’: Agent’s JAVA log
- ‘ps_output’: Agent’s running processes log
- ‘messages’: Agent’s OS log
- ‘jsvc.err’: Agent’s JSVC log

What status for the support bundle check will indicate the check configuration?
- "Disabled": (both) Debug Level & Support Mode disabled
- "Enabled": (both) Debug Level & Support Mode enabled
- "Enabled: Debug mode": Debug Level enabled; Support Mode disabled
- "Enabled: Support mode": Debug Level disabled; Support Mode enabled
The status for Support Bundle check will always reflect “OK”.
User-Editable Check Configuration & Thresholds
How do I configure checks & thresholds?
- Go to Customers > Locations.
- Locate the customer location of interest (via scroll/page or search bar).
- Click the Edit button
 .
. - Click on the Technology button (fourth icon from the top)
 .
. - Select the RPA device of interest by double-clicking it or clicking on the Edit button
 .
. - Click the Checks button (third icon from the top)
 .
. - Locate the check of interest, then click the Edit button
 .
.

User-Editable Configurations
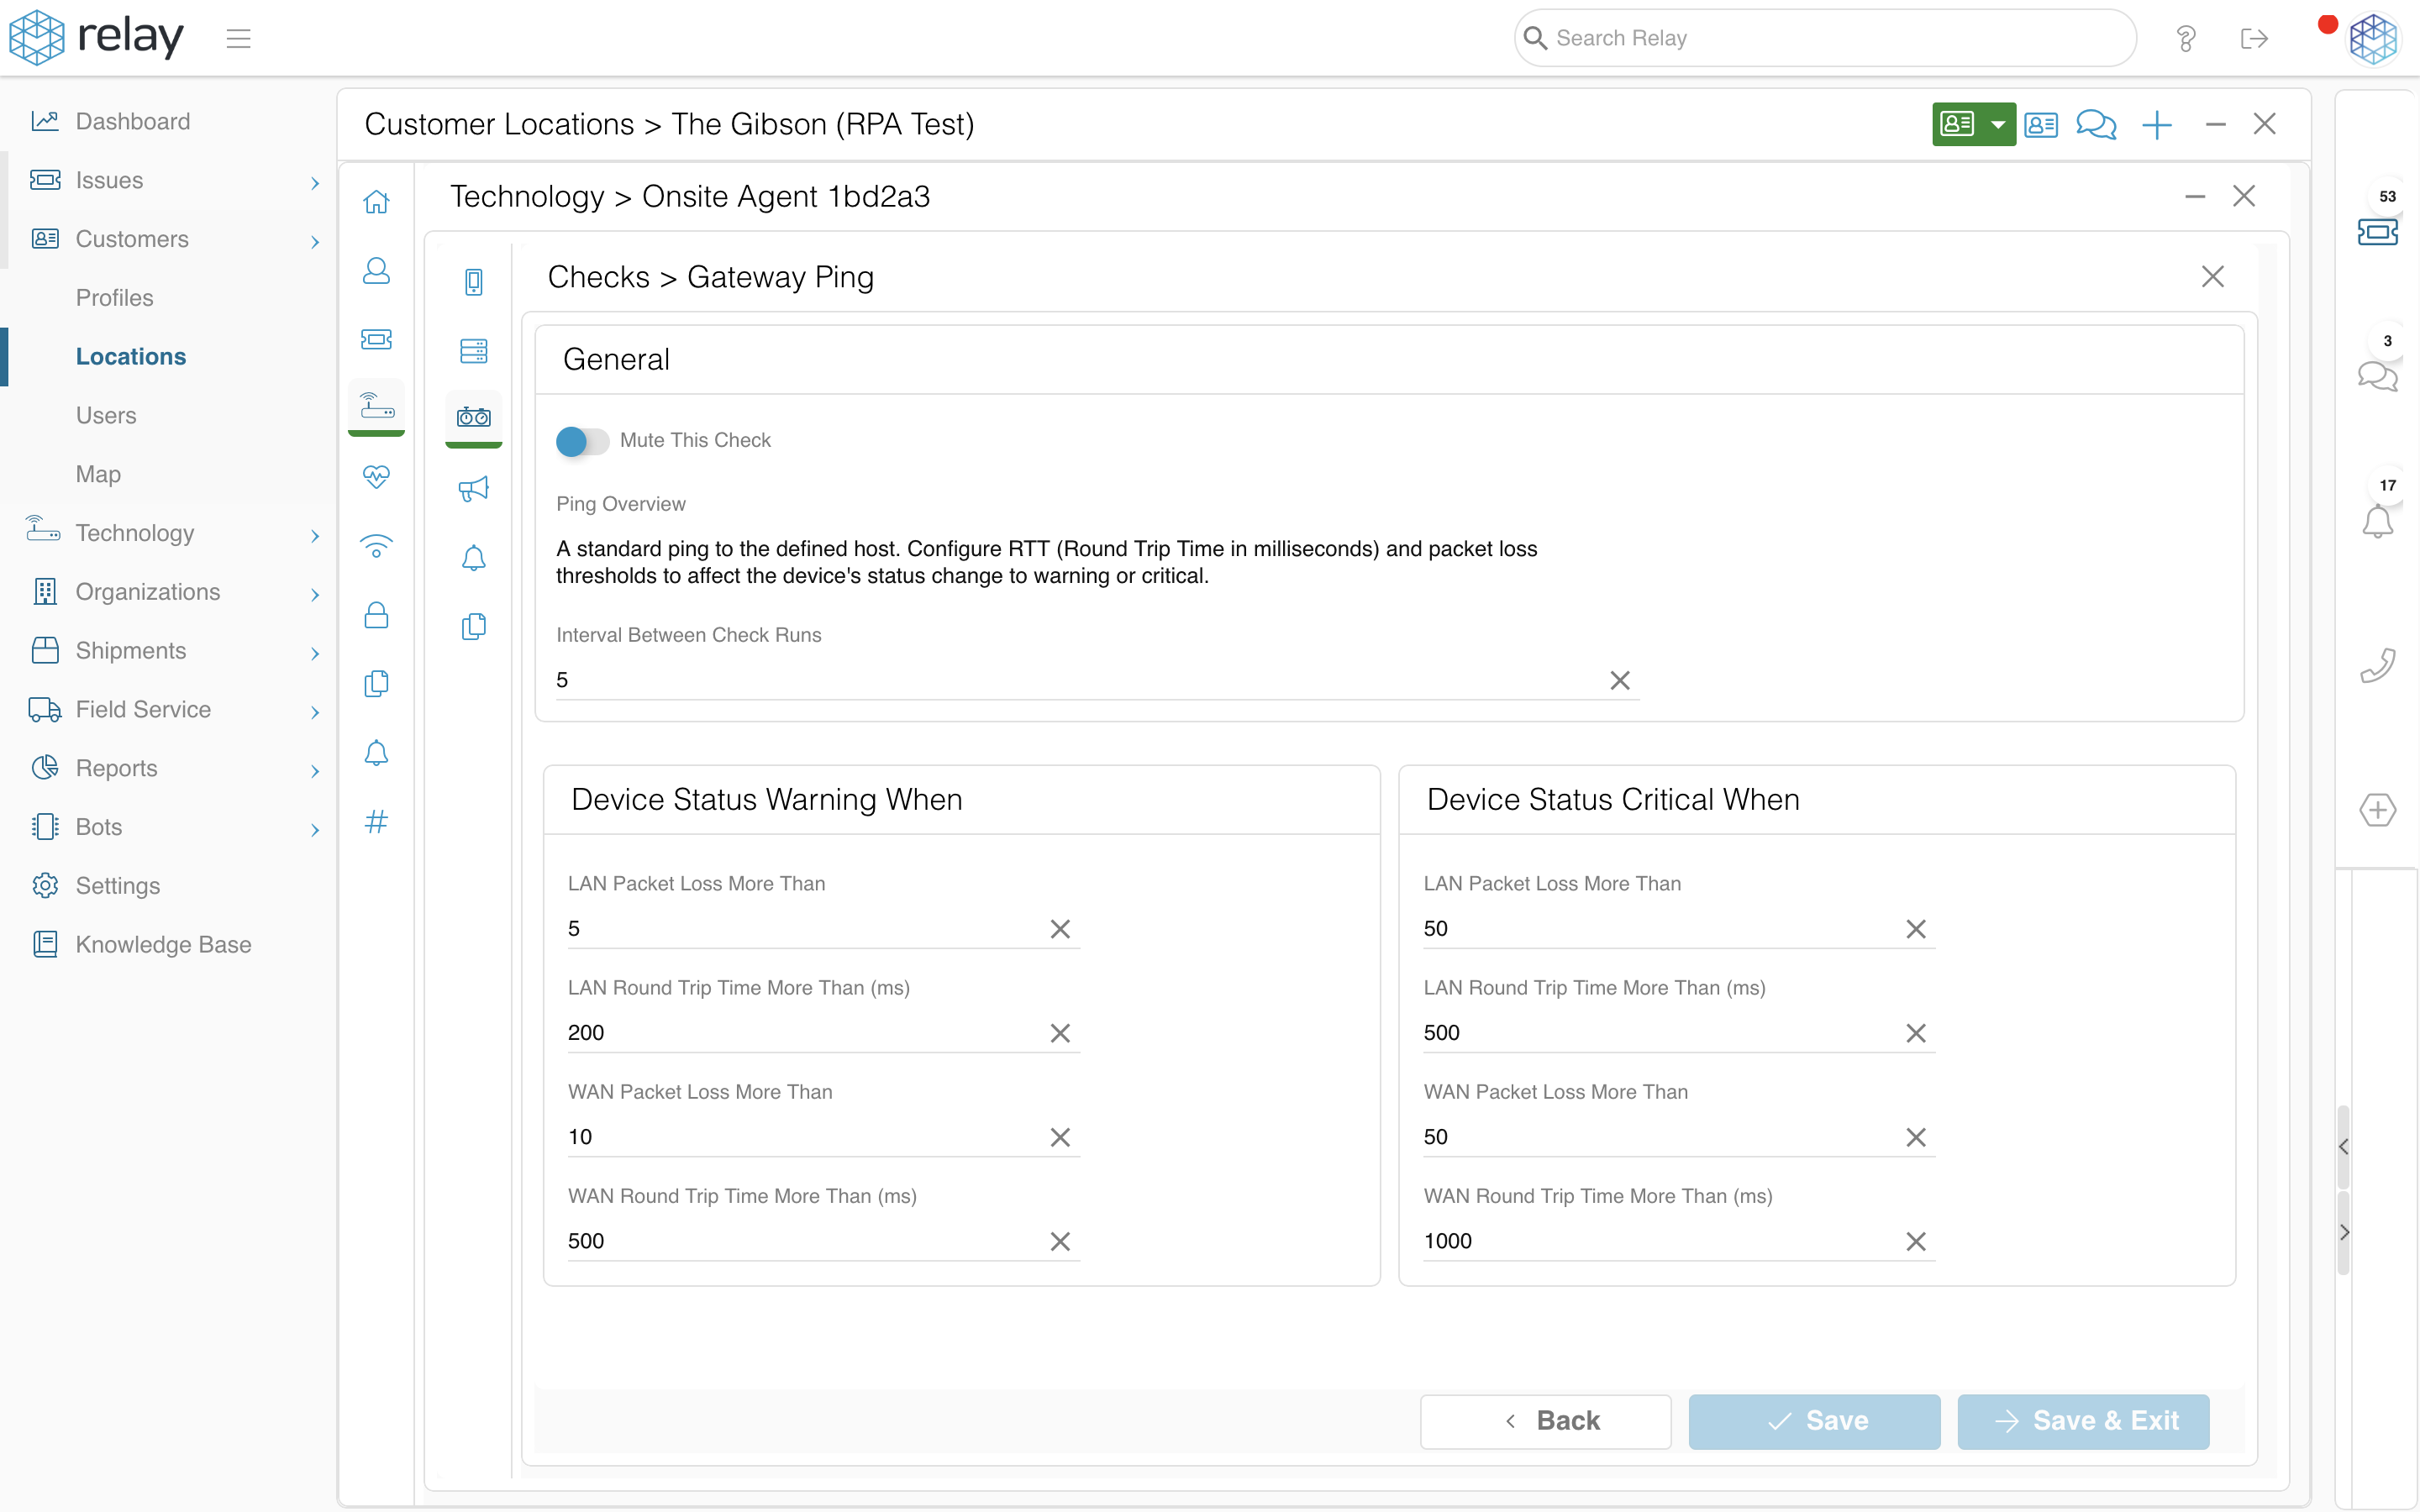
General
Under the header General, the user can configure the following settings:
- Mute This Check (all checks)
- Debug Mode (Support Bundle check only)
- Support Mode (Support Bundle check only)
- Interval Between Check Runs (ping-type checks, scan-type checks, Agent Status check, Printer Levels check, Speed Test check, Trace Route check)
Device Status Warning When / Device Status Critical When
Under the above-named headers, there are two Thresholds:
- Warning
- Critical
These thresholds can be configured in the form of number entries in each integer field.
Proactive Cloud Scans
Proactive Cloud Scans allow you to identify if a product that you monitor loses connection to its cloud endpoints. This is helpful for quickly identifying the root cause of why a product may be offline (i.e., differentiating between LAN, WAN, and other potential points of failure). Click here for additional information on Proactive Cloud Scans.
