Relay Proactive has all the tools you need to keep your Customers' networks and technology safe and online. Relay Proactive connects to the router and passively monitors all devices on the network with the purpose of helping support agents and technology providers better understand their customers’ networks and provide more proactive and efficient support.
Once you’ve identified a Customer who would like to use Relay Proactive at one of their Locations, complete the following steps to associate a specific Relay Proactive device with that Location. You can add Relay Proactive to Relay before it is installed.
- Go to Customers → Locations and open the Location where the Relay Proactive device will be installed.
- Open the location and click on
 (Technology) on the left navigation bar of the Locations modal.
 - Click on
 to add a new Relay Proactive device.
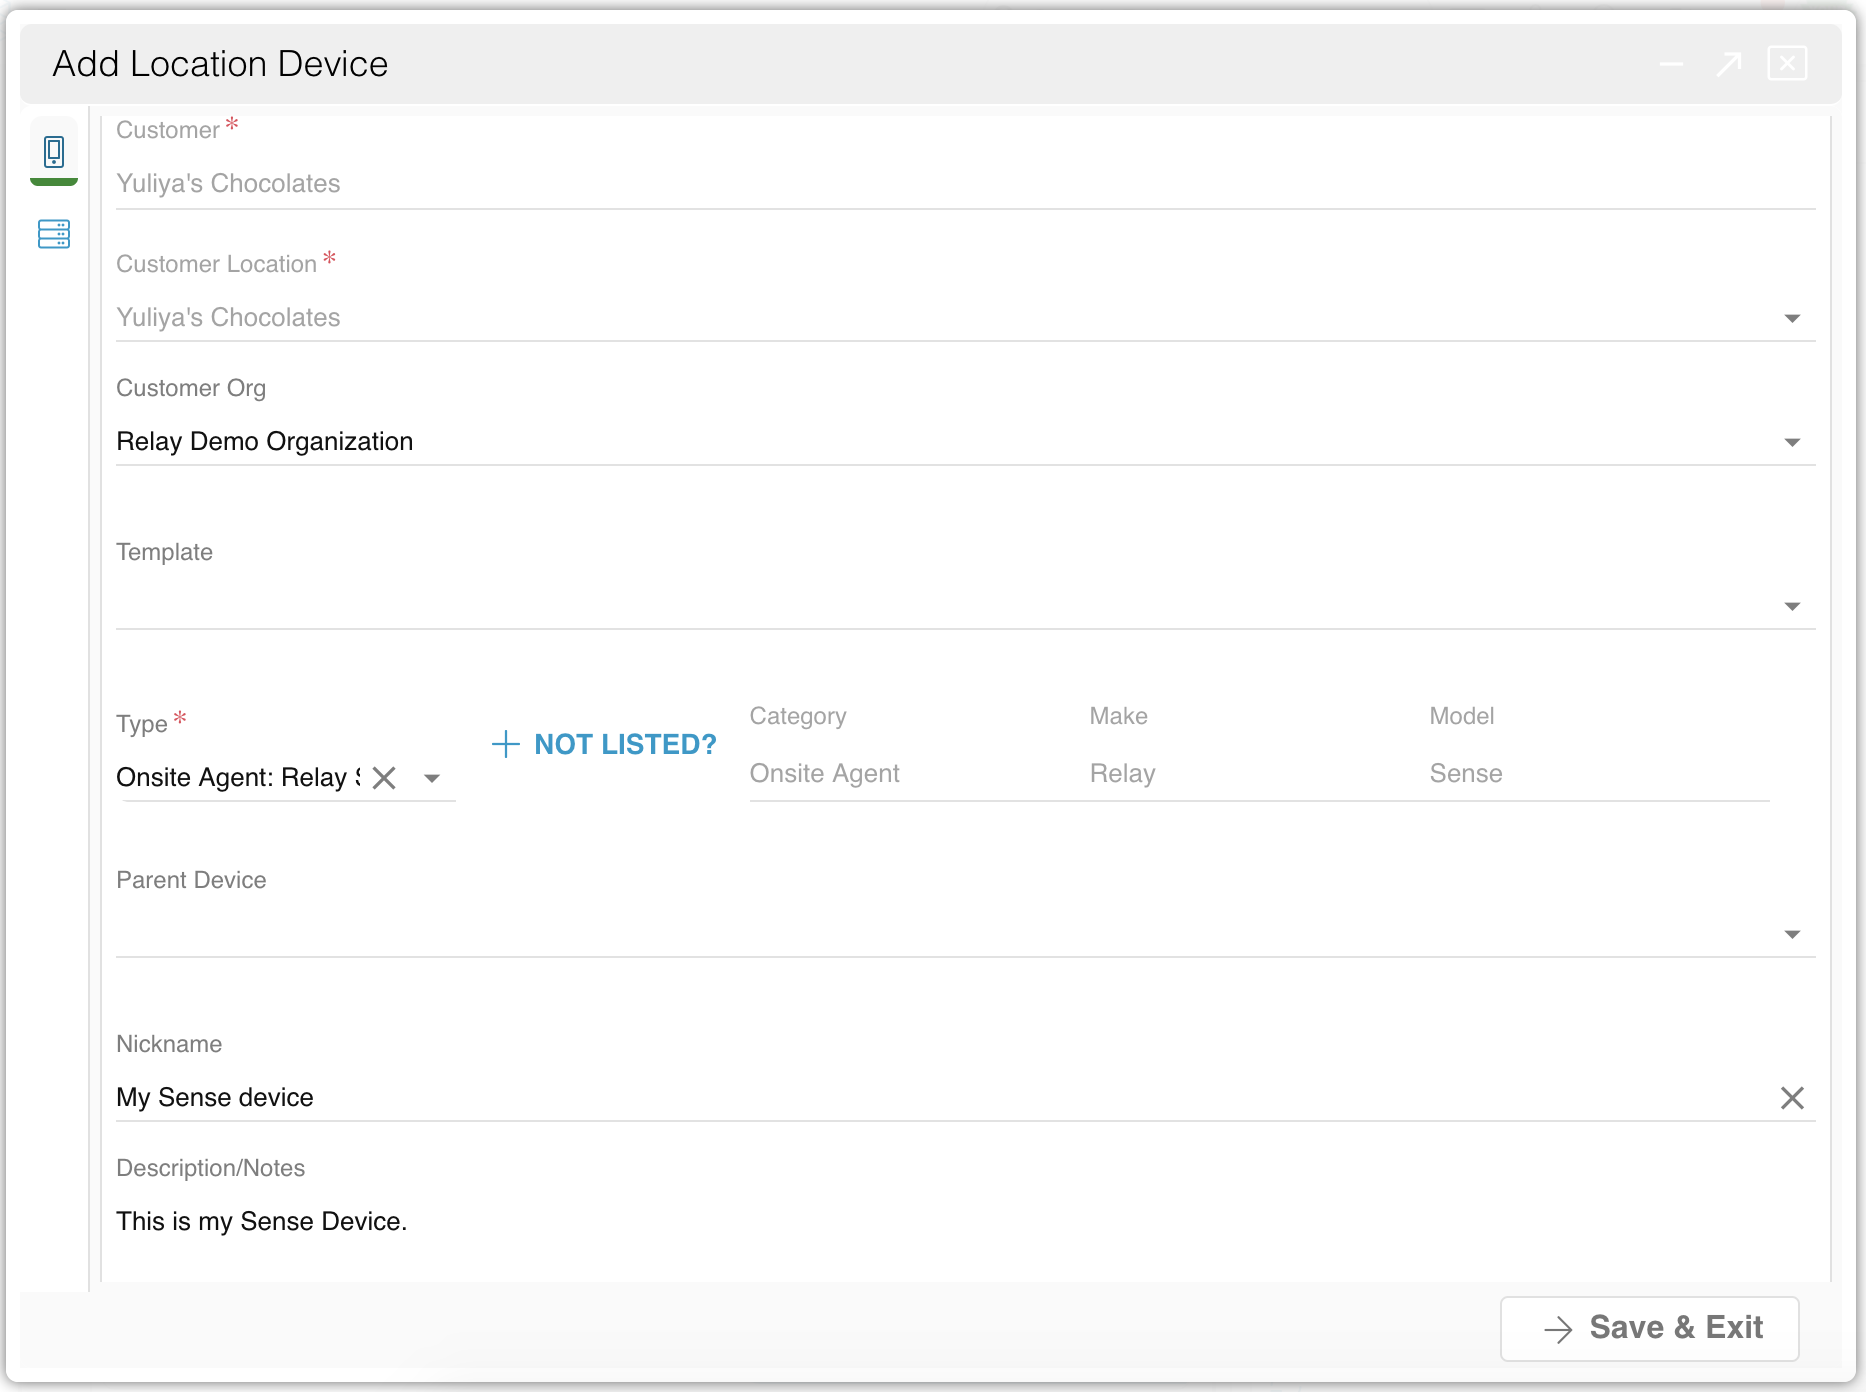
 - Go through the following fields:
- Customer Org: (optional) what Organization is supporting the piece of technology
- Type: search for Onsite Agent: Relay Sense
- Parent Device: (auto-populated) your Relay Proactive device will scan for the parent router and fill in this field after 24-48 hours. The Parent is the main router providing internet to your Customer Location.
- Nickname: (optional) name your Relay Proactive device. This name will appear in your Location's device list.
- Description/Notes: (optional) add more information about your Relay Proactive device.

- Select
 (Advanced) on the left navigation bar of the Technology modal.
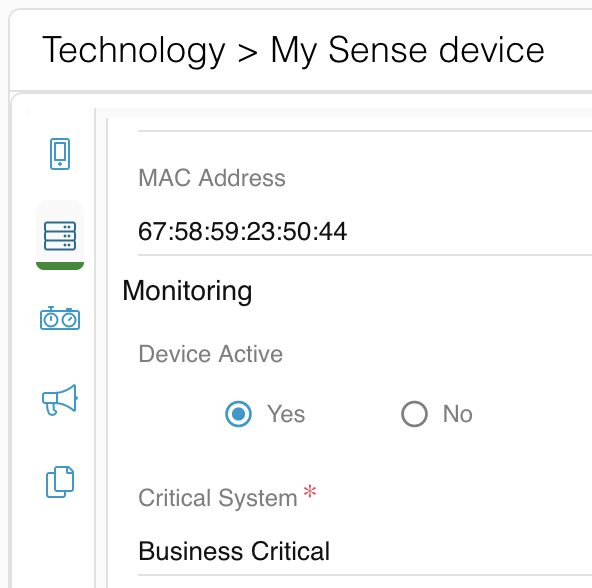
 - Fill out the following fields:
- MAC Address: type the MAC address from the Relay Proactive device exactly as it is shown on the device in the format XX:XX:XX:XX:XX:XX.
- Device Active: set to Yes.
- Critical System: set to Business Critical.
- Hit Save & Exit. Your Relay Proactive device has now been associated with the selected Customer Location. Once the Customer installs Relay Proactive at this Location, the device will automatically begin monitoring the network, according to the Organization- or Location-wide monitoring rules. NOTE: please allow 24-48 hours for the Relay Proactive device to scan the Parent router and other devices on the network.

User tip: after the initial Relay Proactive 24-48 hour waiting period, access the device profile again and double-check the Parent Device information. If the Relay Proactive device has scanned the wrong internet router, change the Parent. This action will also update all the other scanned devices' parent routers. If your Location has multiple routers, also verify that the scanned Parent router has the right IP address, which you can find in the router device's Advanced tab.