How do I insert image(s)/GIF(s) into my article?
- In the article Body text editor, select
 (Manage Files).
 - Click Select File(s) and browse for image(s)/GIF(s) on your computer.
- Select Image as the File Type.
- Click Upload File(s). The first uploaded image/GIF will appear in the article body where you left off. More images/GIFs can be inserted in the article by re-opening
 (Manage Files) and clicking on the image/GIF.
How do I resize an article image or GIF?
Method 1
Method 1 allows you to scale an image without changing its proportions.
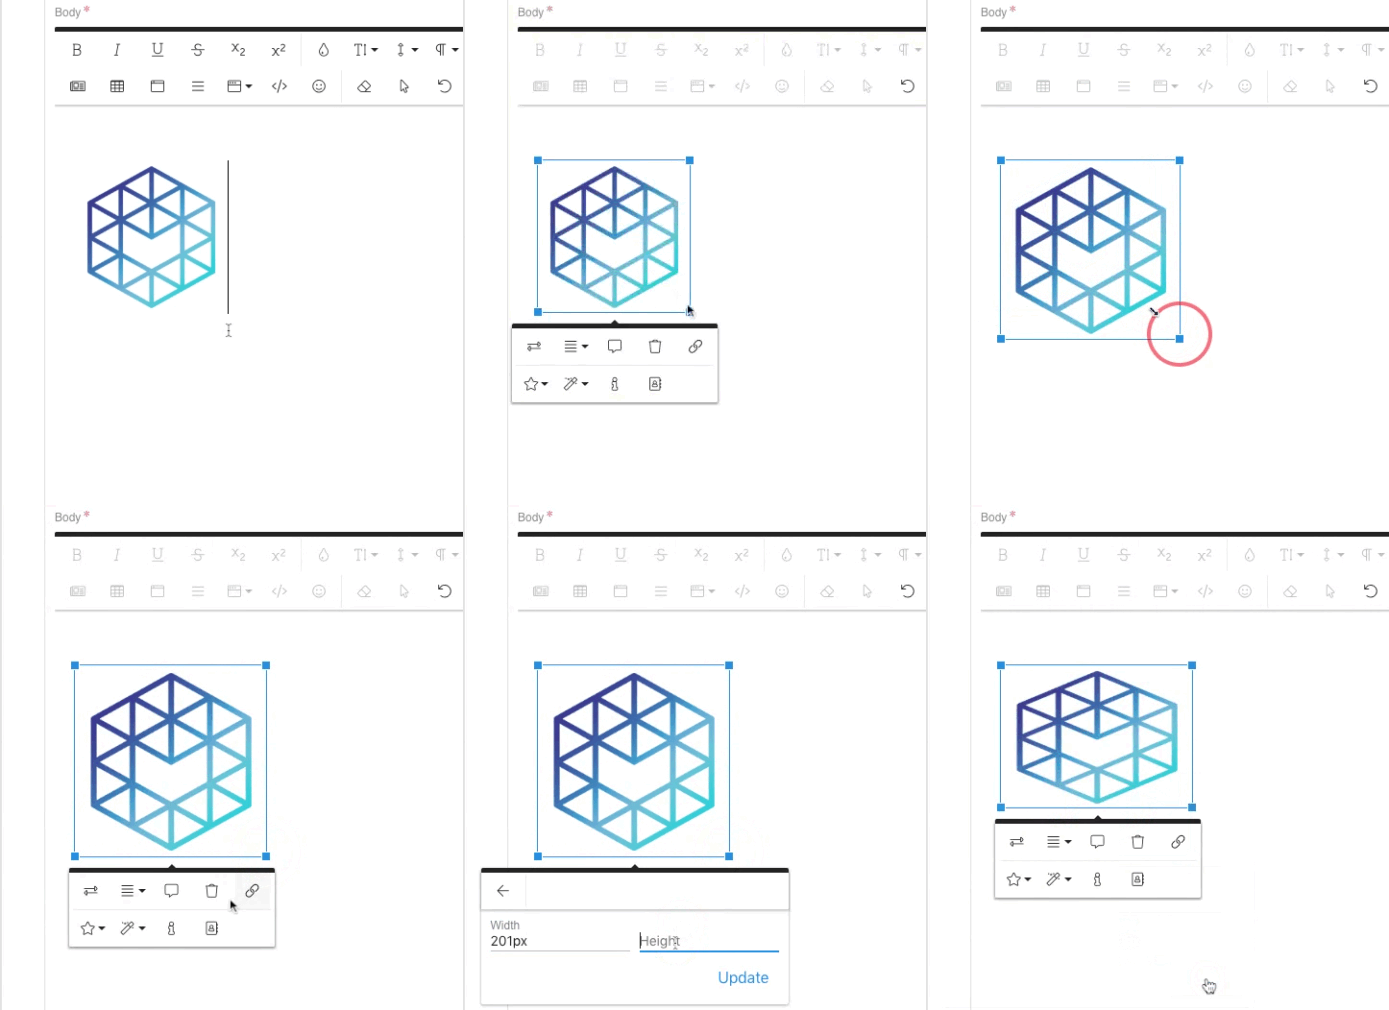
- Click on the image. You will see a blue frame appear around it.
- Drag one of the corners of the frame to resize the image.
Method 2
Method 2 allows you to change the proportions of an image.
- Click on the image. You will see an icon menu appear under it.
- Click on the
 (Change Size) icon.
 - Edit the width and height, in pixels (px).

What do the image menu icons mean?

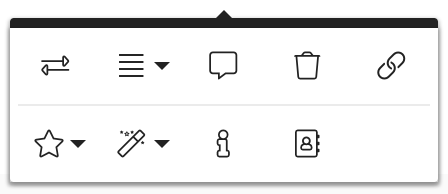
 Replace: upload, drop, or search for a new image.
 Align: select between Left, Right, and None.
 Image Caption: select to add a caption below the image. Deselect to remove the caption.
 Remove: delete the image.
 Insert Link: link the image to an external URL.
 Display: select between Inline and Break Text.
 Style: select between Rounded, Bordered, and Shadow. You can select/deselect multiple options.
 Alternative Text: edit the html alt text. This helps search engines understand what the image is and helps your rankings globally across the website.
 Change Size: resize the image.