A Customer User is an individual managing or working at a Customer Location.
- Go to Customers → Users. You can also go to Customers → Profiles or Customers → Locations, open the Customer/Location you want to associate the Customer User with, and click on
 (Customer Users) on the left navigation bar of the Customers/Customer Locations modal.
 - Select +ADD in the top left corner of the Customer Users modal.
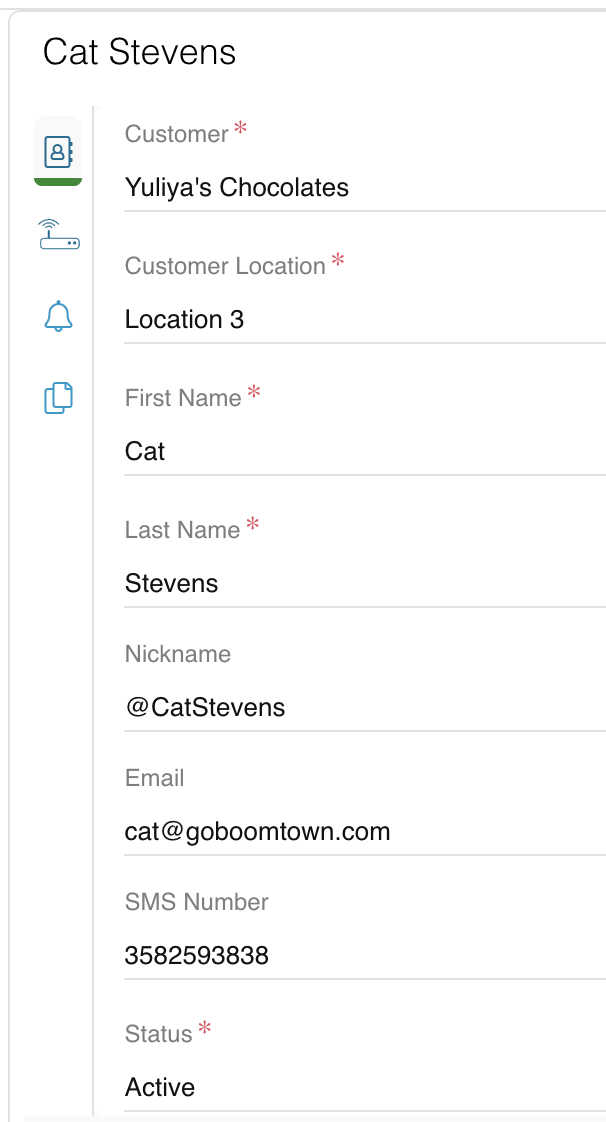
- Fill out the following fields:
- Customer: begin typing the name of the Customer and select the correct name from the suggestions that appear.
- Customer Location: once you have selected the Customer, select the new User's Location from the dropdown. This is the Location at which the User works or the Location they manage.
- First & Last Names: type the Customer User's first and last names.
- Status: select Active.
- (optional) Fill out the rest of the User information fields, such as SMS Number or Email.

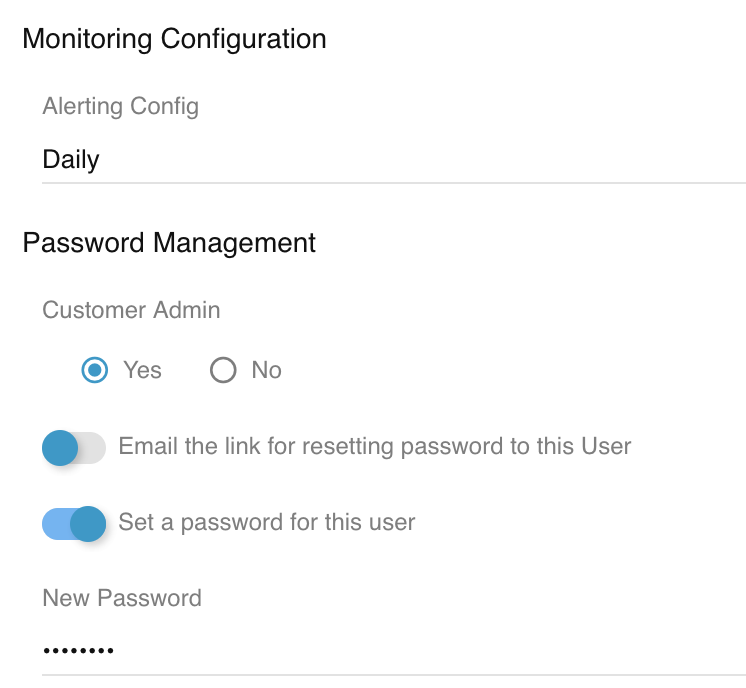
- (optional) Under Monitoring Configuration, for Alerting Config, choose between Daily, Off, or Real-time. This determines when the User will receive notifications based on Relay Proactive network monitoring device scans. NOTE: you will also need to configure Organization-wide or Location-specific monitoring rules for Customer Users to receive notifications, regardless of their Alerting Config.
- (optional) Under Password Management, select whether you wish the new Customer User to be a Customer Admin or not. You may also toggle on Email the link for resetting password to this User or Set a password for this User. The Customer User's password will be used in the Connect mobile app or a webConnect widget that requires a password. If granted the correct permissions, Customer Users can also use their password to log into Relay.
- Hit Save & Exit.
