Add a webConnect chat widget to your website
Last Updated:What's in this article?
What is the webConnect chat Integration?
The webConnect Integration allows your customers to contact your Teams' support agents through the webConnect chat window. You can add a Concierge Bot to the webConnect chatroom to greet the Customer, answer basic questions, and route the Customer to the appropriate Team. You can also add webConnect chat to your Knowledge Base pages.
How do I set up a webConnect Integration for my Team?
NOTE: you need Group Admin permissions to use this functionality.
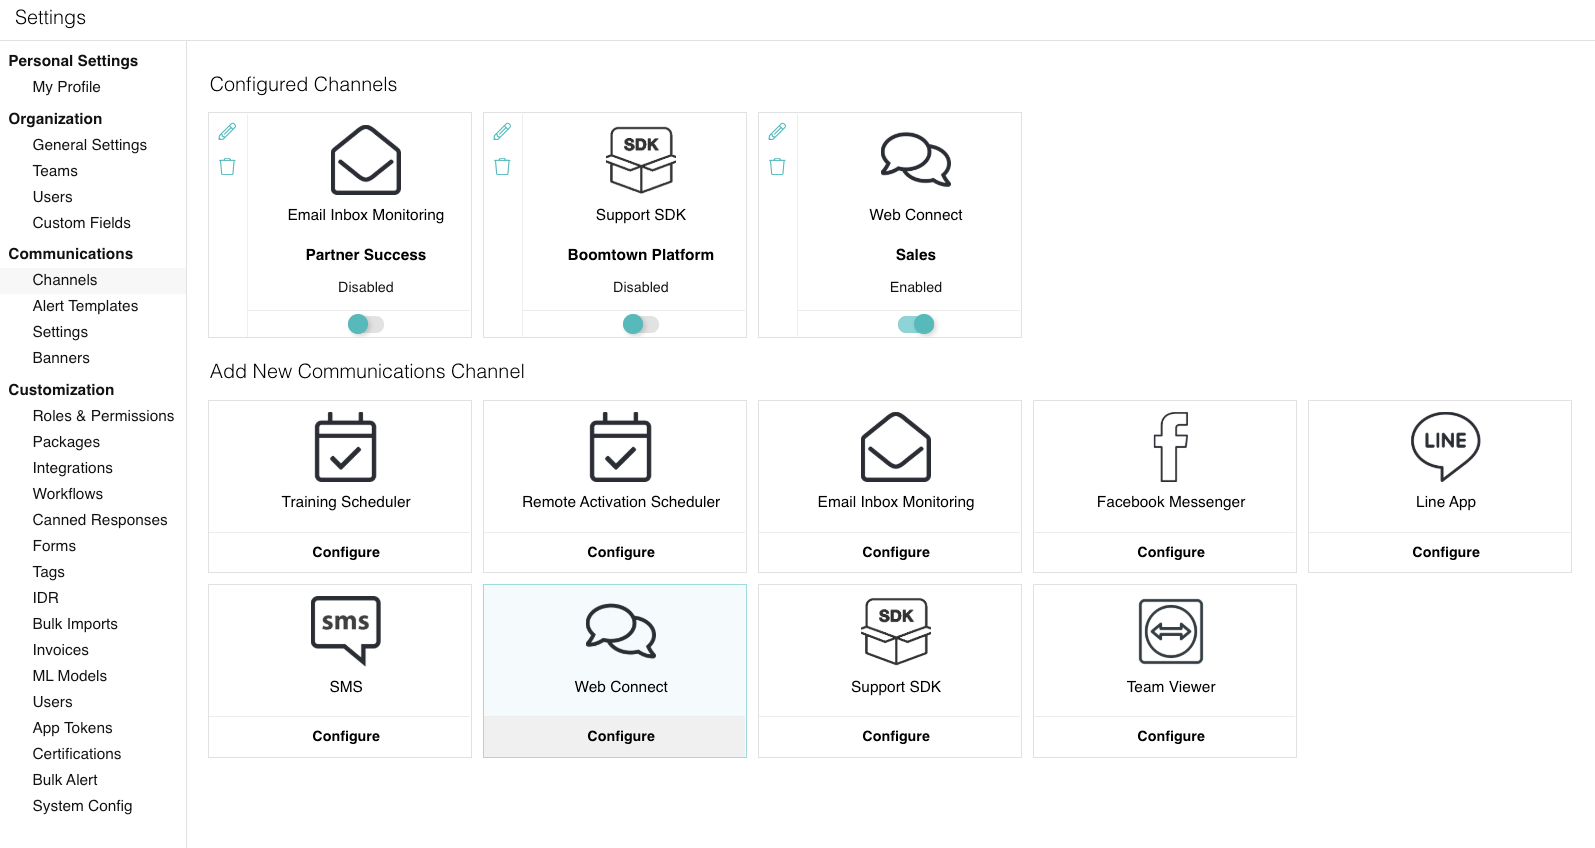
- From the main navigation menu to the left, go to Settings → Channels
- From the sub-menu to the left, locate the Communications header and click on Channels.
- Under the Add New Communications Channel header, locate the Web Connect tile and and click on Configure button.
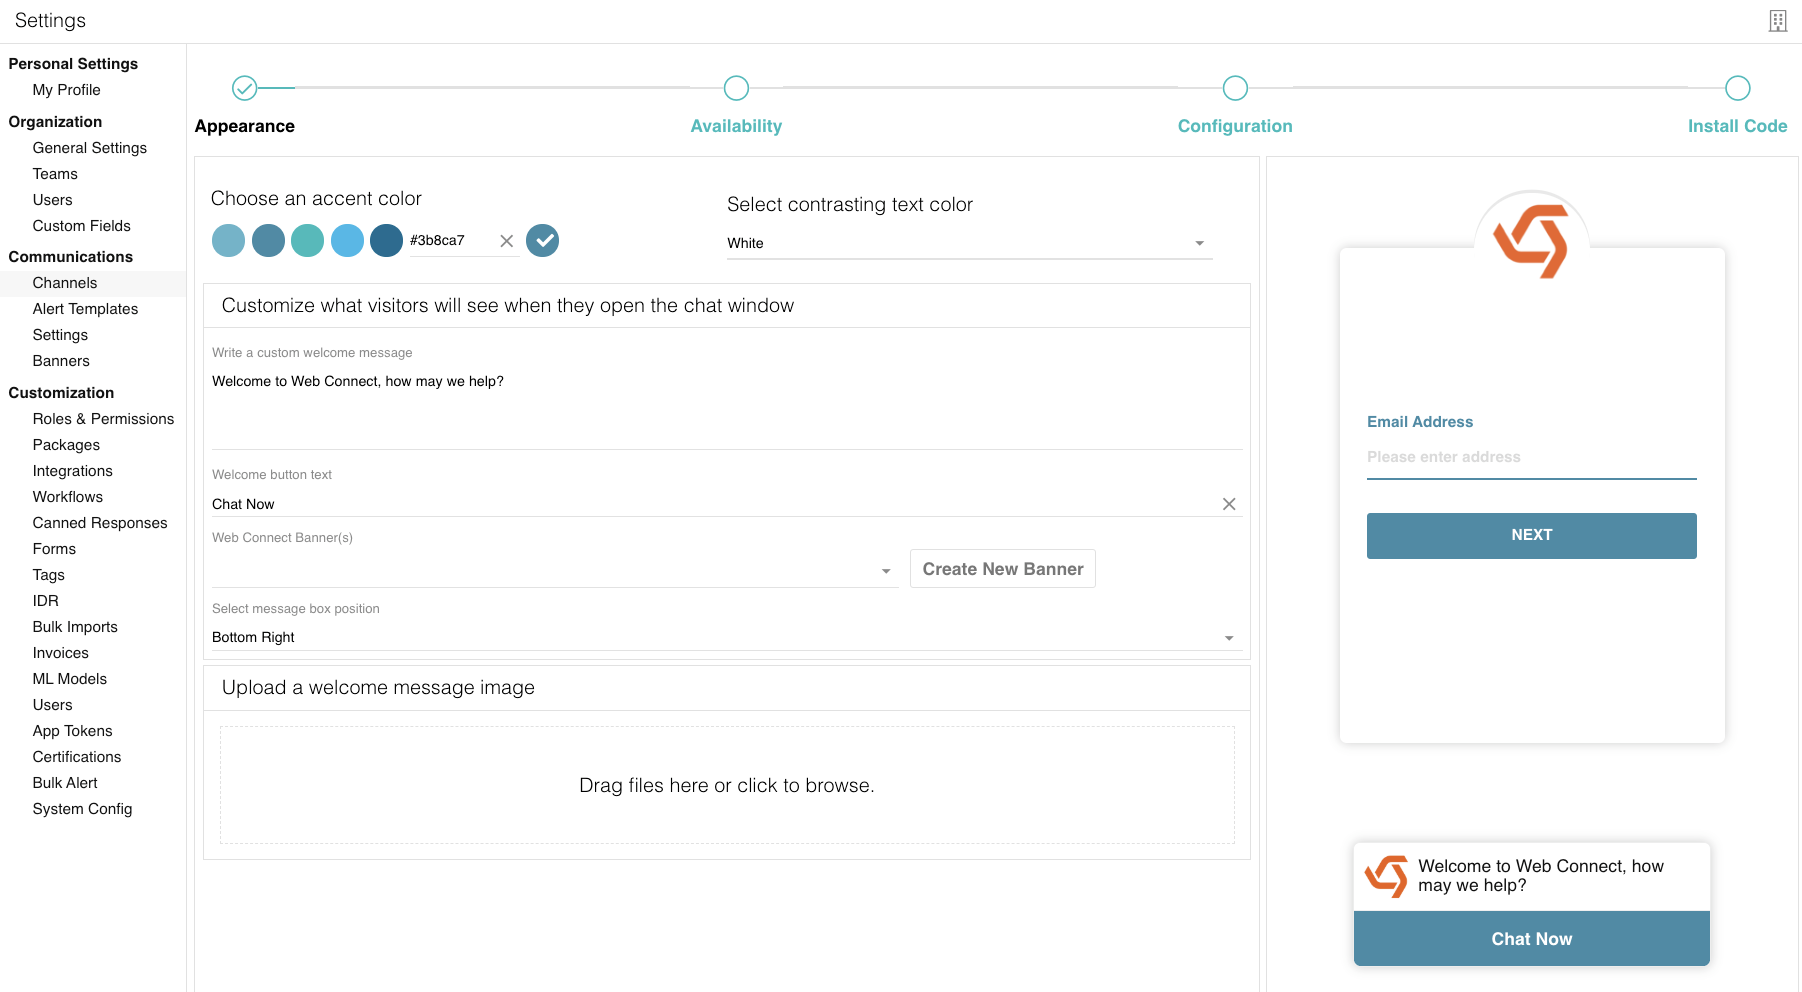
Appearance
NOTE: the logo at the top of the webConnect chat window will be your Organization's avatar.
- Choose an accent color: select one of the color options or type a hex color code. This color will be used for the Next and Start Conversation buttons of the webConnect chat, as well as the Chat Now button on the webConnect widget. In the screenshot below, orange #f17105 was selected.
- Select contrasting text color: select the color of the text on the buttons from the dropdown.
- Customize what visitors will see when they open the chat window:
- Write a custom welcome message: type the message you would like the user to see when they start the conversation.
- Welcome button text: type the message that will show up on the webConnect widget button.
- Web Connect Banner(s): select a banner that will show up at the top of the chat window above the conversation. You can also Create New Banner.
- Select message box position: select where you would like the webConnect widget to show up on your page.
- Upload a welcome message image: upload the image that will show on the webConnect widget on your website page. NOTE: by default, this image will be the Relay logo.
- Hit Save & Next.
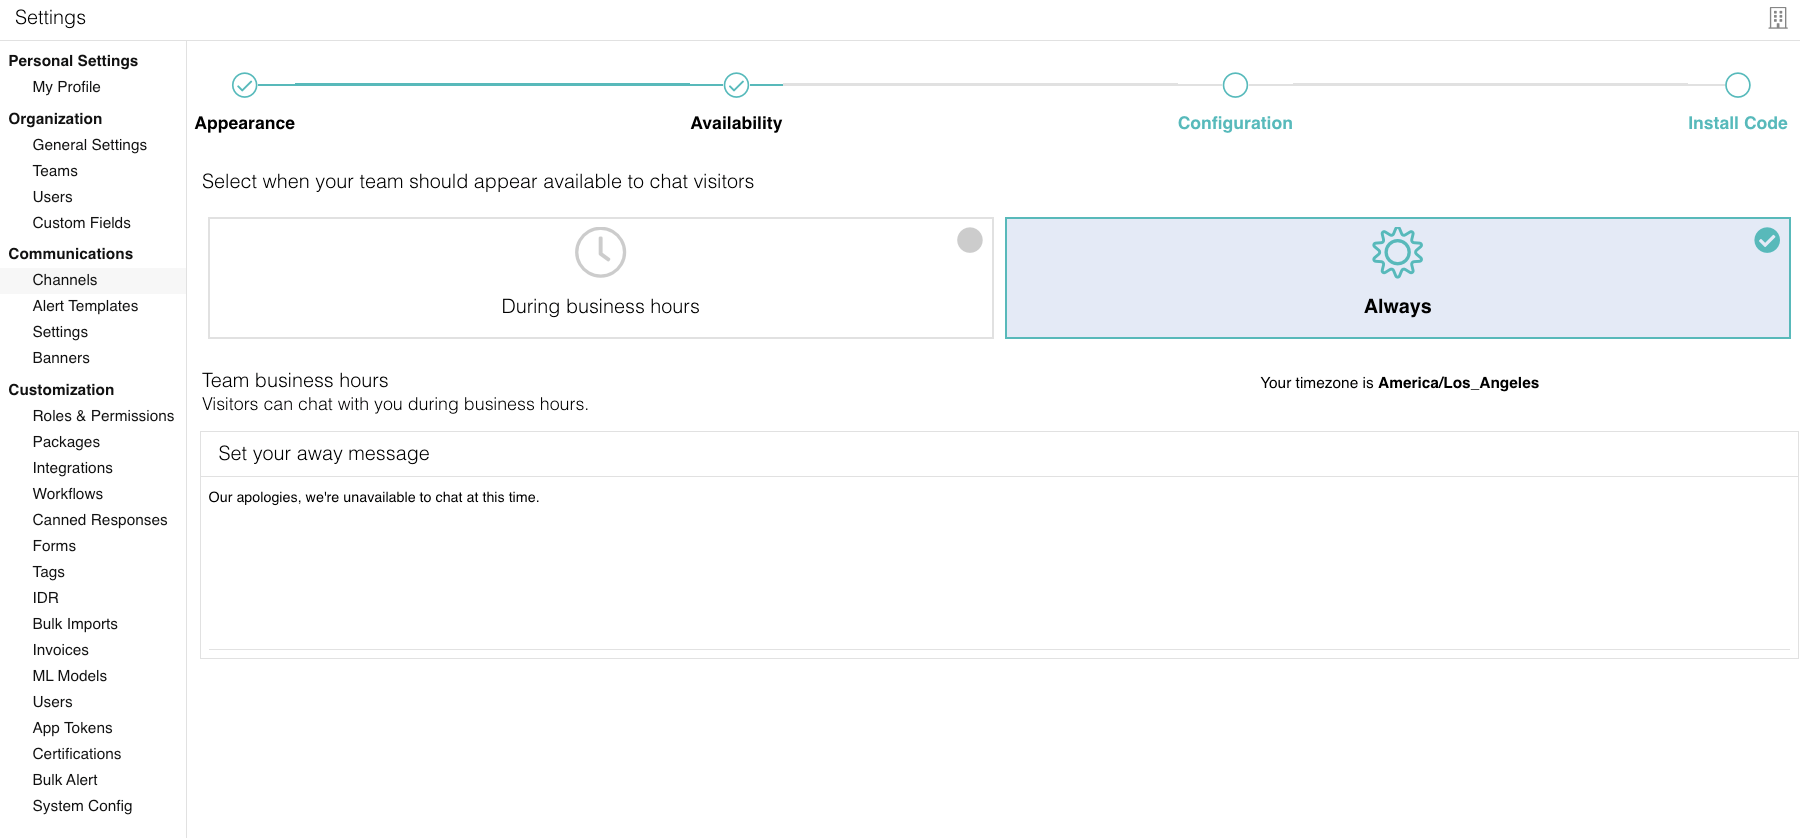
Availability
- Select when your team should appear available to chat visitors:
- During business hours: when you select this option, you will see + Add hours button appear below. NOTE: if you would like to add hours in non-whole-hour increments, you will need to first add and hour from the dropdown and then edit the time manually.
- Always: your Team will always appear as available.
- Set your away message: this message will be displayed to visitors outside your Team hours of operation. NOTE: you can also set away messages on Concierge Bots. Learn how here.
- Hit Save & Next.
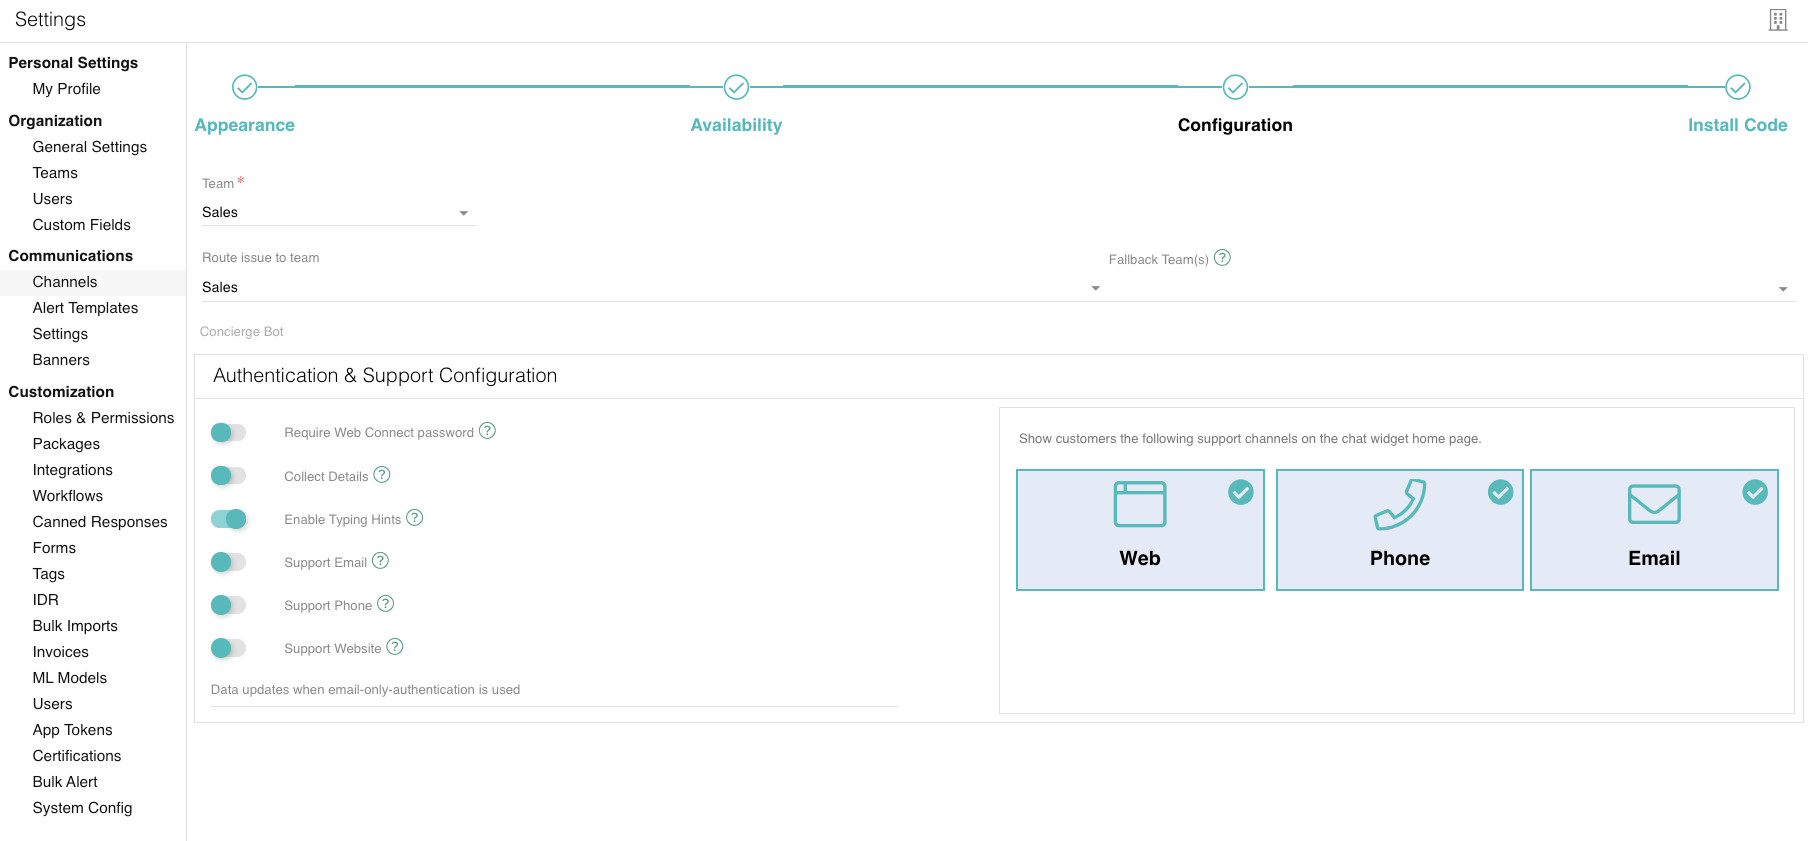
Configuration
- Route issue to team: select a Team in your Organization that will automatically receive the Issue when a Customer chats in. The Issue will appear in the Team's agents' Unclaimed inbox queues.
- Fallback Team(s): select the Team(s) that the Issue will be routed to if the original Team is unavailable. The Issue will be routed to the Teams in the order they are listed. For example, if the first listed Team is unavailable, the Issue will be routed to the second and then third listed Team.
- Concierge Bot: (auto-populated) the Concierge Bot that will jump into the chat when the user first chats in.
- Authentication & Support Configuration:
- Require Web Connect password: toggle on if you would like users to only be able to access the chat if they have a password.
- Collect Details: by default, the user will be asked to enter their email address and first name before they start a conversation. Toggle this field on to collect other details from the user, such as last name, business name, phone number, business address, and password.
- Enable Typing Hints: toggle on to be able to see when your Customer is typing before they hit send.
- Auto re-open issue: toggle on if you would like to re-open a Customer's previous Issue when they chat in for a second time.
- Data updates when email-only-authentication is used: before starting a conversation, the user is required to type their email. If there is a match for that email for a Customer User in Relay, but the user types a different name and phone number from the ones listed in the Relay record, you can update the phone/name record(s) for the Customer User.
- Show customers the following support channels on the chat widget home page: select if you would like to show additional support channels for the customers to be able to access when they click on the webConnect widget. Adding the Web icon will simply direct them to the web chat.
- Hit Save & Next.
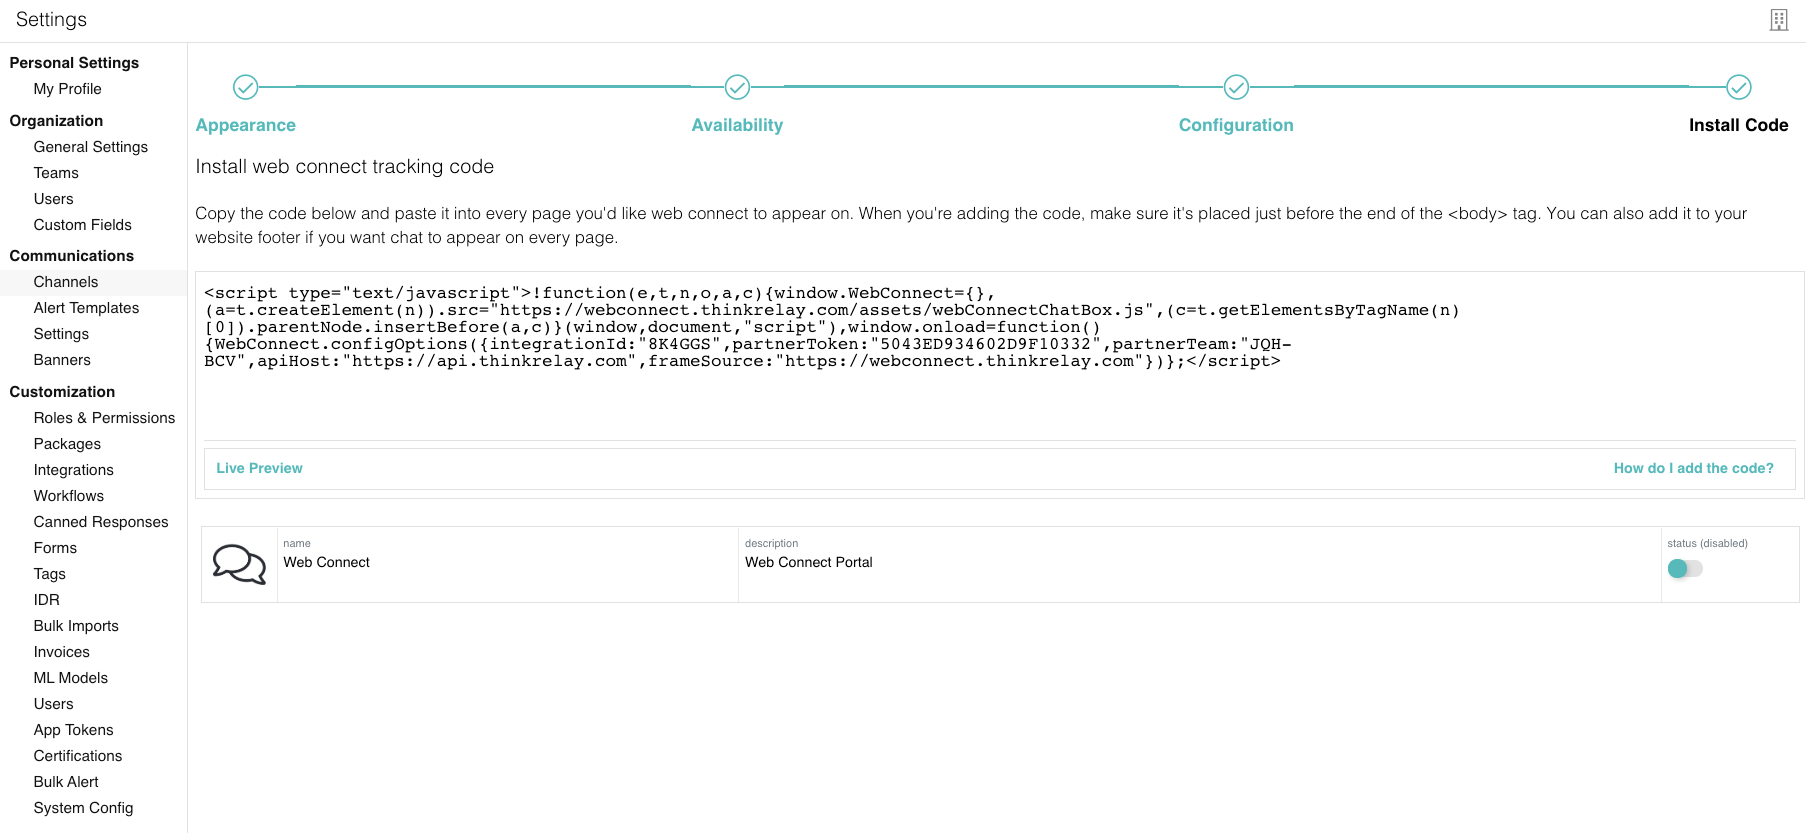
Install Code
- Install web connect tracking code: follow directions on the page to add the webConnect widget to your website. See the screenshot below for an example.
- Live Preview: preview and test your webConnect integration. NOTE: you must first change the status of the integration to enabled.
- Status (enabled): toggle on to preview, test, and use the webConnect integration.
- Hit Done.