Set up the Salesforce.com Integration
Last Updated:What's in this article?
The Salesforce Integration allows you to push Relay Issues into your Salesforce instance. This allows you to get updates on tickets without logging into Relay.
This integration is bidirectional—you can also make edits on cases in Salesforce and push them back into Relay.
Set up the Salesforce.com Integration in Relay
- From the main navigation menu to the left, click on Settings.
- Under the Customization header, click on Integrations.
- Under the Add New System Integration header, locate the Salesforce.com tile and click on Configure.
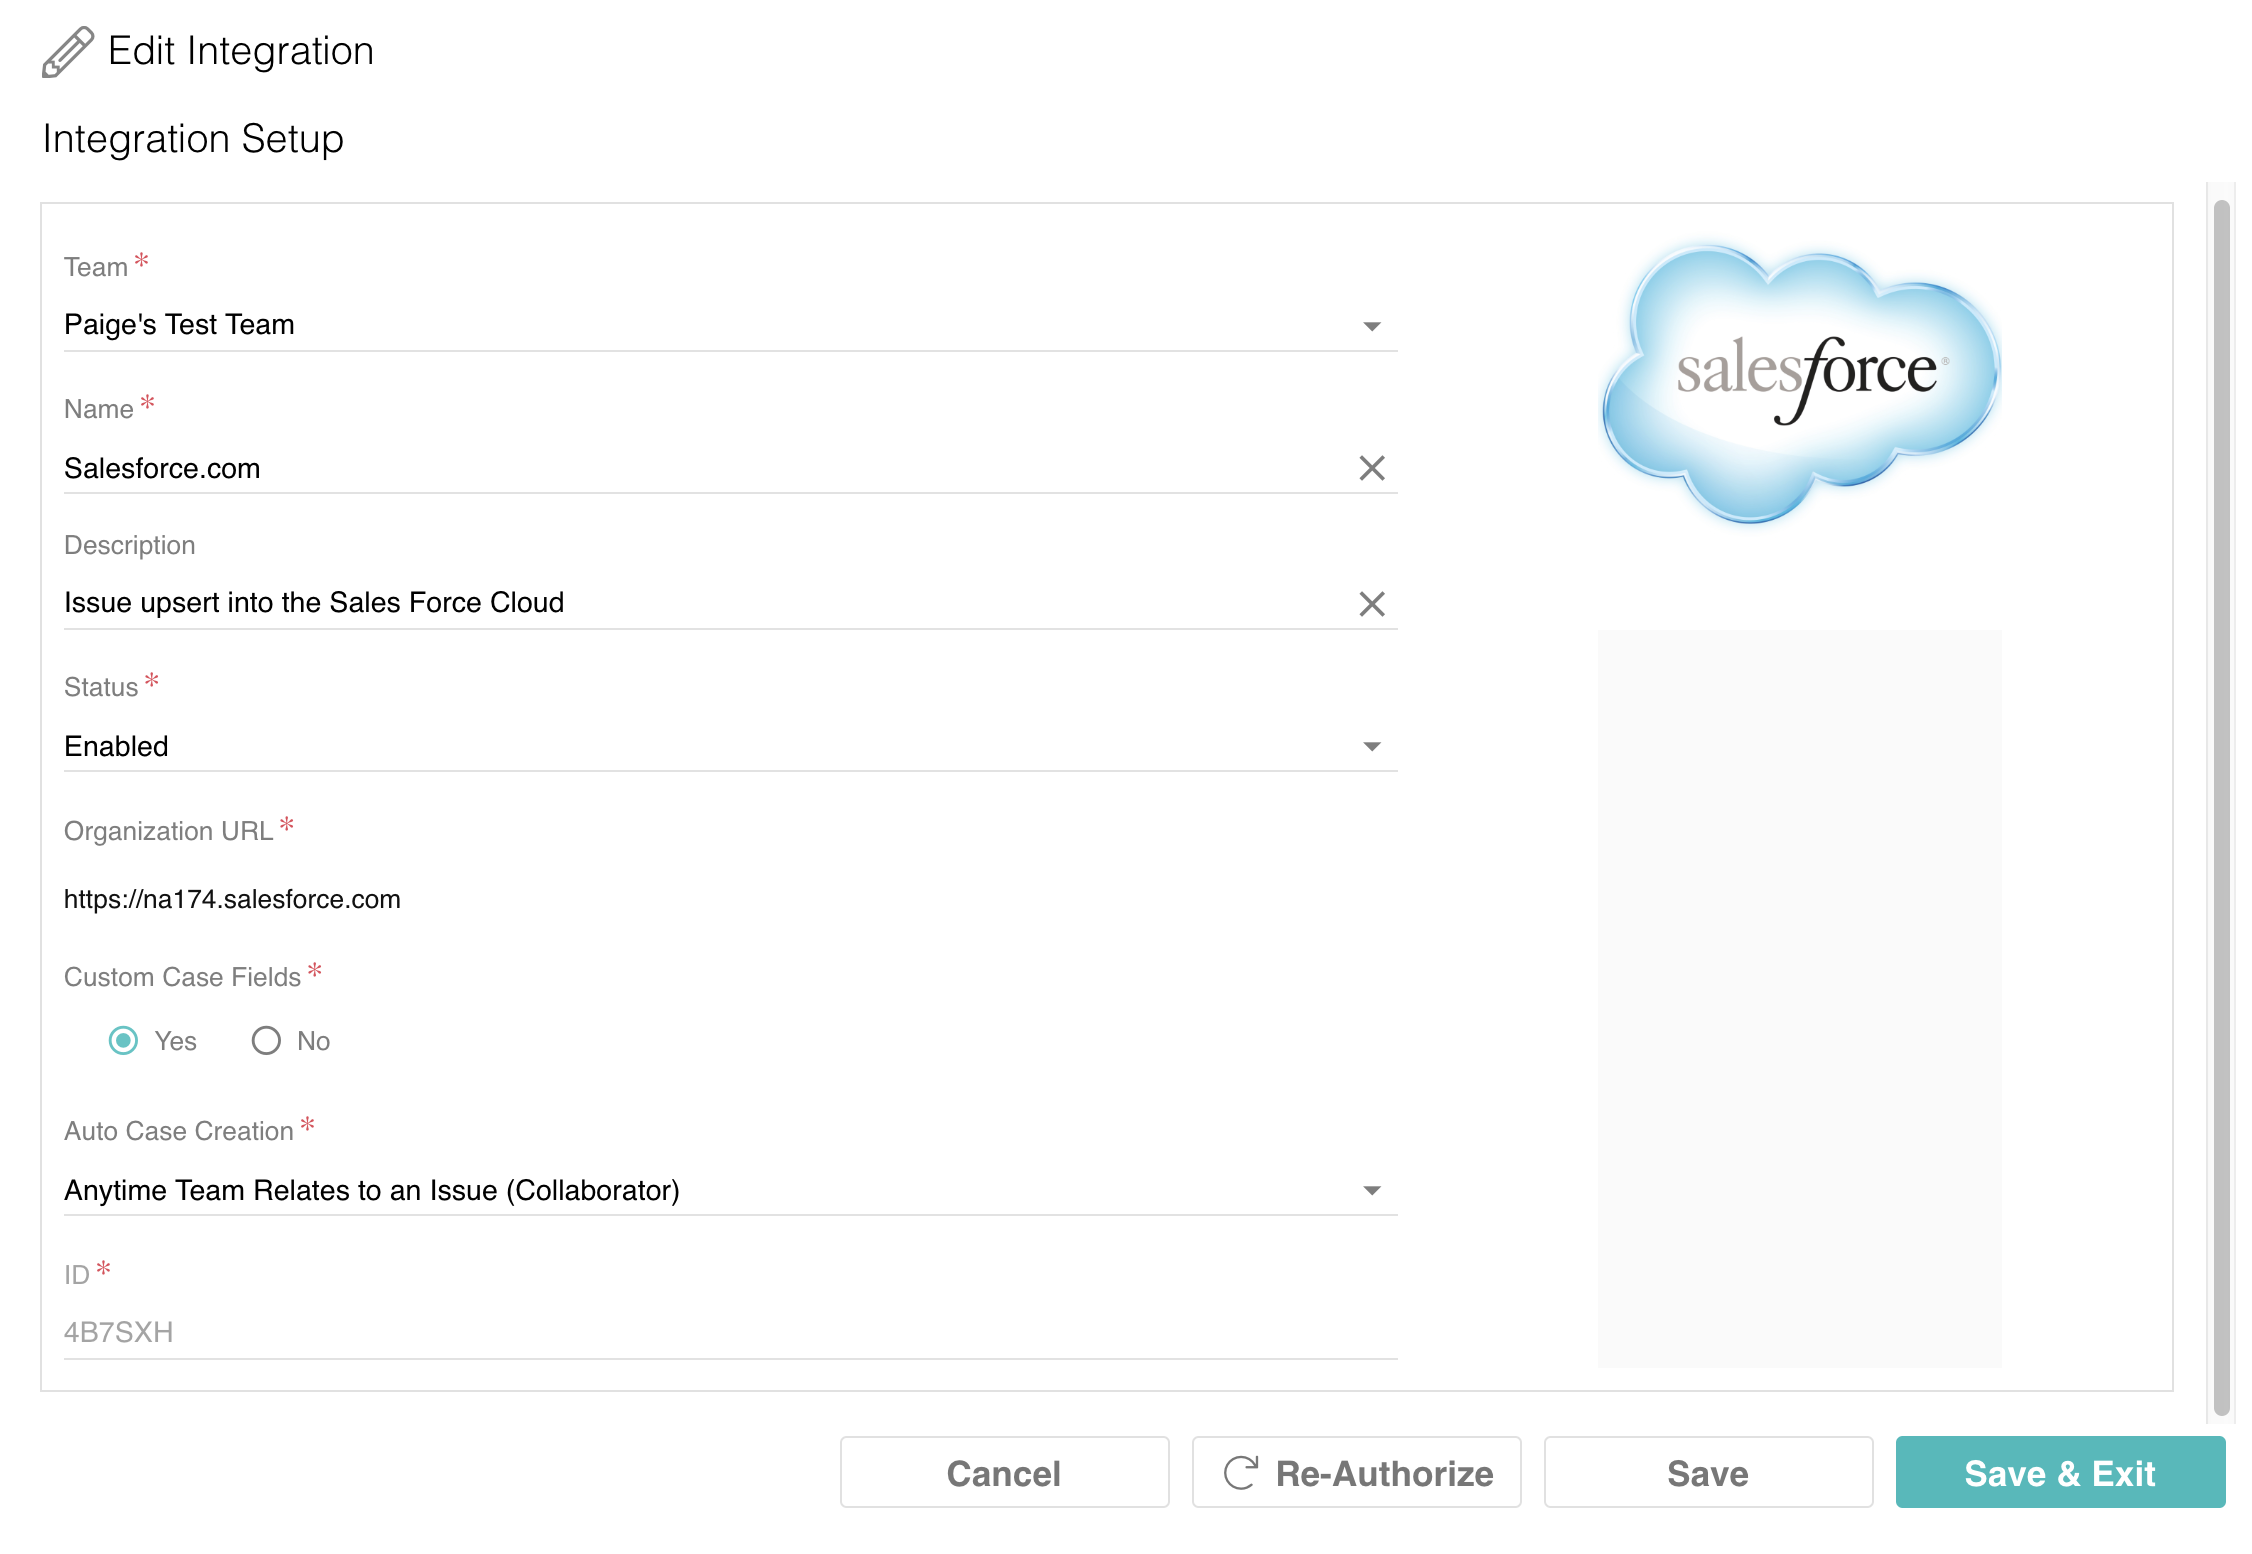
- Fill out the following fields:
- Team: Select the Team of interest from the dropdown menu.
- Name: Type the name you want to be displayed in the internal list of your Team's Integrations.
- Description (optional): Type the description of your Salesforce.com Integration.
- Status: select Enabled from the dropdown menu.
- Custom Case Fields: see section on Salesforce.com custom fields below.
- Auto Case Creation: select your preference for auto-creating Issues.
- Hit Save or Save & Exit.
- You will be redirected to log in to your Salesforce.com account to authorize your Integration. Click the Authorize or Re-Authorize button and enter your Salesforce.com login details to authorize the integration.
Salesforce.com Custom Fields
Before you perform the following steps, you must create specific Custom Fields in Salesforce. View this video to learn more about how to create a Custom Field in Salesforce.
Below is the list of Custom Fields that you should configure for the ‘Case’ Object. NOTE: Salesforce automatically adds the __c after each Custom Field, so you will not need to add that yourself.
Boomtown Custom Fields for the ‘Case’ Object: (NOTE: *denotes a bi-directional sync between Salesforce.com and Relay)
API Name | Data Type |
BT_Category__c | Text(64) |
BT_Issue_ID__c | Text(64) (External ID) |
BT_Issue_Ref_ID__c | Text(6) (External ID) |
BT_Status__c | Text(16) |
BT_MID__c | Text(255) |
BT_Owner__c | Text(128) |
BT_Resolution__c | Text(64) |
BT_Type__c | Text(64) |
BT_Name__c | Text(255) |
BT_IDR_Issue__c | Text Area(255) |
BT_IDR_Diagnosis__c | Text Area(255) |
BT_IDR_Resolution__c | Text Area(255) |
BT_ParentID__c | Text(64) |
BT_Source__c | Text(64) |
BT_Device__c | Text(128) |
BT_Device_Severity__c | Text(32) |
BT_Special_Notes__c | Text Area(255) |
BT_URL__c | URL(255) |
Authorize the integration on Salesforce
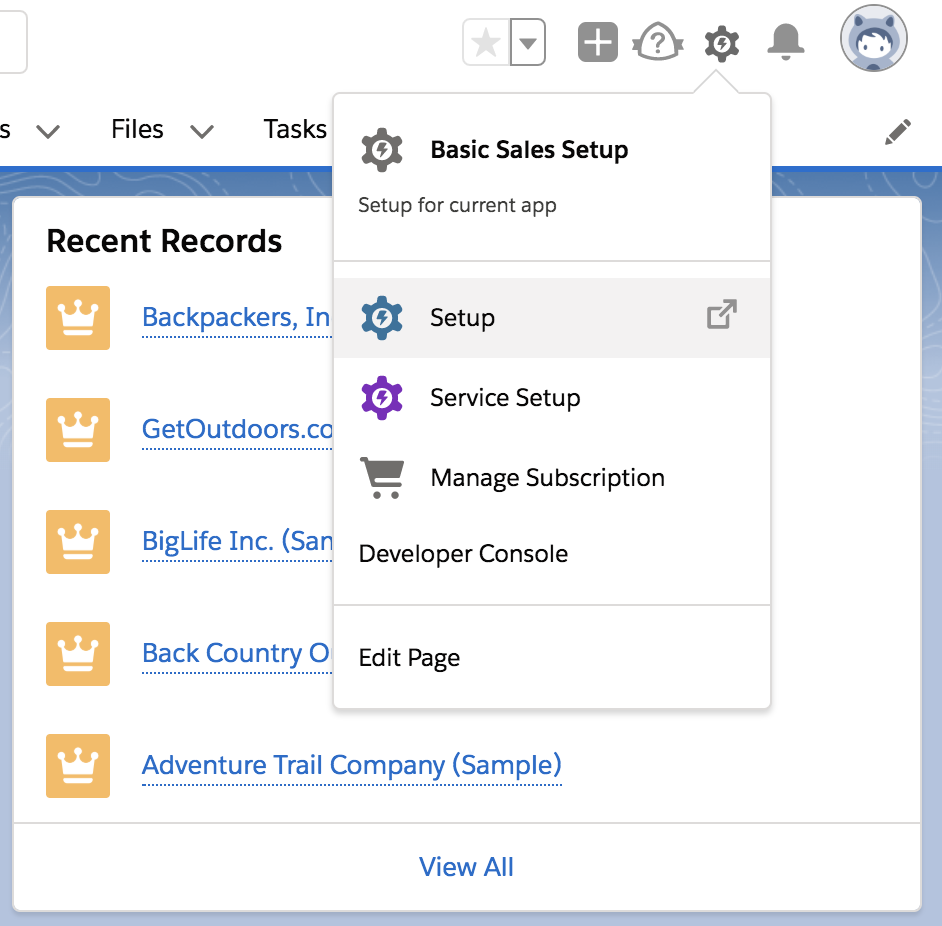
Step 1: After logging in to Salesforce, click on the Settings icon in the top right corner, then click on Setup.
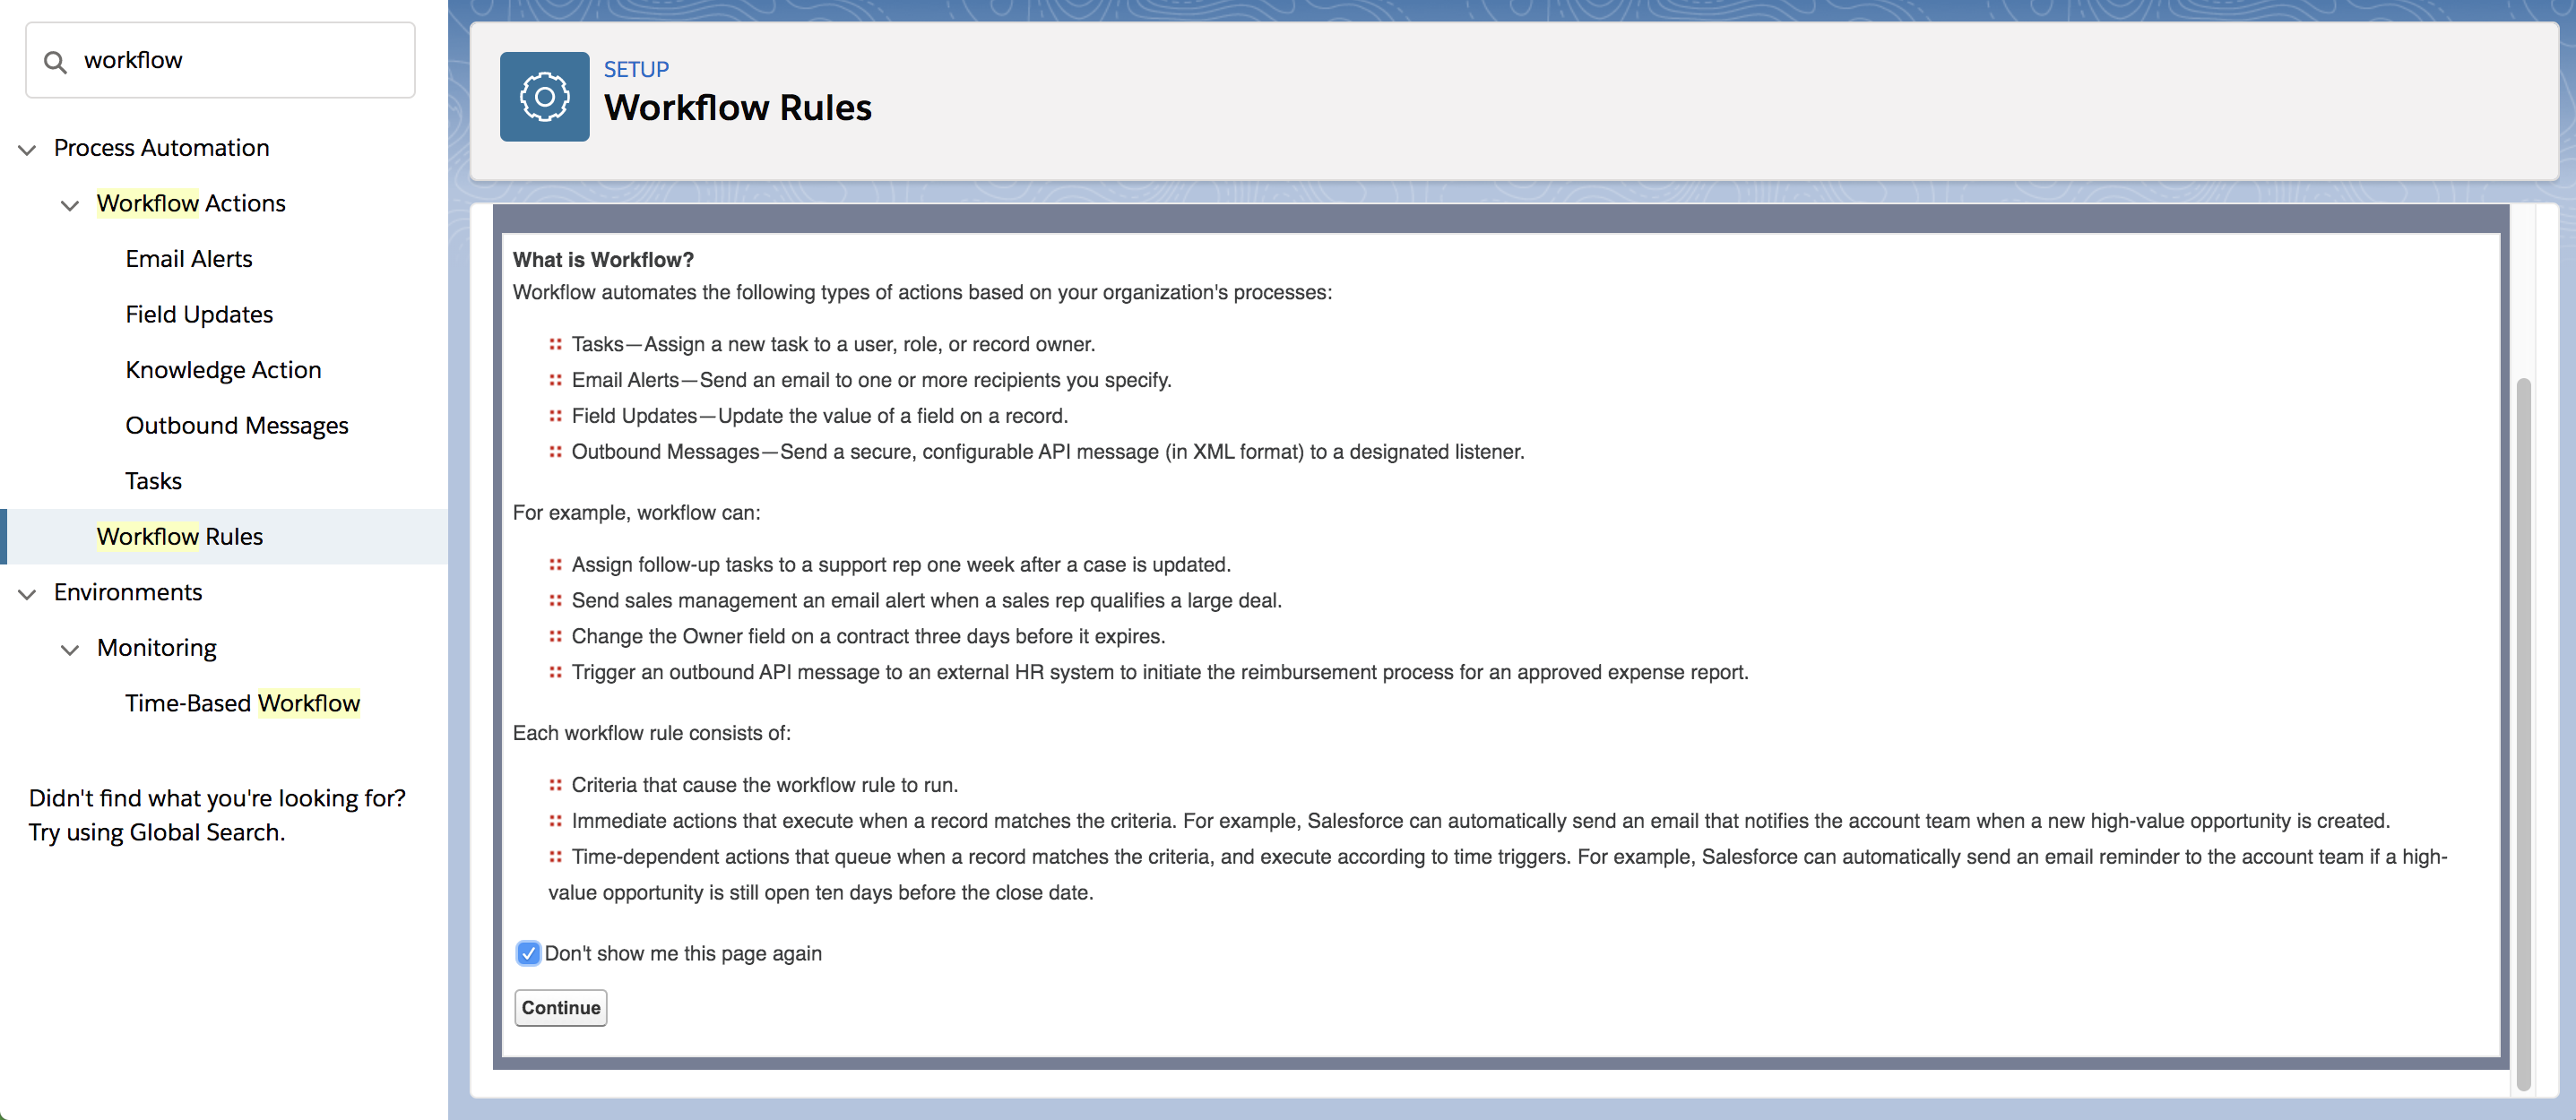
Step 2: Search for Workflow in left nav search. Select Workflow Rules under Workflow Actions, then click on Continue.
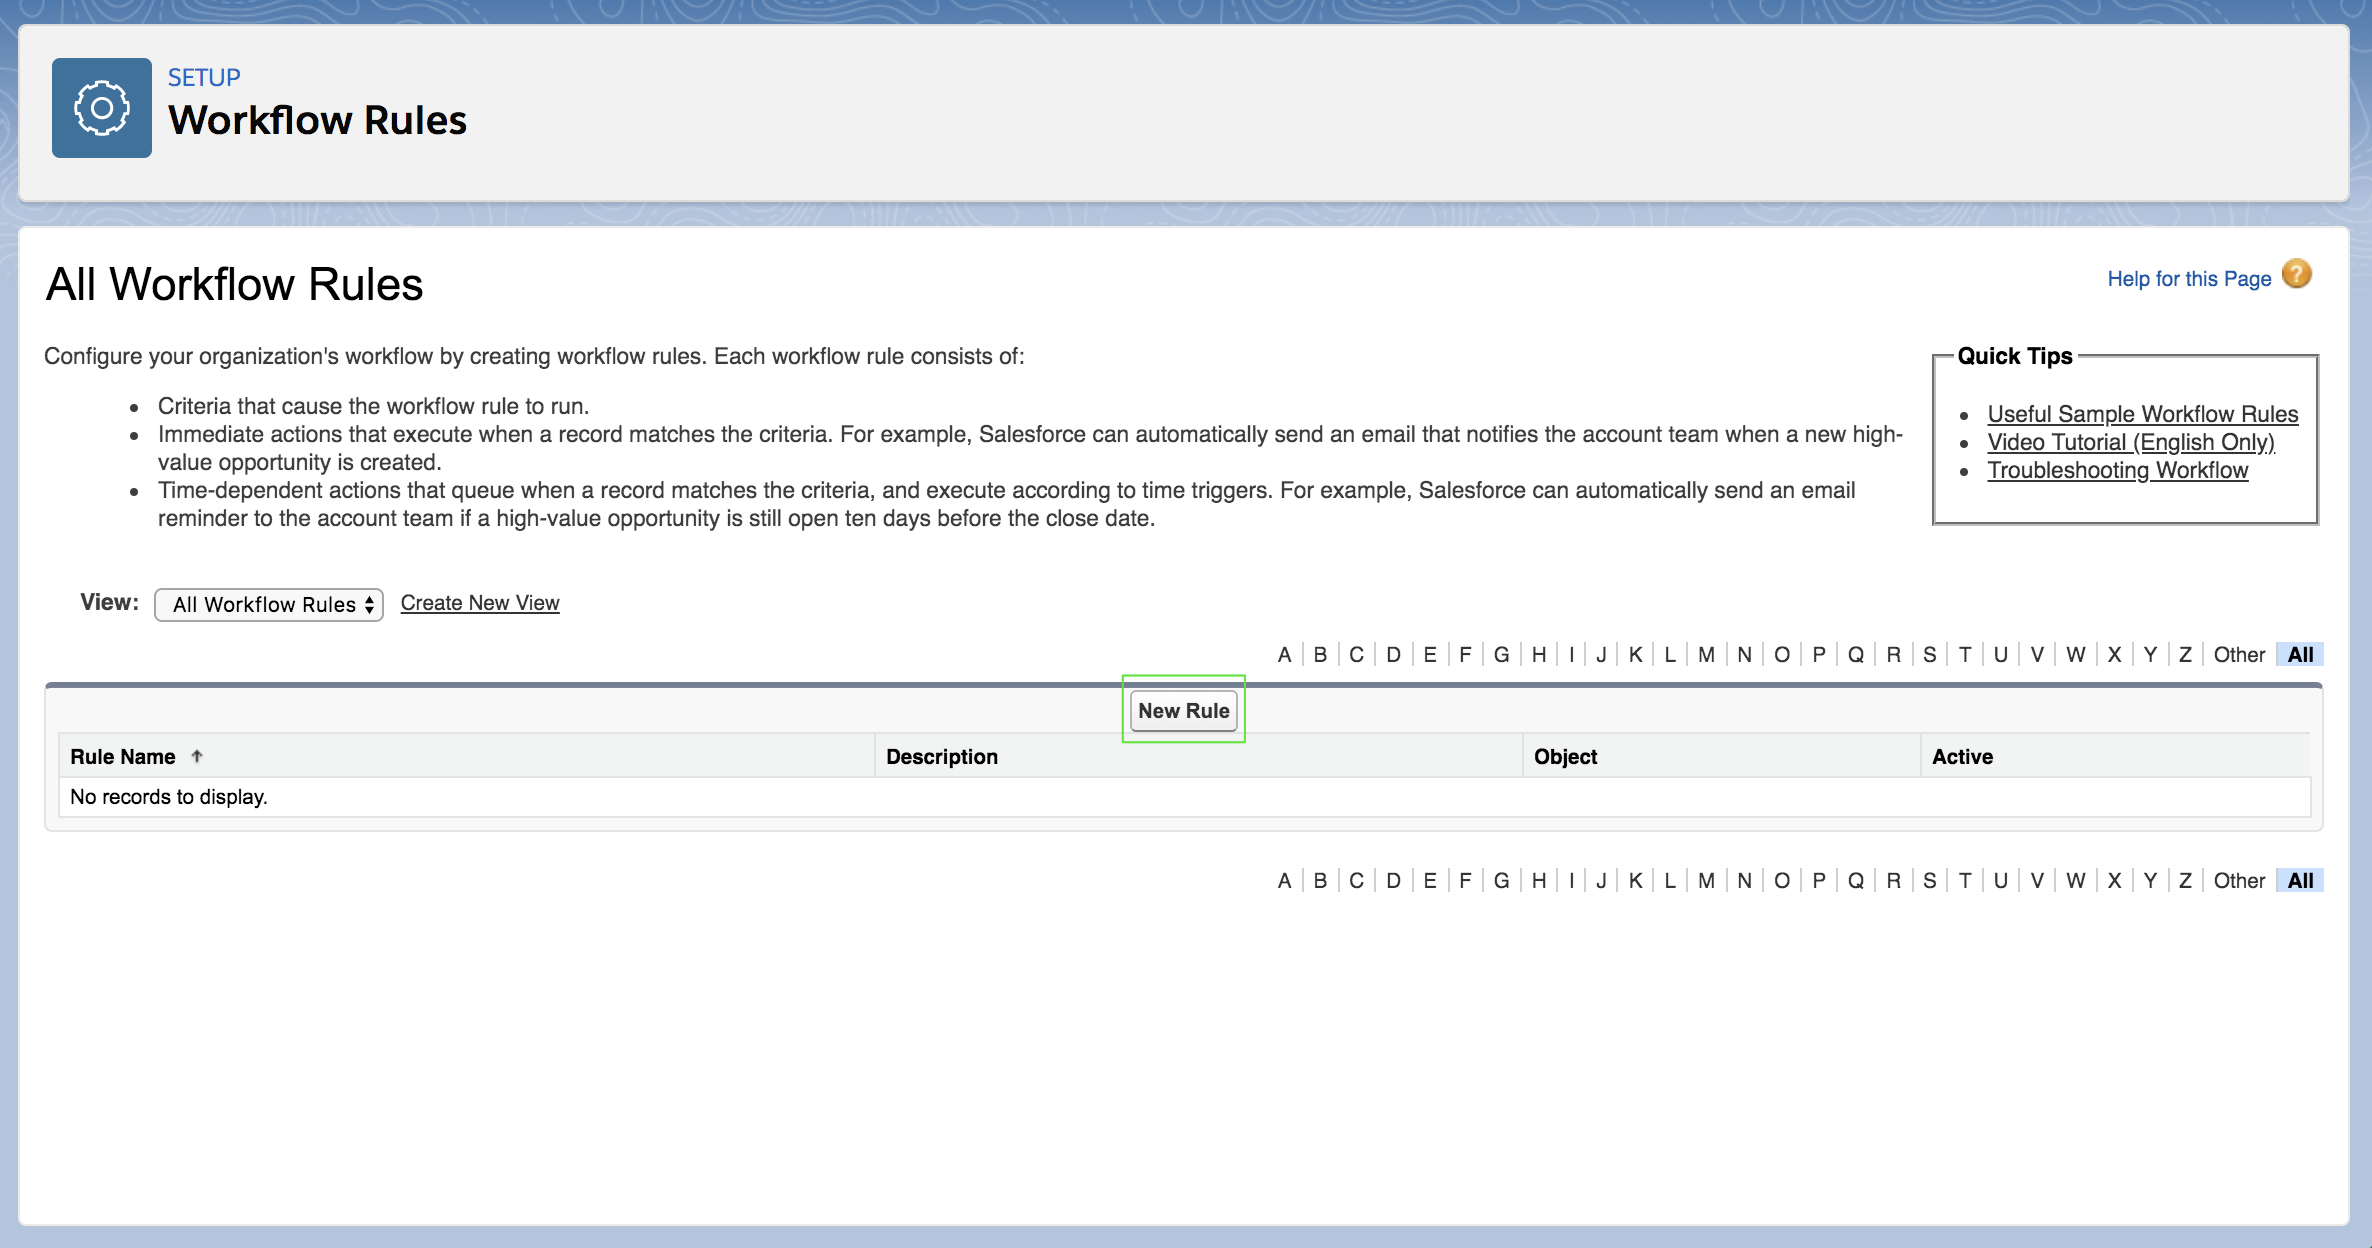
Step 3: Click on the New Rule button.
Step 4: For Object, Select Case or Case Comment, then click on the Next button.
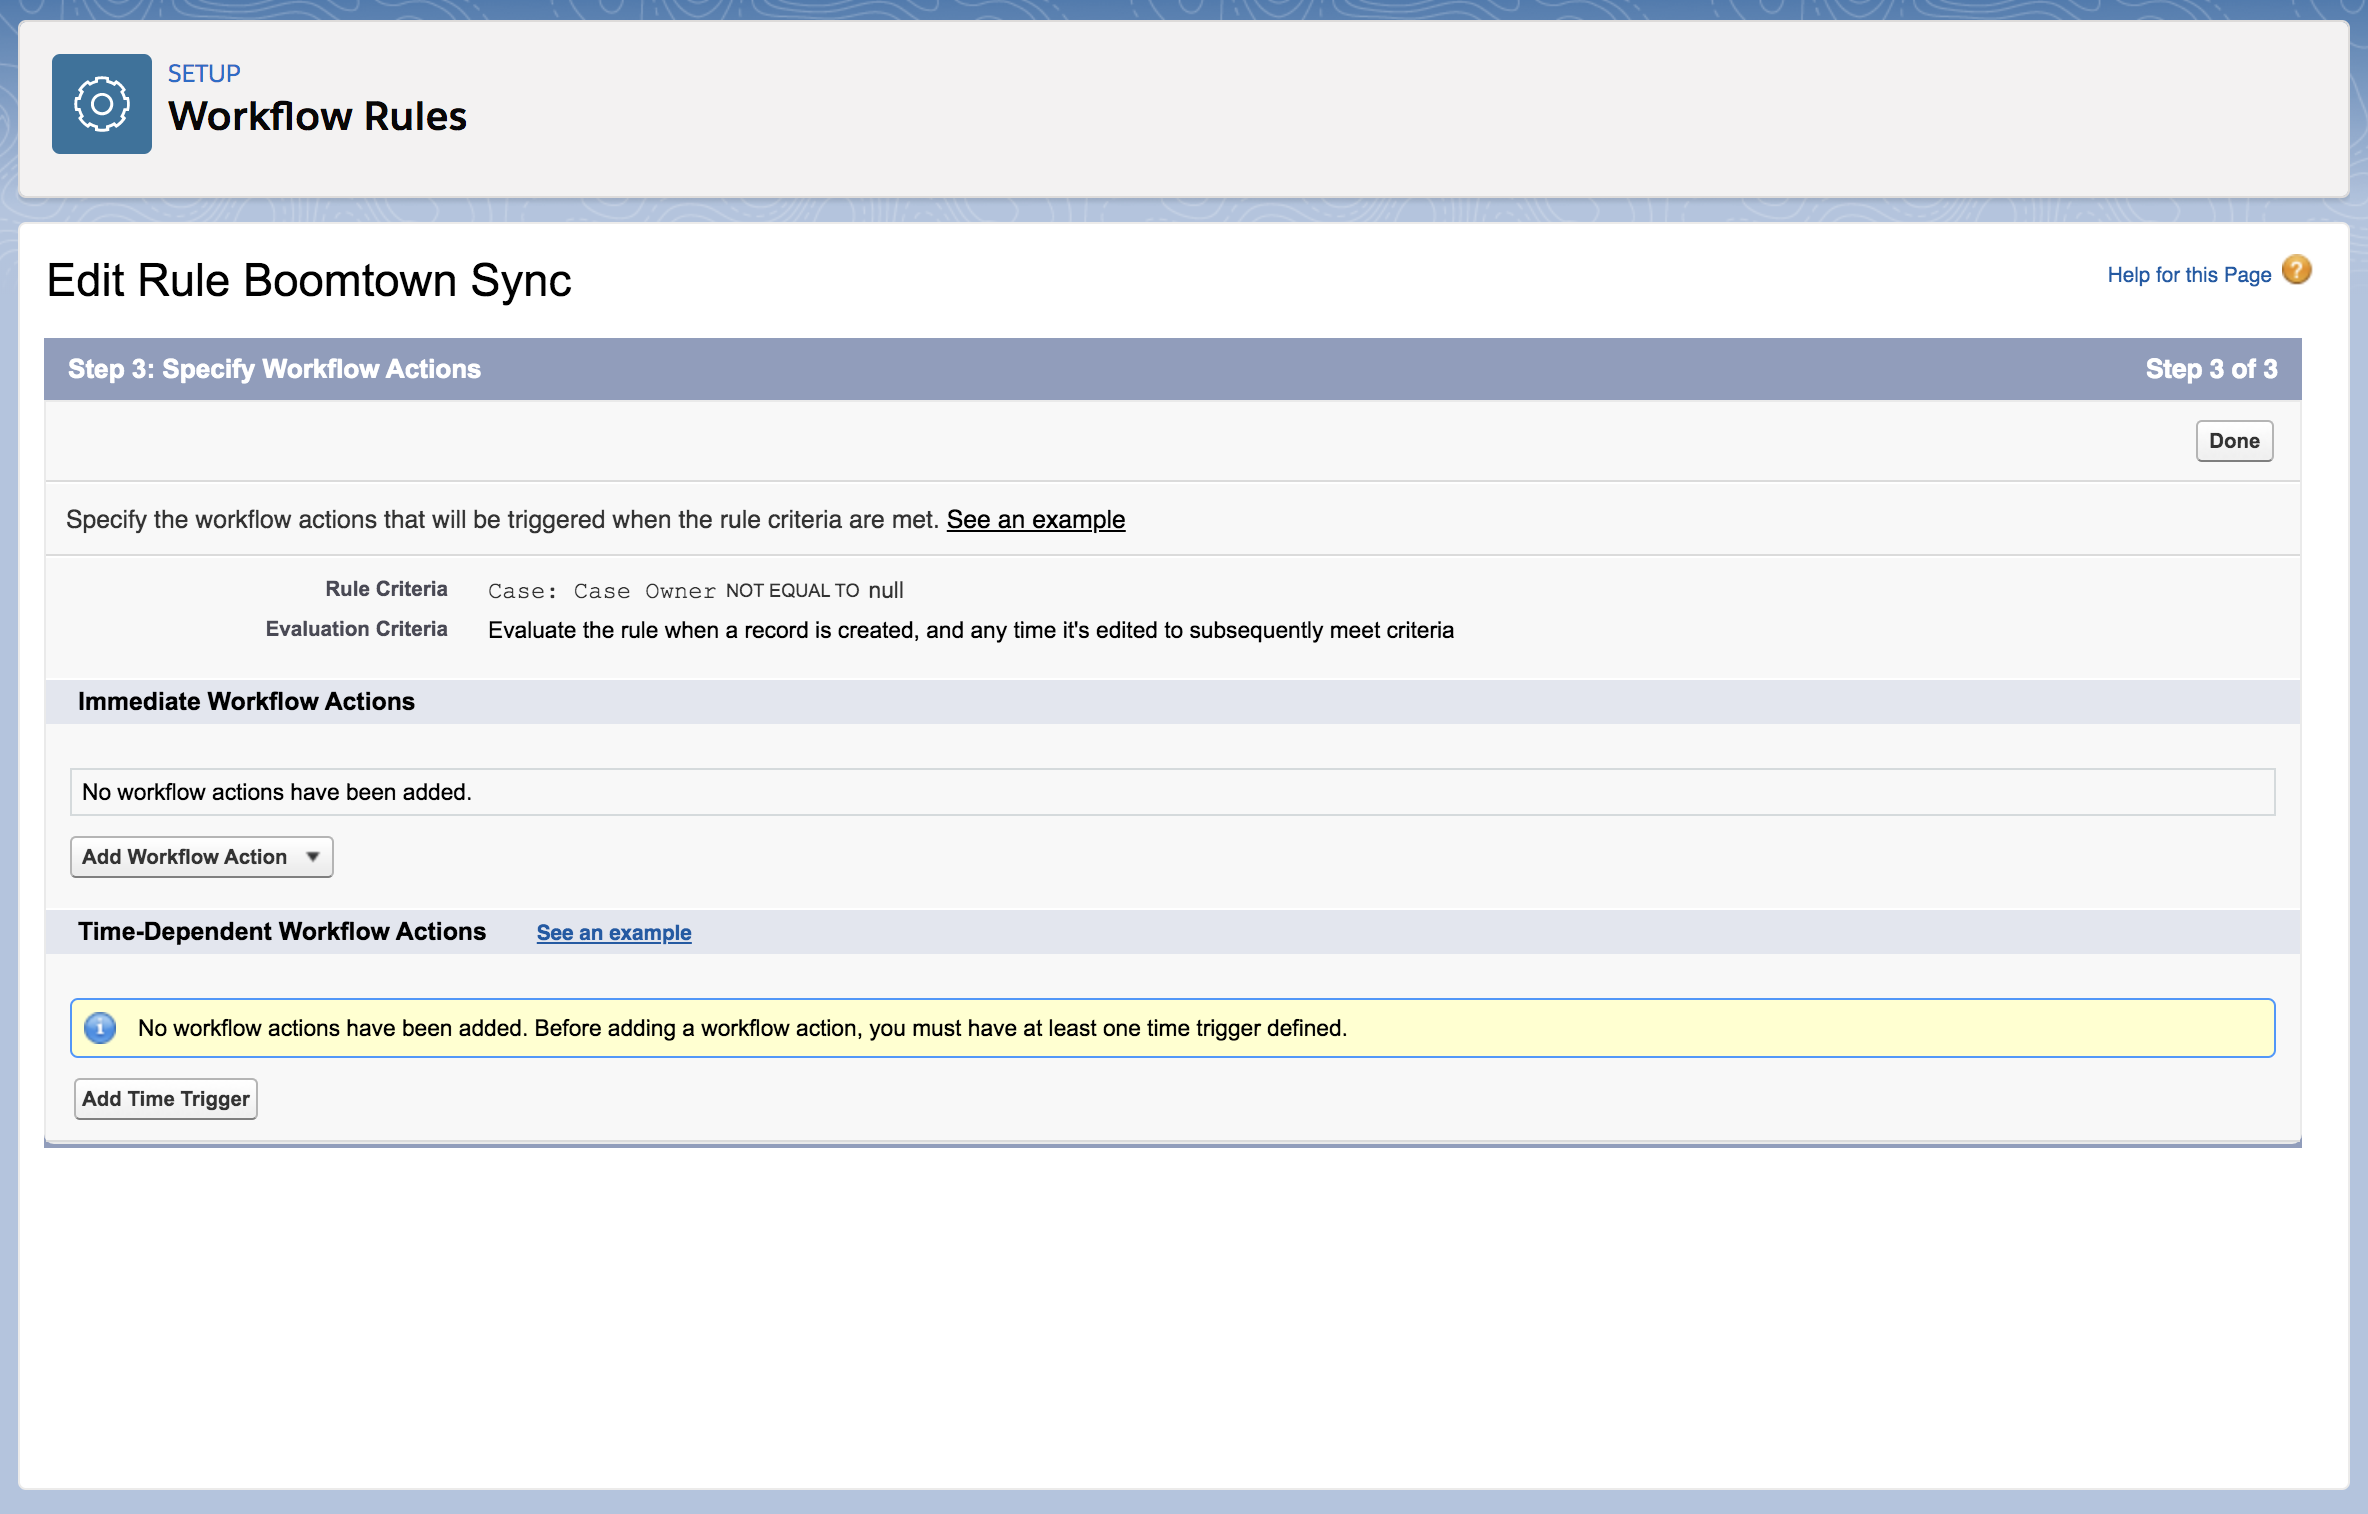
Step 5: Configure the Workflow Rule as desired. NOTE: If you do not want to send all issues to the Boomtown Platform, select "created, and any time it's edited to subsequently meet criteria" under Evaluation Criteria. Then specify the criteria for when the issue should be sent to Relay. When you're ready, click on the Save & Next button.

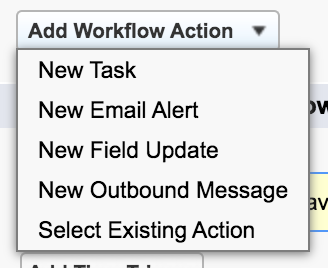
Step 6: Click Add Workflow Action and select New Outbound Message.
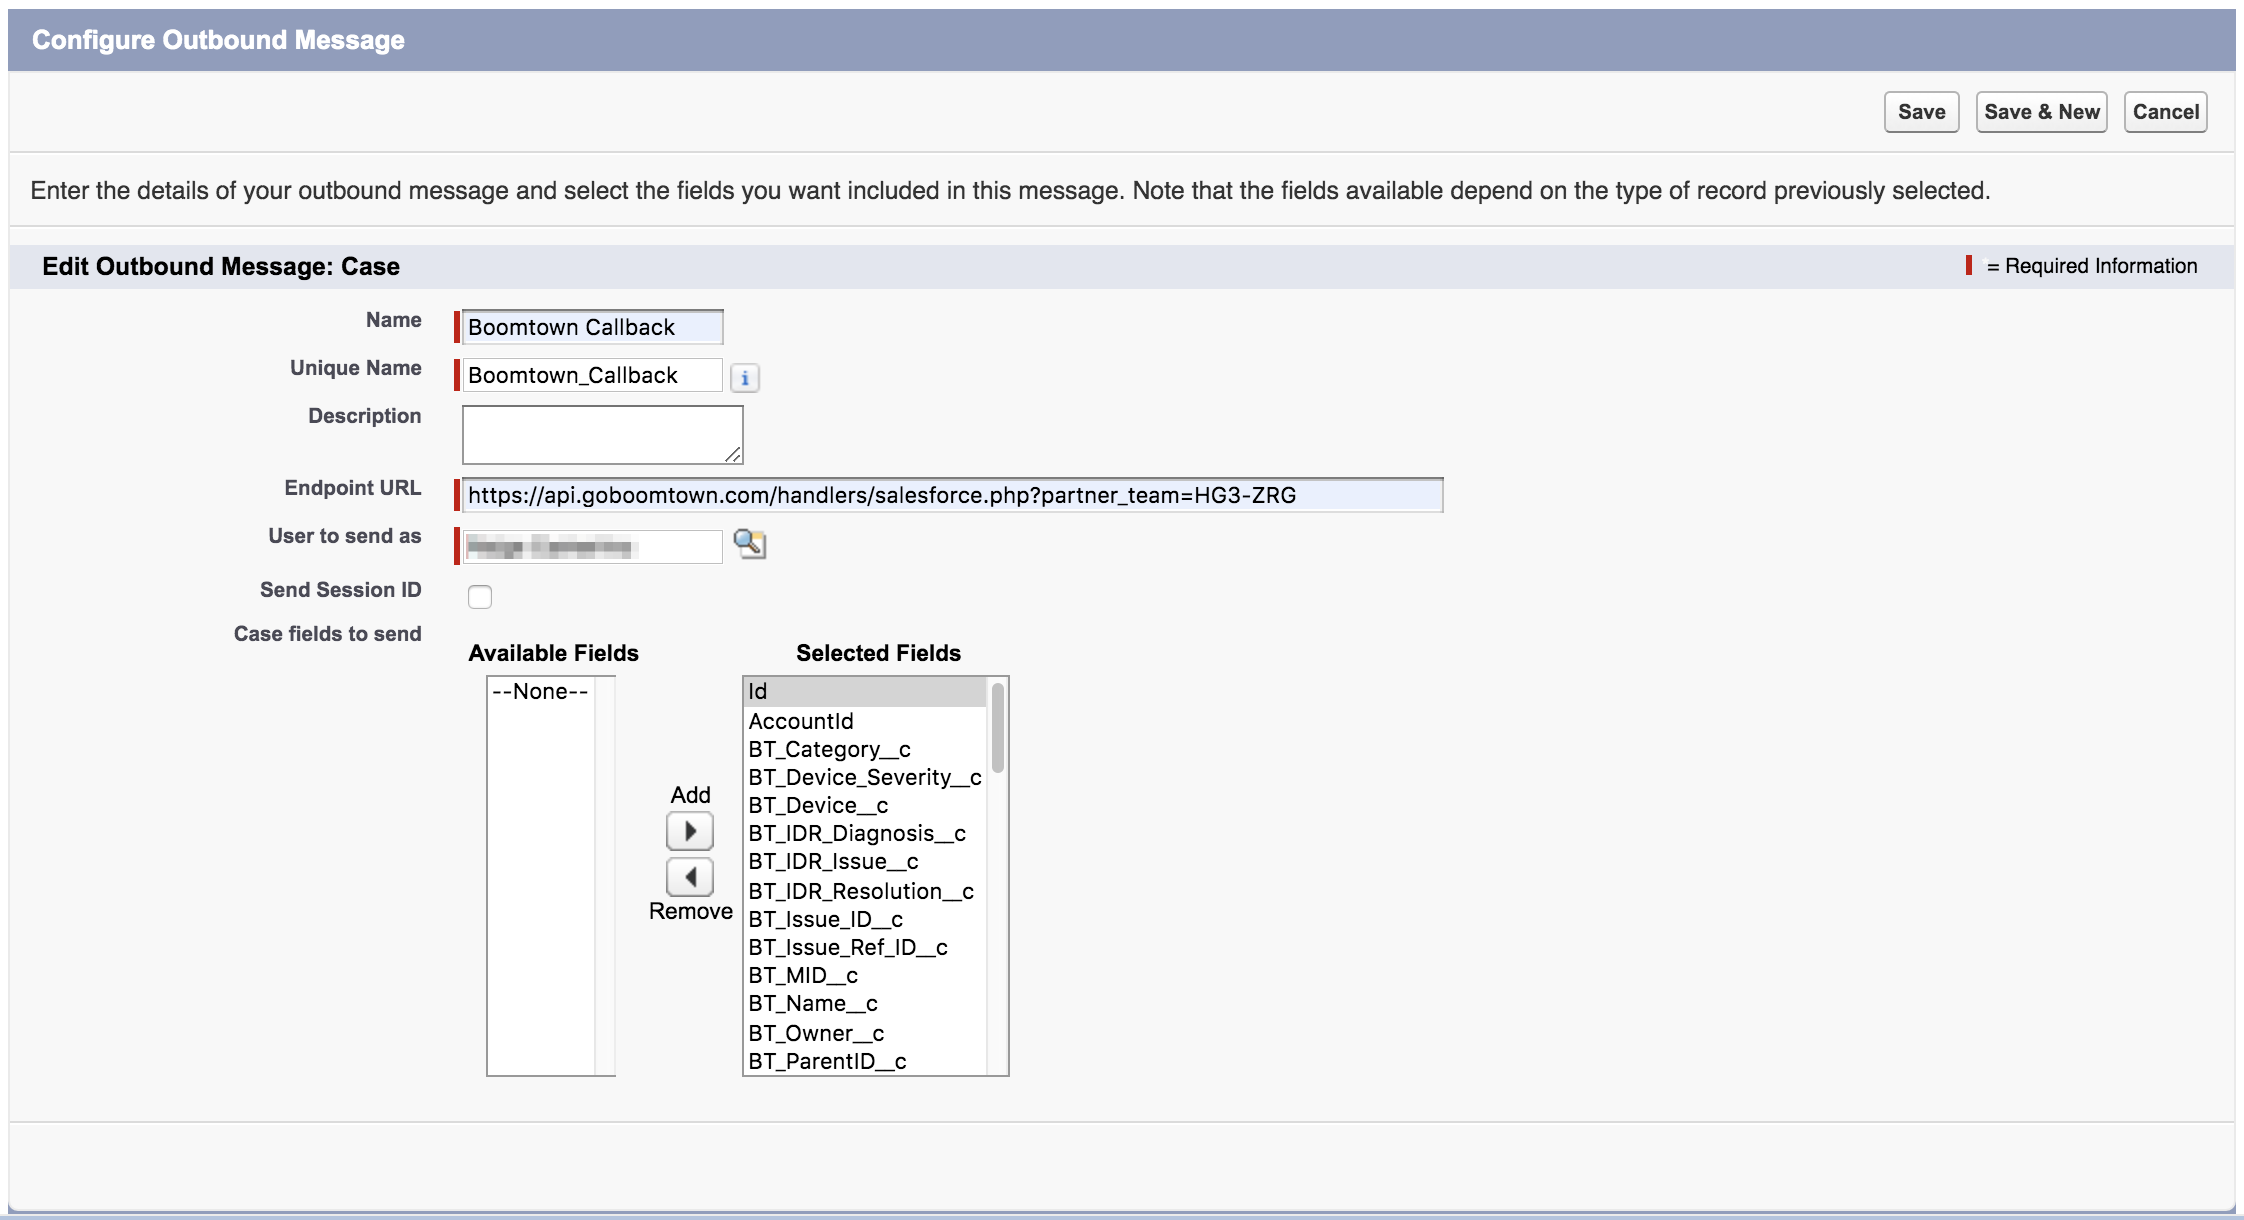
Step 7: configure callback to Boomtown. The endpoint URL must be specific to a single Team—include its ID (learn how to find a Team's ID in Relay here).
Step 8: Select all Boomtown (prefixed with BT) object fields to submit.
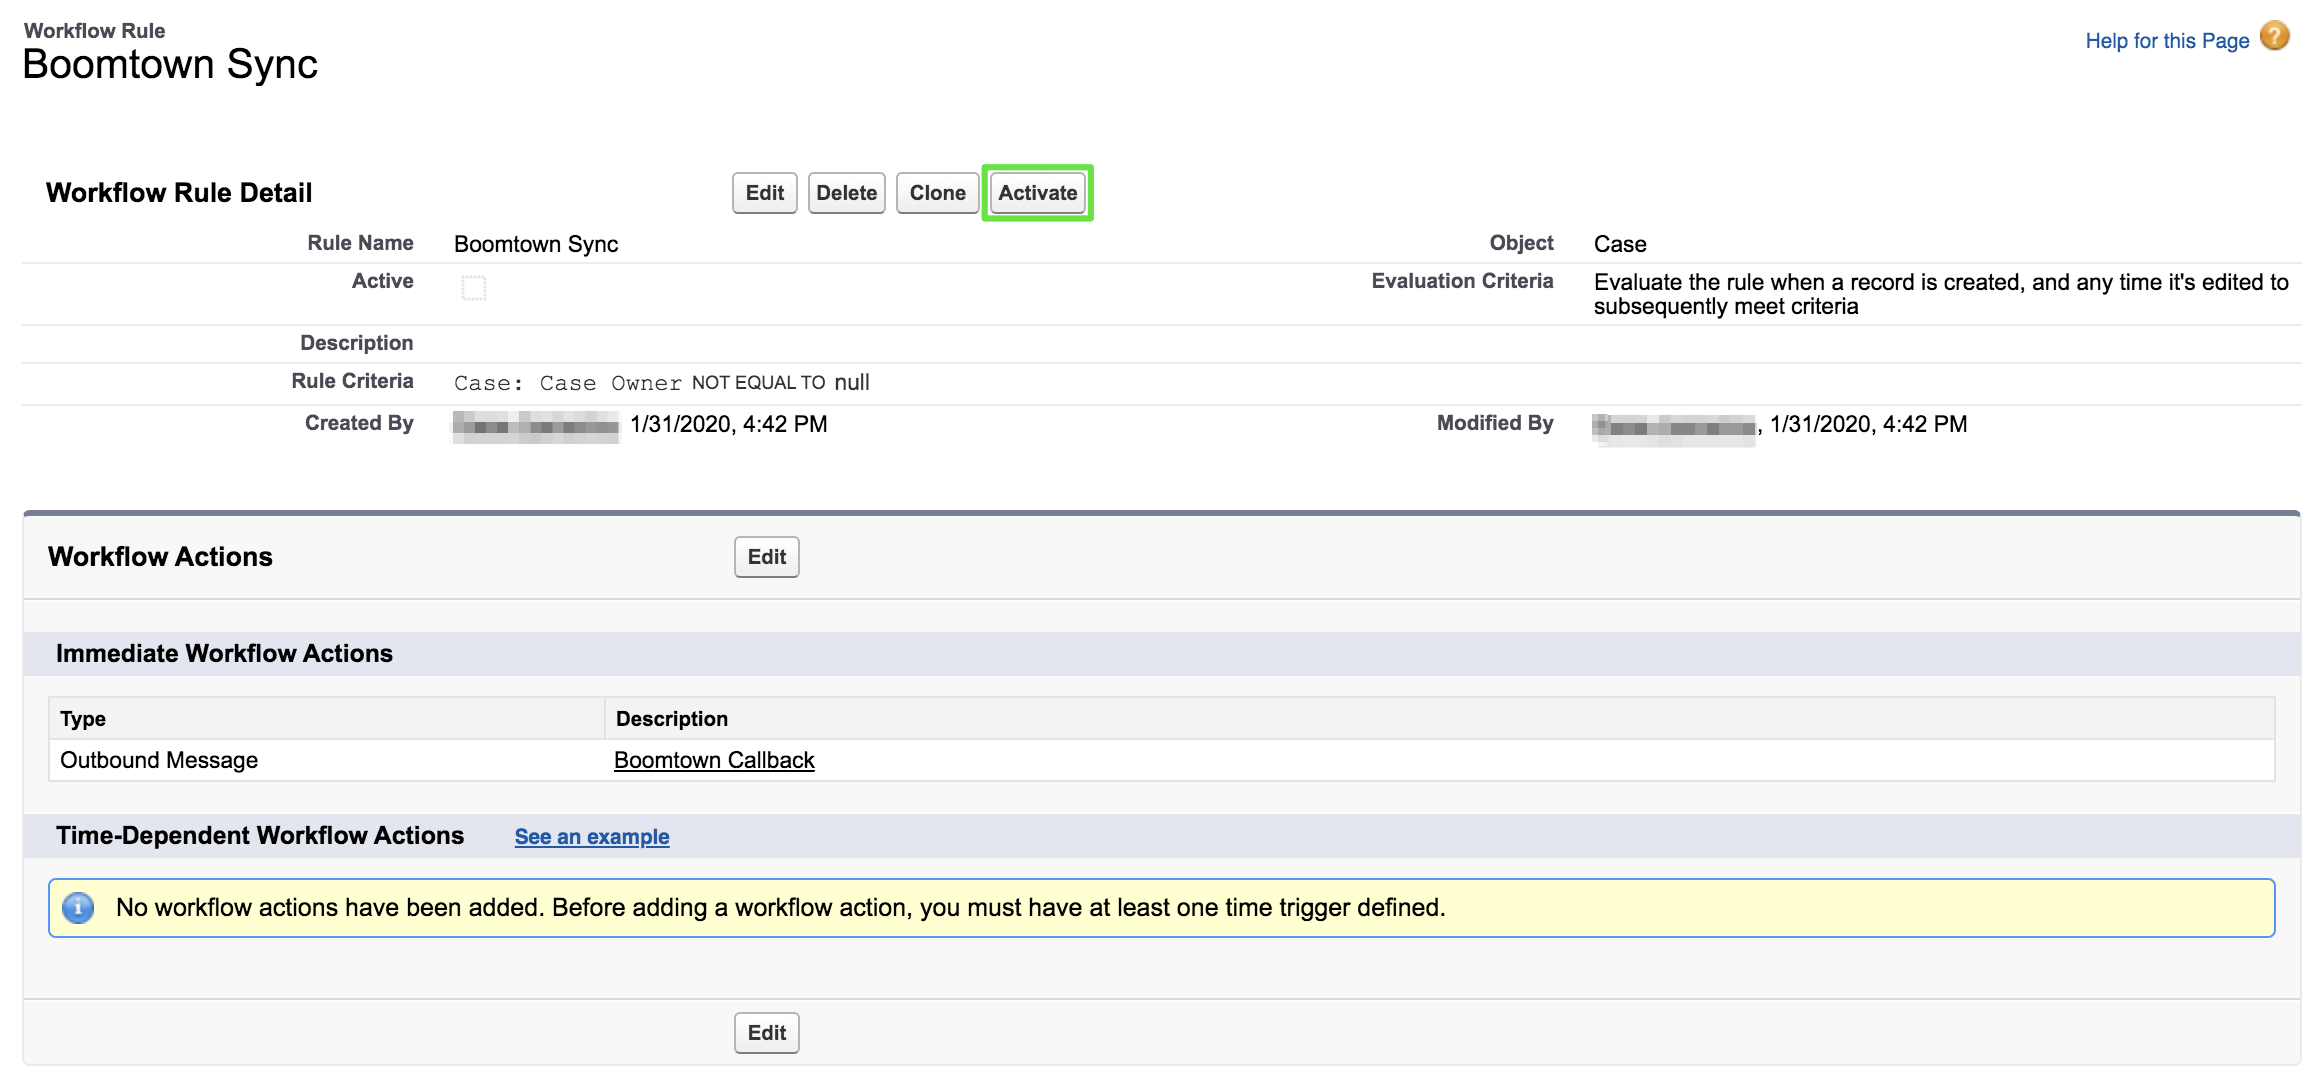
Step 9: After saving, click Done and then Activate next to the new workflow.