The Zendesk Integration allows you to push Relay Issues into your Zendesk instance. This allows you to get updates on tickets without logging into Relay.
- Go to Organizations → Teams and search for your Team.
- Double click on the Team or click the
 (Pencil) icon next to it.
 - On the left navigation bar of the Org Teams modal, go to
 (Integrations).
 - Select
 to open the Integration Setup modal.
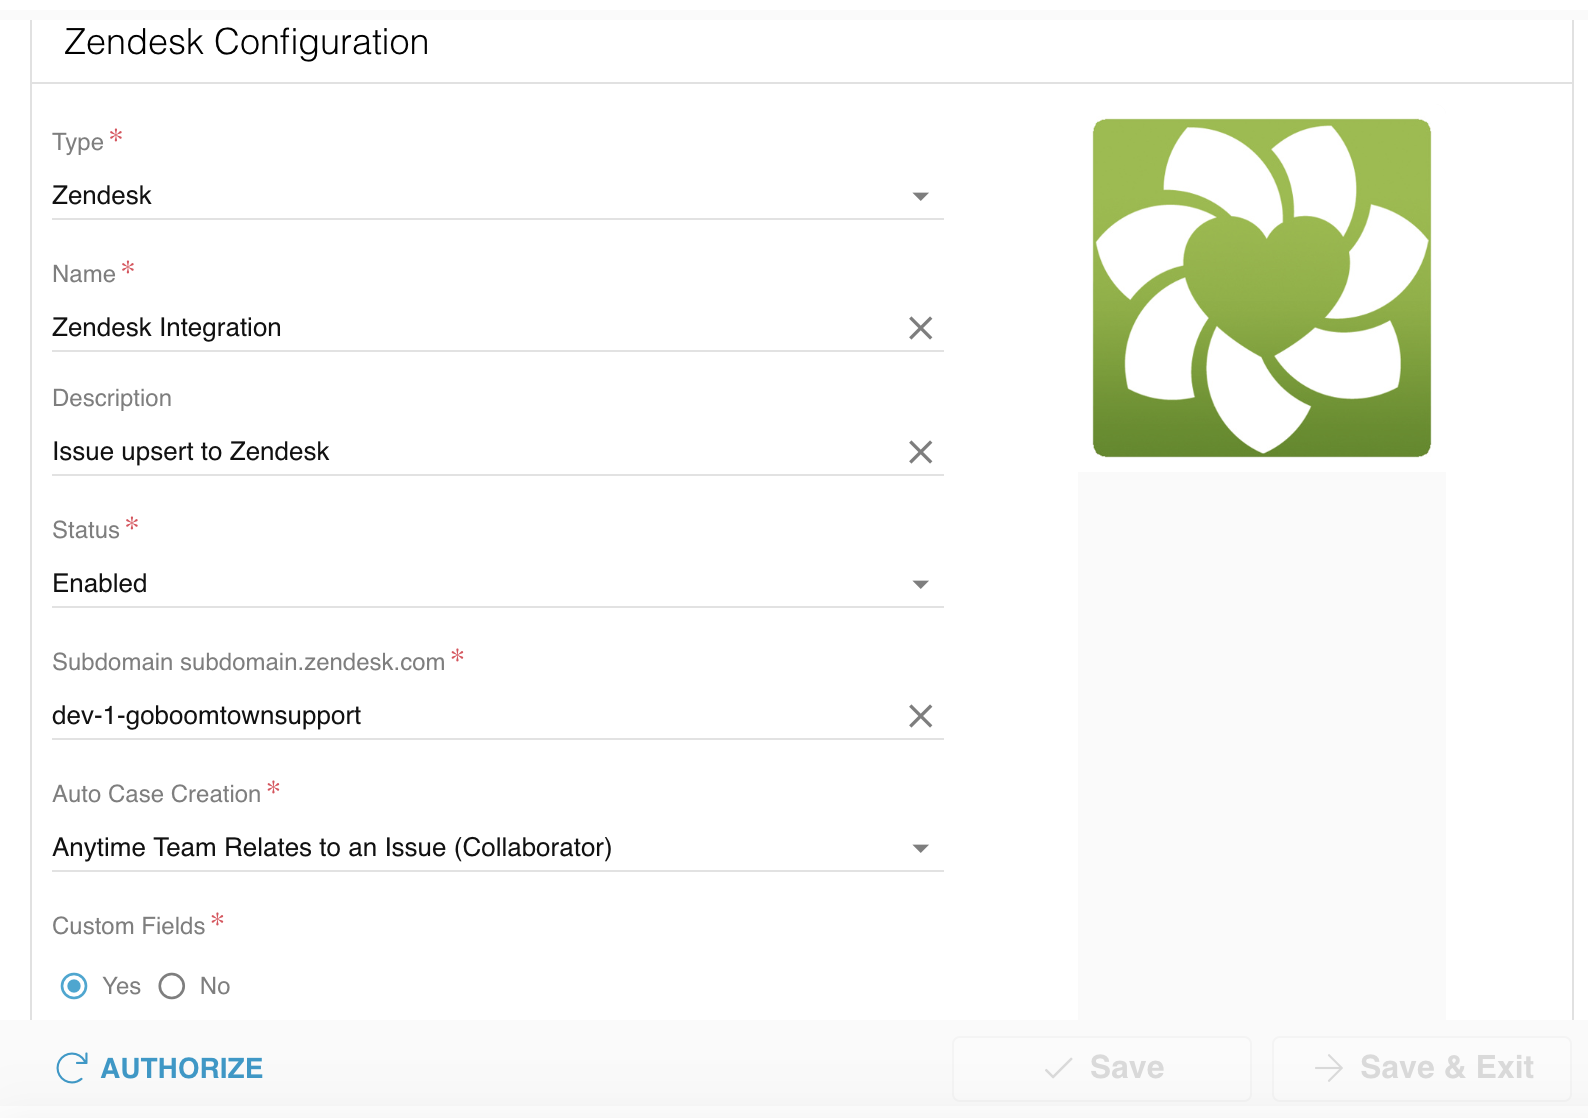
 - Fill out the following fields:
- Type: select Zendesk from the dropdown.
- Name: type the name you want to be displayed in the internal list of your Team's Integrations.
- Description: (optional) type the description of your Zendesk Integration.
- Status: select Enabled from the dropdown.
- Subdomain subdomain.zendesk.com: enter your subdomain name. For example, if your subdomain is partner.zendesk.com, enter partner in the field.
- Auto Case Creation: select your preference for auto-creating Issues.
- Custom Fields: select Yes if you would like to integrate with custom fields in Zendesk. You will see a list appear below. Enter the ID(s) for the custom Zendesk field(s) which you want to receive data from Relay.
- The following Zendesk custom fields can be integrated with Relay: category, Issue ID, owner, resolution, type, name, IDR Issue, IDR Diagnosis, IDR Resolution, parent ID, source, equipment tags, support tags, device.
- Hit Save or Save & Exit. You will be redirected to an external Zendesk page to complete the Integration authorization.
- Click Allow on the external page to complete the Integration setup.
