Support Poynt Hardware & SetUp
Peripherals, or external accessories like printers and cash drawers, allow merchants to use tools that make managing their business simple. These can easily be connected to your Poynt Smart Terminal using a USB or network connection.
In this article, we’ll cover the following topics.
- Supported Peripherals List
- Connecting a USB Accessory
- Connecting a Network Accessory
- Managing your Accessories
- Switching Peripherals
Note: Not all peripherals are supported by all processors. Please consult your Reseller Organization for more information.Supported Peripherals
| Category | Models |
|---|---|
| USB Printers | Esky POS-5870 EPSON TM-T20II STAR TSP650 STAR TSP100 TSP143iiU mPOP POP10-B1 |
| Network Printers | Thermal: EPSON TM-m30, STAR TSP100/TSP143Lan Impact: STAR SP700, EPSON TM-U220B |
| Cash Drawers | STAR SMD2-1317 + USB Trigger STAR Model: 37965560 + USB Trigger M-S Cash Drawer CF-405-M-B + USB Trigger SOLUX - SX-CD-100-RJ + USB Trigger mPOP POP10-B1 - combination cash drawer/ printer APG Vasario MMF VL16USB04 Note: Cash Drawer USB Trigger (such as the BT-100U Cash Drawer Driver Trigger) required for connecting drawer to the Poynt dock. |
| USB/HID Barcode Scanner | Inateck BCST-20 |
| Cash Register | Sams 4S ER-5200m |
Note: A list of supported peripherals for Elavon merchants can be found here. Please reach out to Elavon support for any questions on availability and pricing.
How to Connect
Peripherals are able to be connected to your terminal via USB, network, or bluetooth.
Connecting a USB accessory
Step 1: Connect your peripheral to the terminal dock using a USB cord. The terminal must remain in the dock to use devices connected this way.You may also choose to connect your peripheral directly with the Poynt Terminal using a Micro-USB cord.
Step 2: Once connected via USB, the terminal will display that it has been Connected. You may test it by selecting and doing a test print.
Connecting a Network accessory
Step 1: Go to swipe-down menu from Home screen and select “Settings”. Select the “Accessory” section.

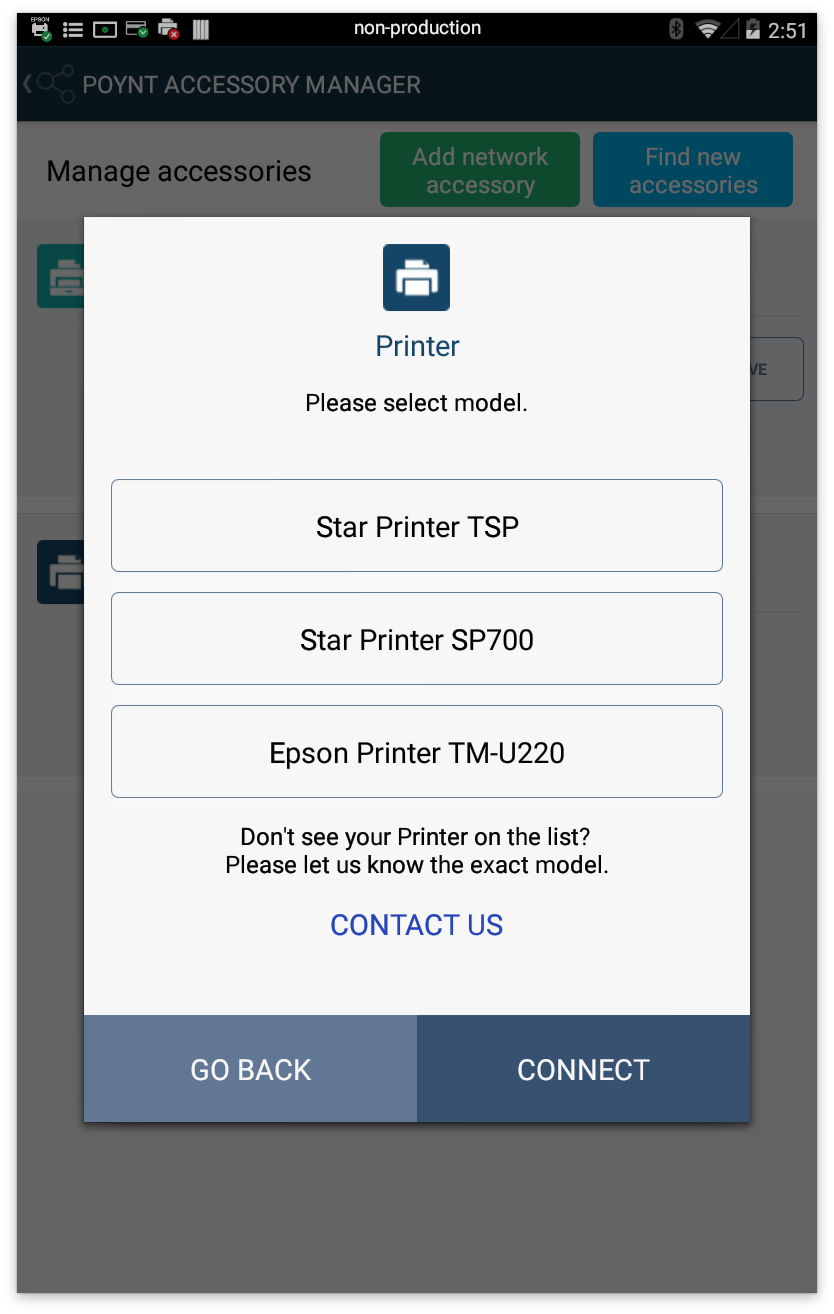
Step 2: Click “Add network accessory”. This will launch a menu where you will select the type of accessory you’d like to set up.
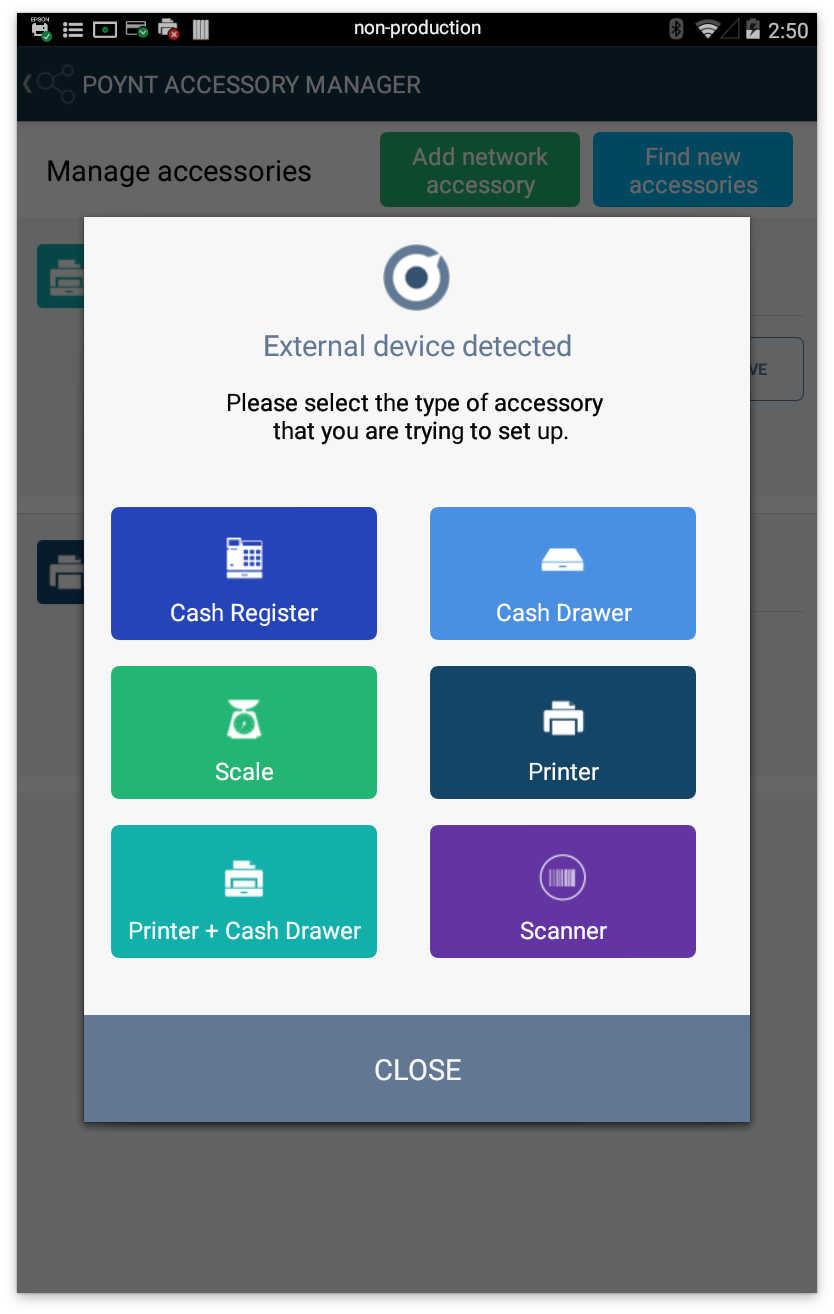
Step 3: Once you select your accessory type, the available models will appear. Select your model and then click “Connect”.
Step 4: Enter IP address.
Each network peripheral will have a unique way to identify the device’s IP address. If you don’t know the IP address, review the peripheral’s manual for instructions.

Step 5: Select Confirm.
Step 6: Test the device from the Manage accessories list to confirm connection.
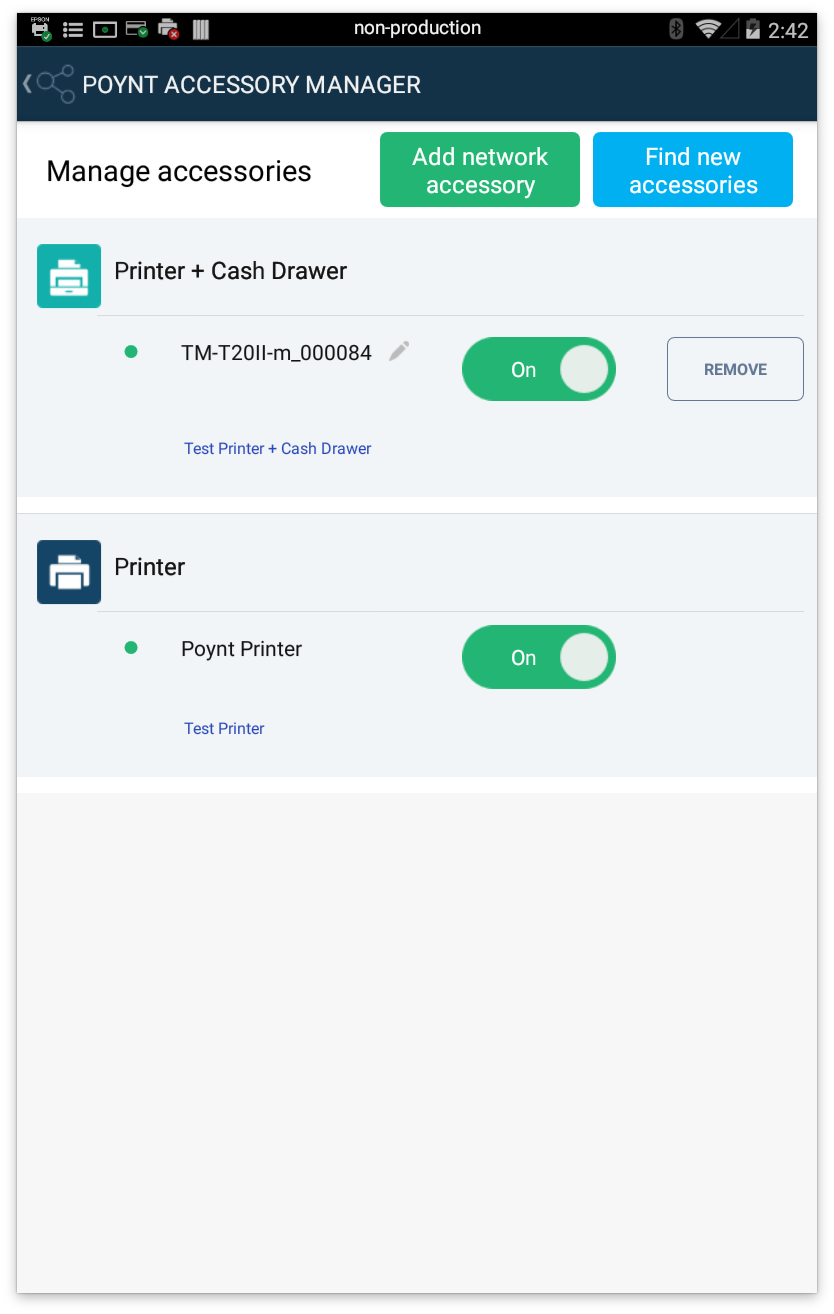
Manage Your AccessoriesManage external accessories or peripherals by accessing the swipe-down menu, selecting Settings from the blue bar, and clicking “Accessory”.
On the Manage Accessories page, you will find the option to:
- Add a new USB, network, or bluetooth peripheral
- Test peripherals
- Nickname peripherals
- Toggle On or Off peripherals
- Remove Peripherals
Switching Peripherals
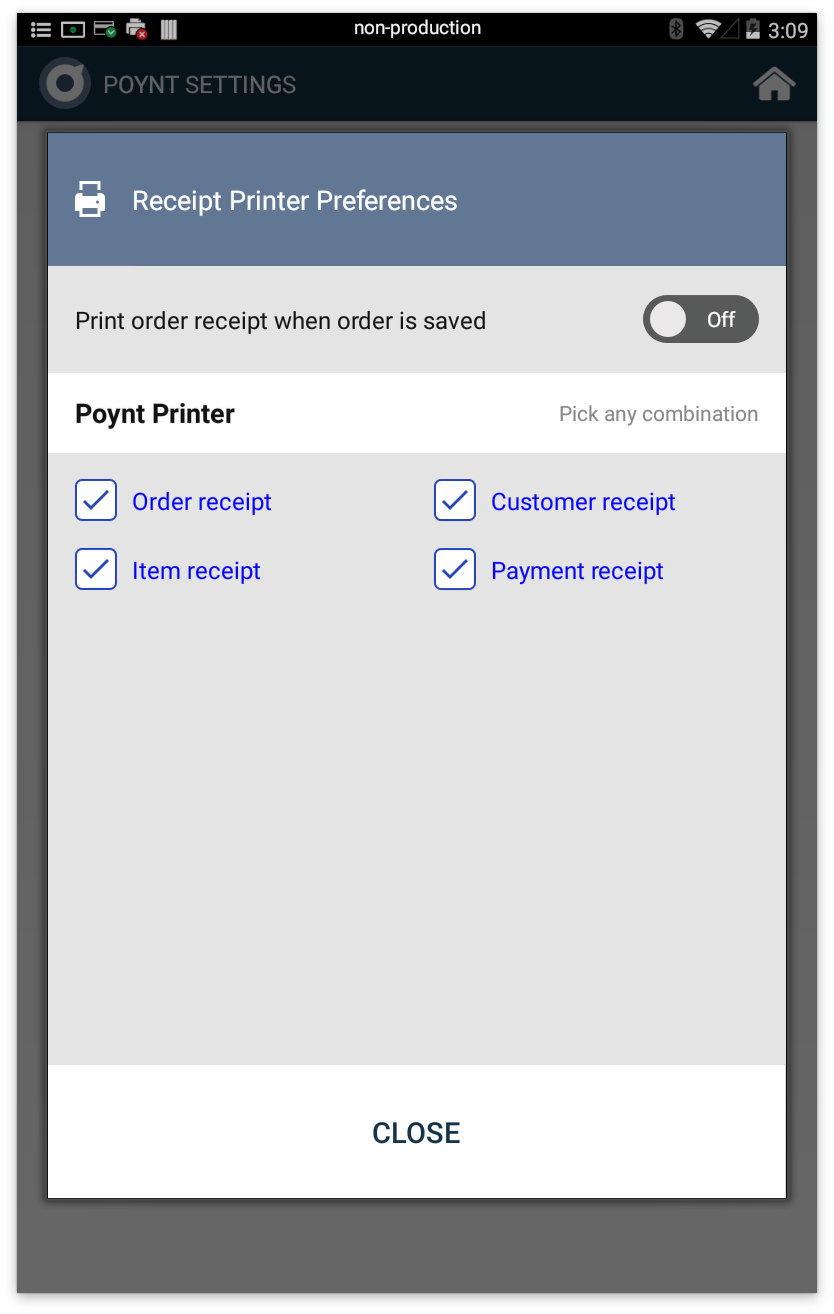
Your Poynt terminal comes equipped with a printer that you can use to print receipts and settlement reports. This will be used as your default printer unless you update Printer Preferences or toggle off your Poynt printer in Manage Accessories.
Once you connect an external printer above, you may want to use multiple printers for difference receipt types. You will need to edit “Receipt Printer Preferences” to determine which receipts you would like to print.