In addition to relaunching our QuickBooks Online integration, we are pleased to offer a new accounting integration with QuickBooks Desktop.
This will allow merchants to export transactions and orders to QuickBooks Desktop. Features include automated daily syncs, as well as the ability to choose a past date to start syncing your transactions from. All data is synced with Order & Product item information from the Poynt Register & select 3rd party apps (ie RocketTabs, POS-n-Go).
QuickBooks Desktop is now available as part of the Advanced & Premium plan and also available for $10/per month/per business. This is separate than the fees that Quickbooks charges for their Desktop and Online products.
NOTE: QuickBooks Desktop is currently only available for the US.
Once your Quickbooks Desktop account has been created, It's a 4 step process to sync it with your Poynt account.
Step 1: Set up Preferences (https://youtu.be/OFlCH9vOUH4)
Step 2: Download the web connector (https://youtu.be/sUHohrLTlgI)
Step 3: Run the web connector (https://youtu.be/q46Z5SWZ9dU)
Step 4: Configure and test sync (https://youtu.be/KDJuoafkoUs)
Setting up Preferences
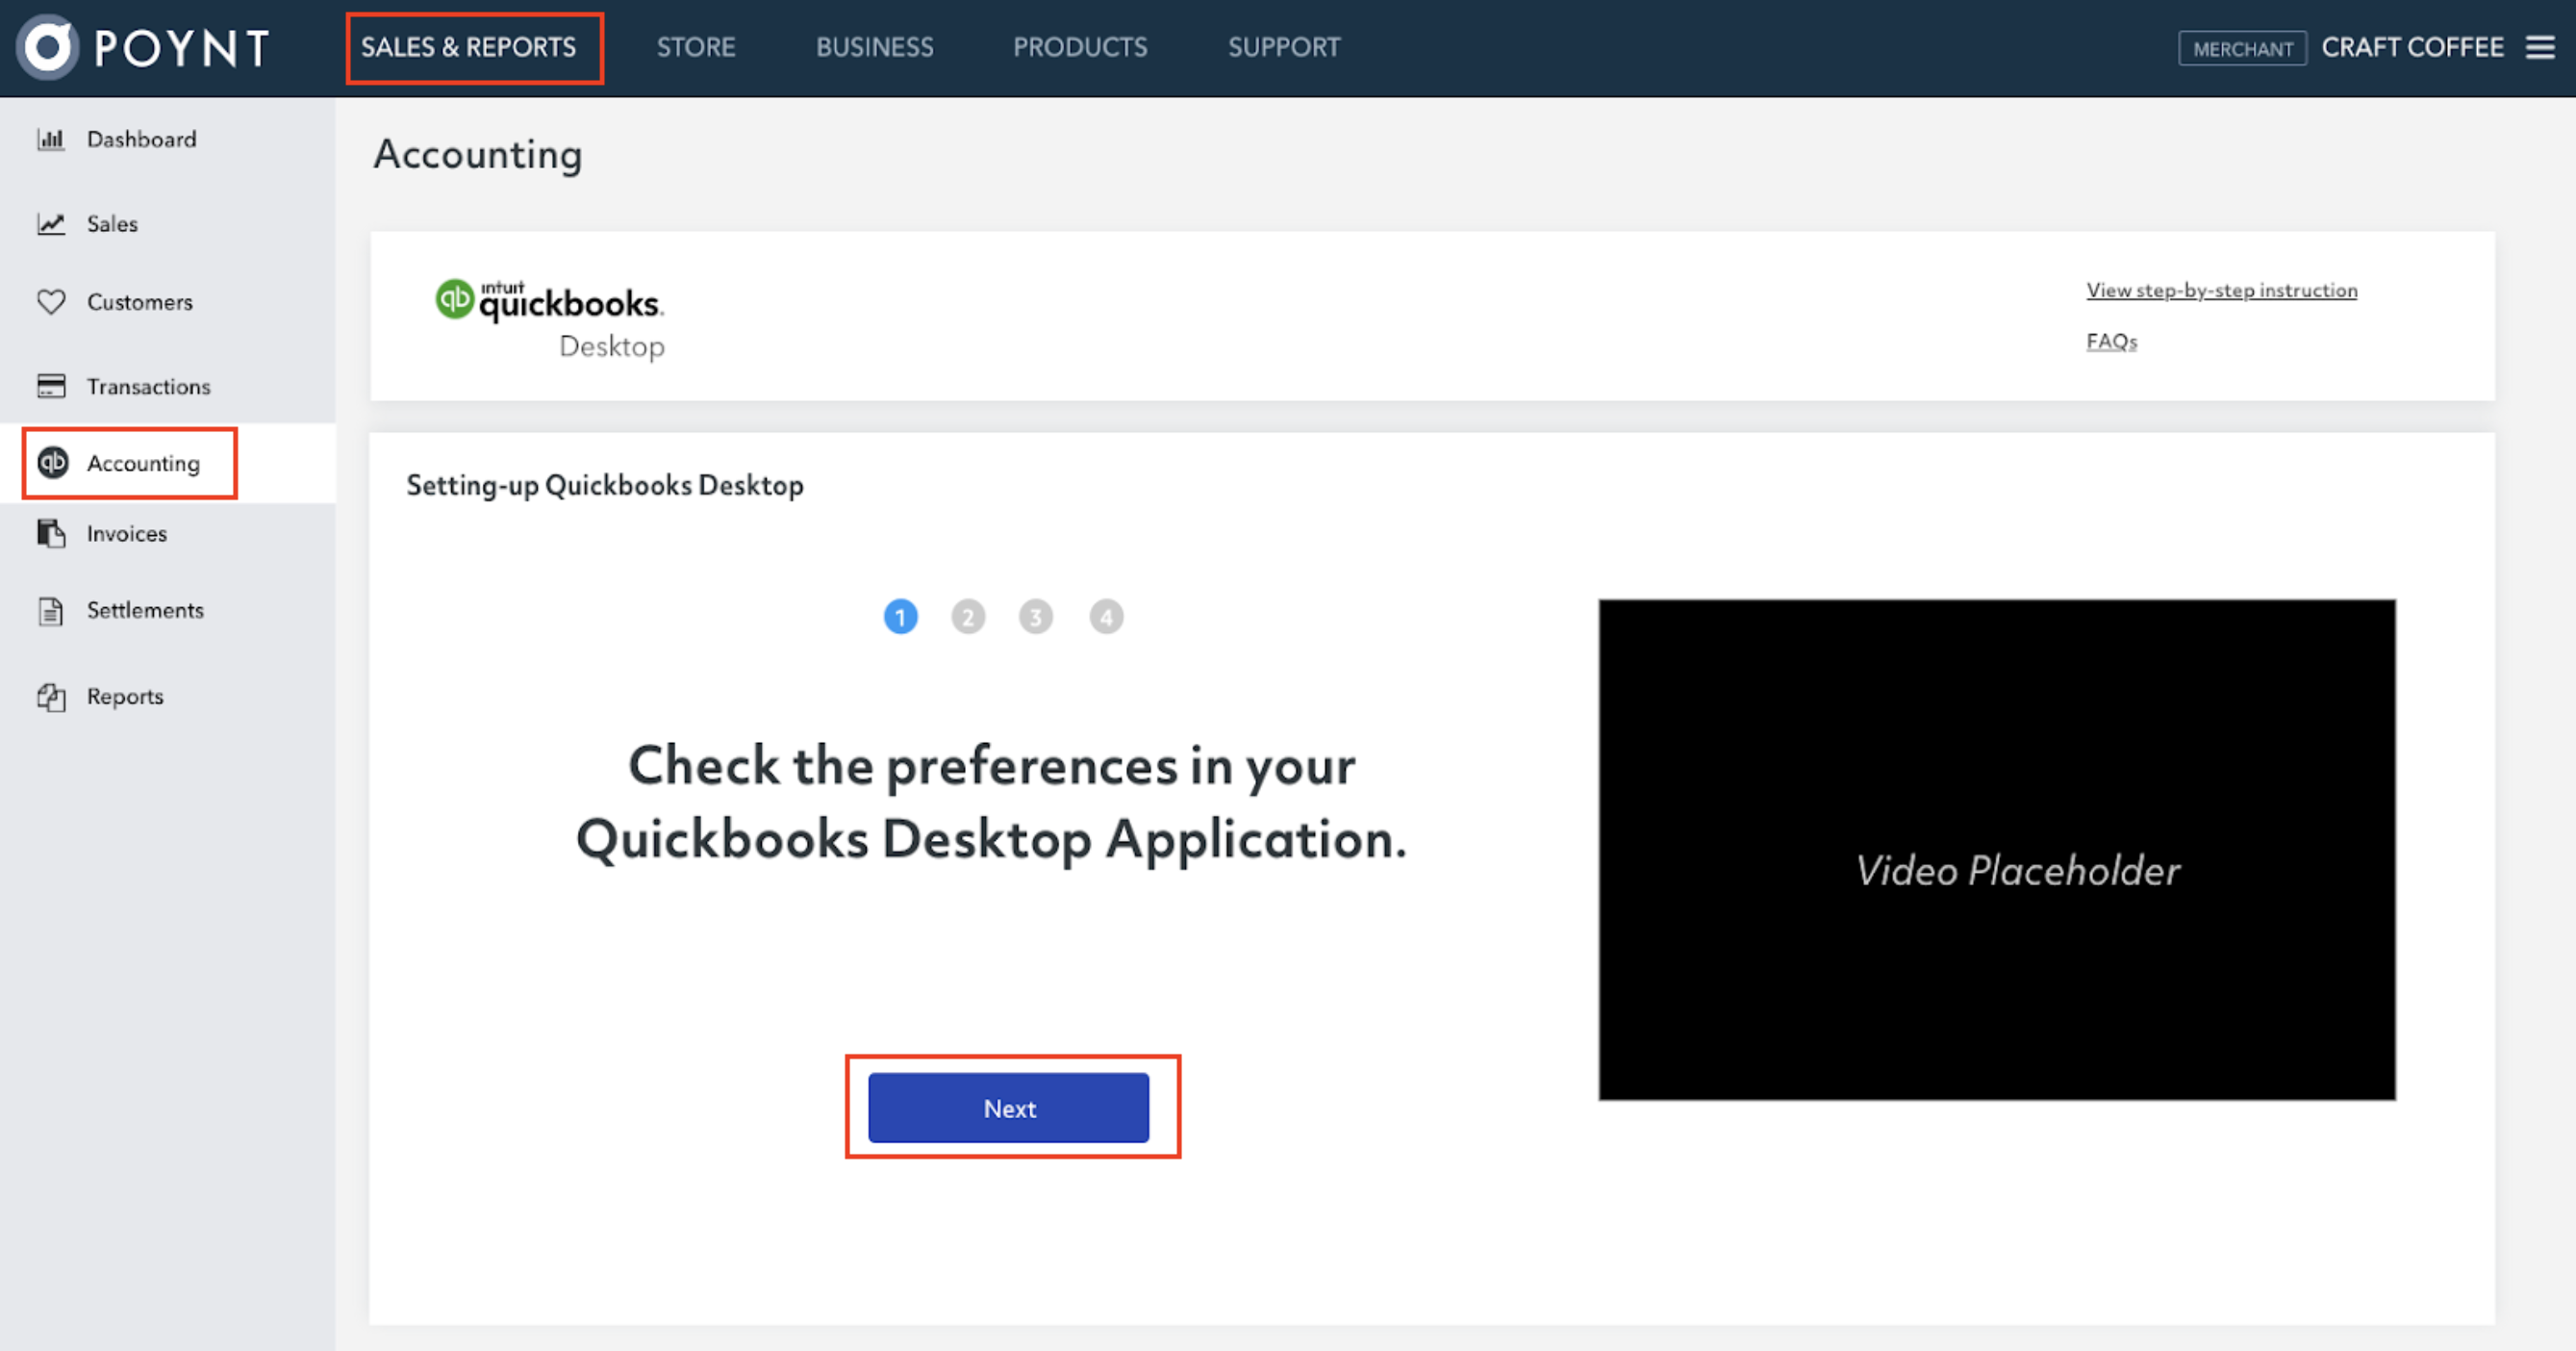
In order to make sure all the data gets synced between Poynt and Quickbooks, we need to confirm that Preferences are set up correctly in your Desktop application. In Poynt.net, click on the Accounting link under the Sales Tab. Click on Next to get started.
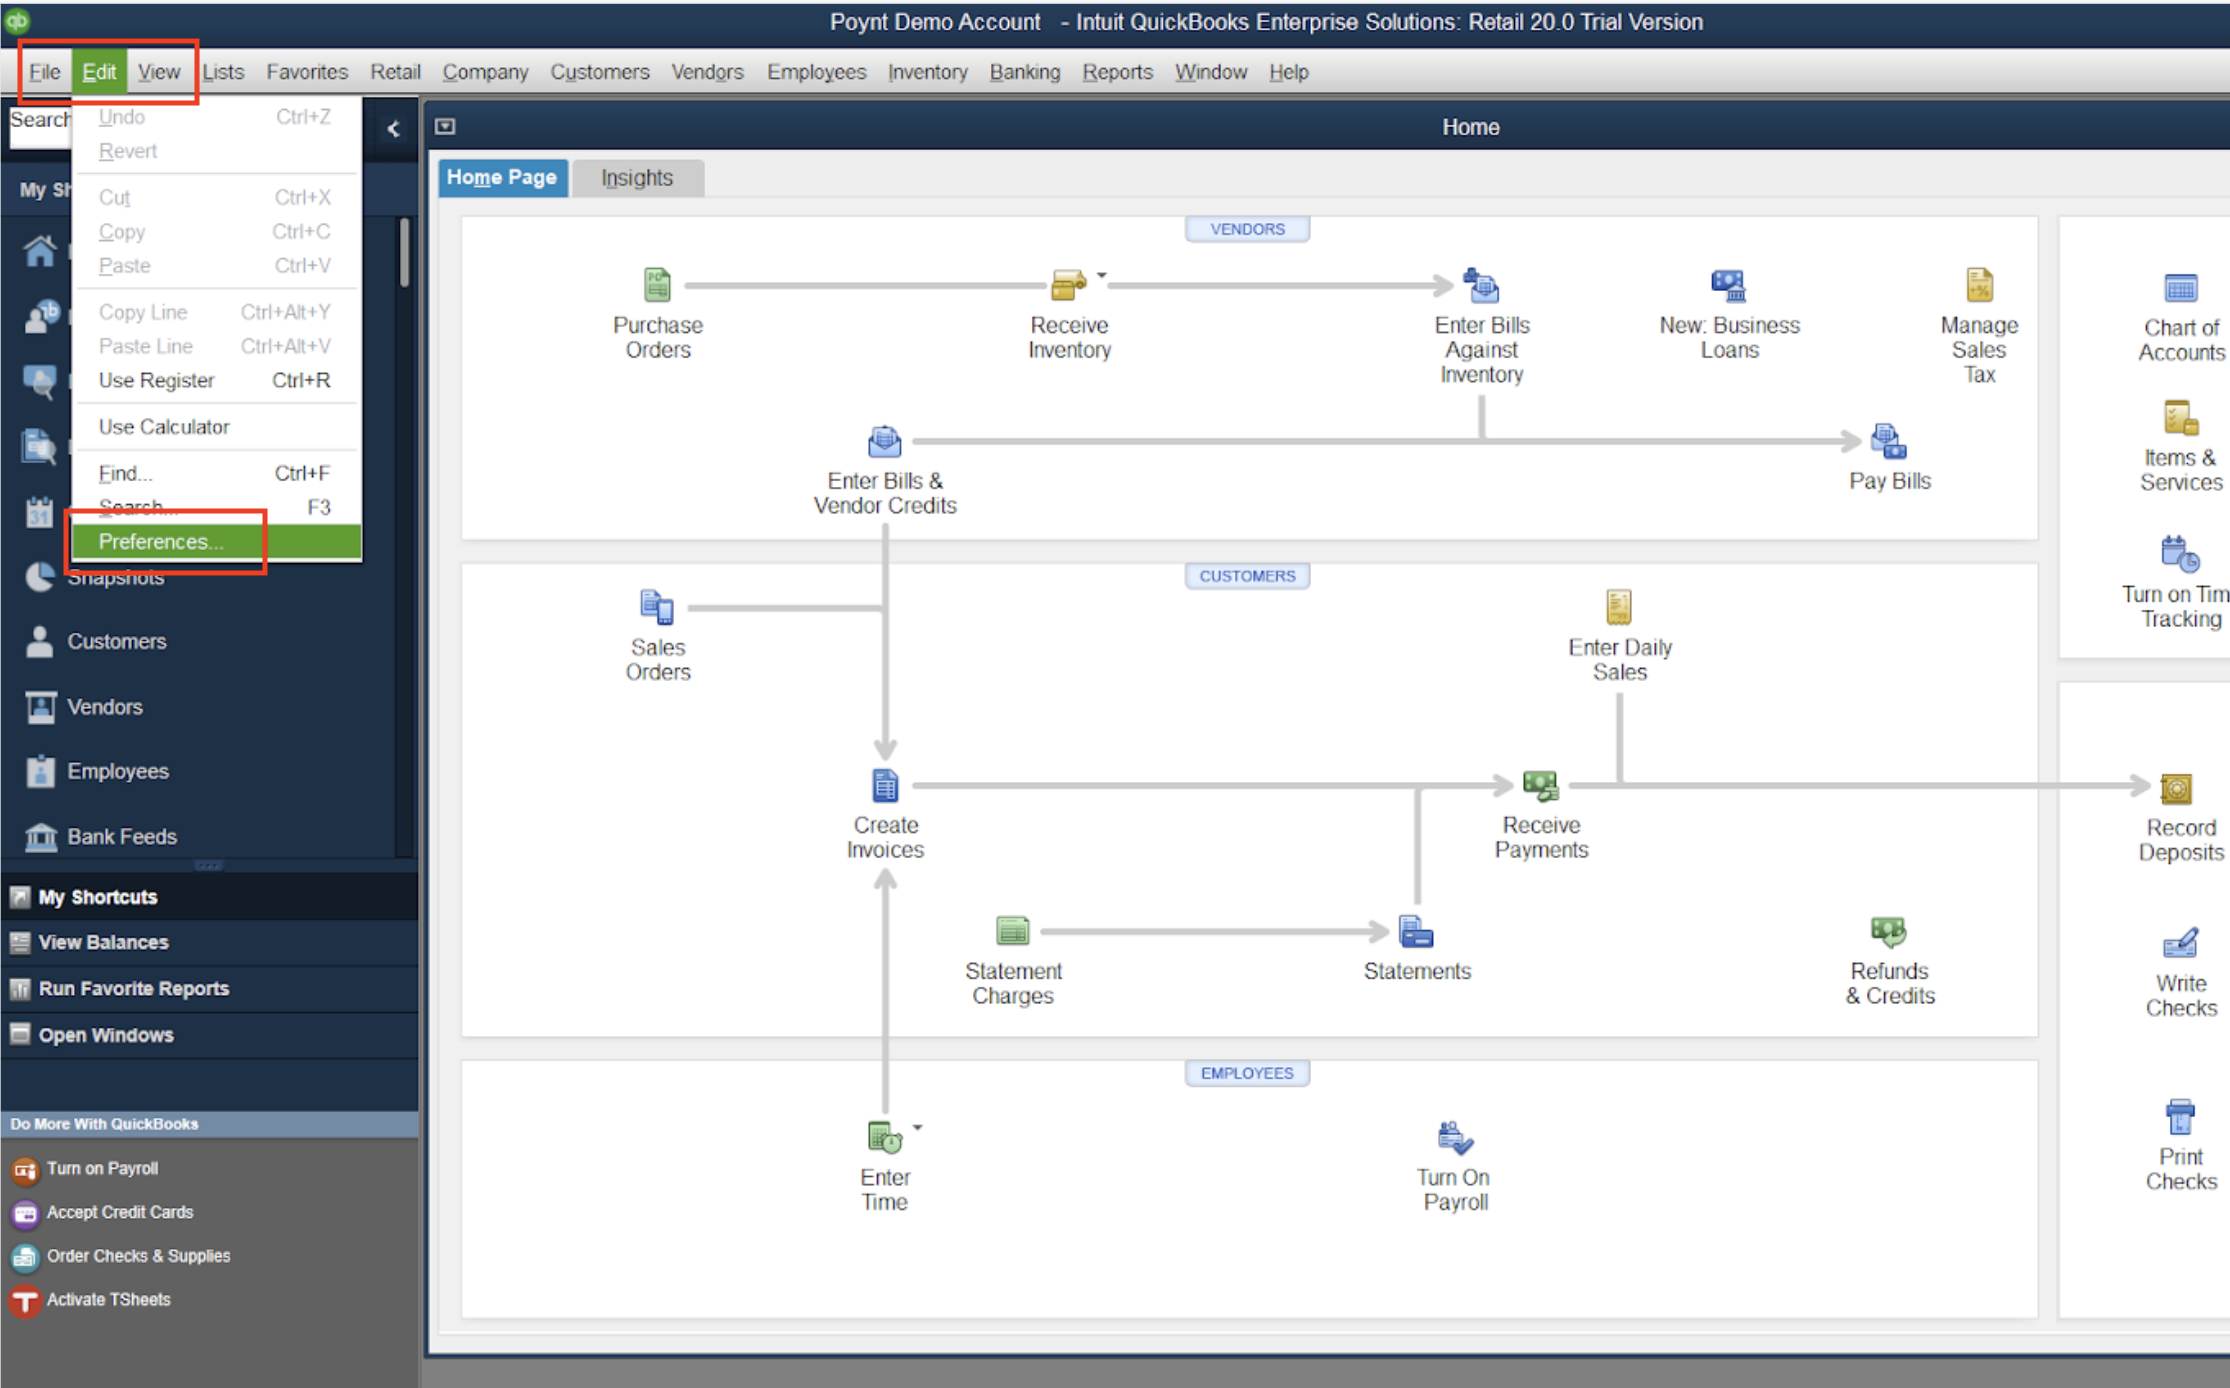
Launch the Quickbooks Desktop application, and click on Preferences under Edit.
Configuring Sales Tax
The first thing to check is that your Sales Tax is configured. You'll need to check off "Do you charge sales tax". If you don't already have a sales tax item added, you can do so now.
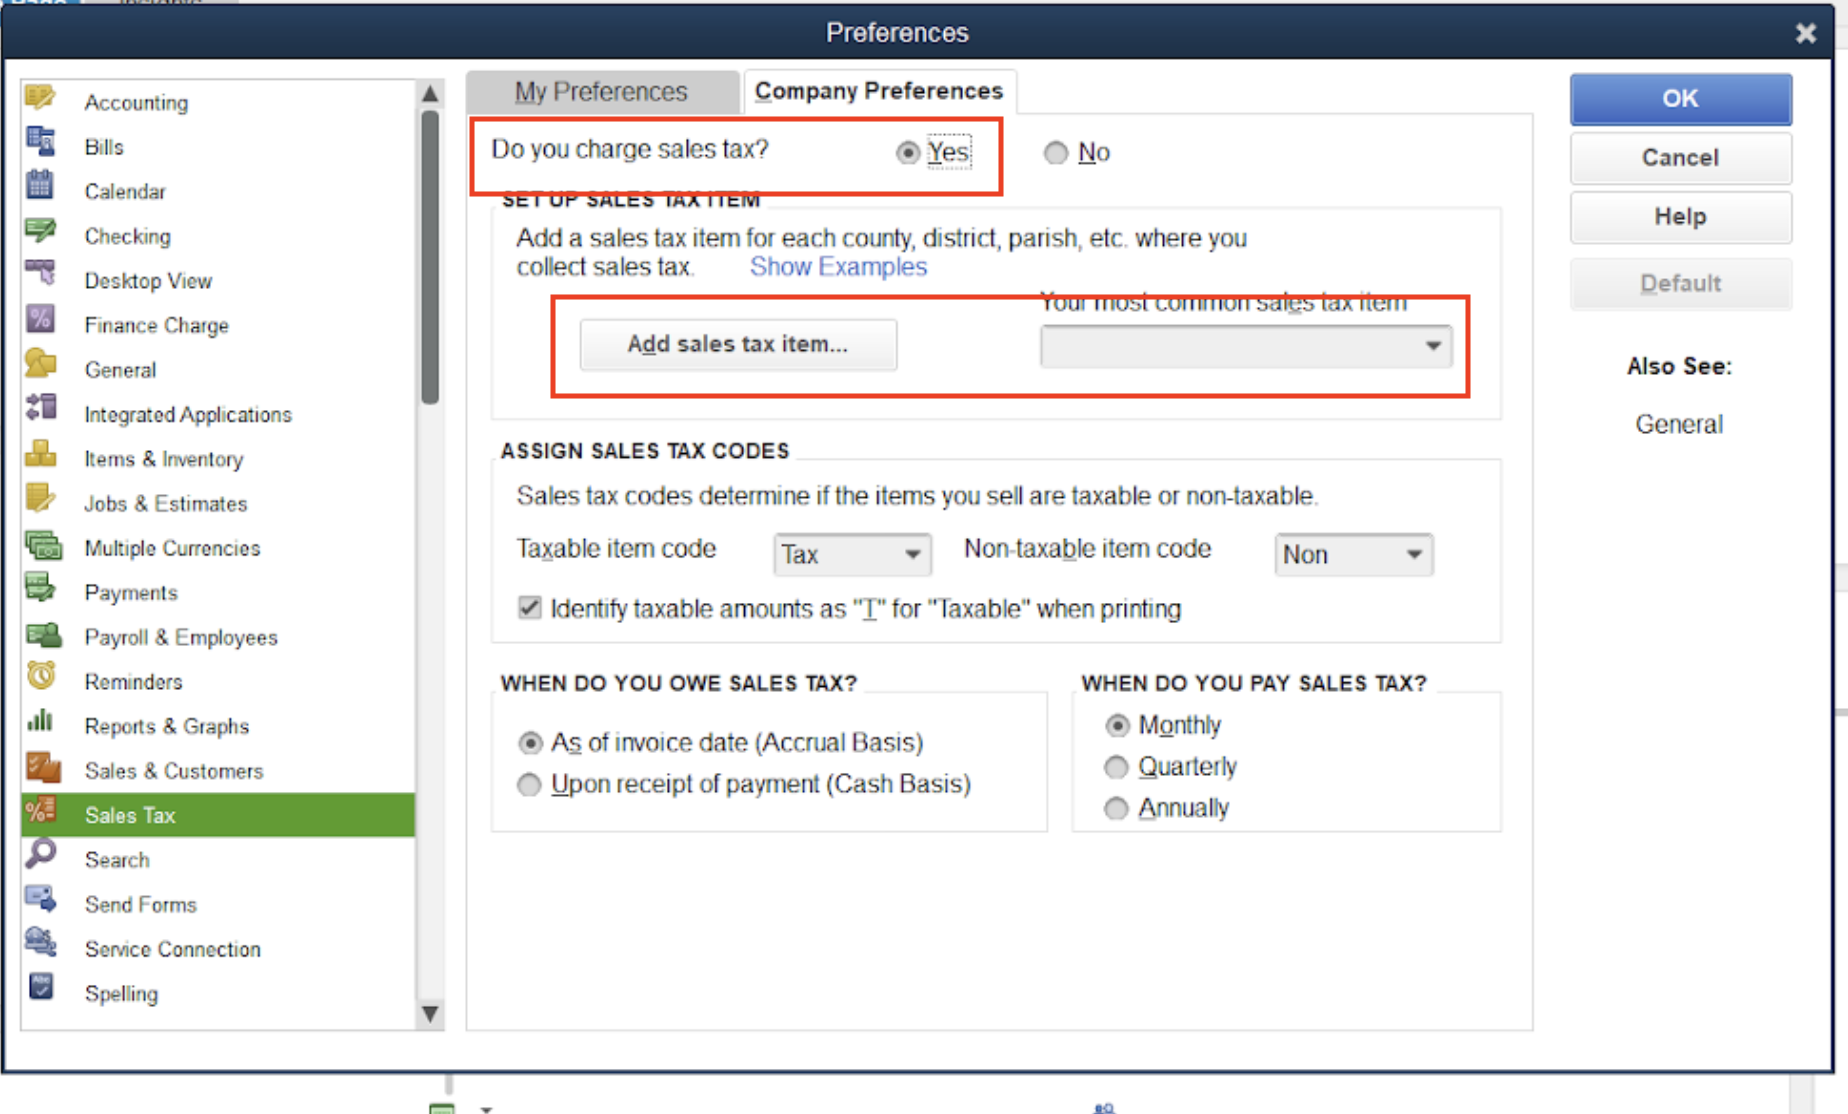
Adding Sales Tax Item
Click on Add Sales tax item to choose from the options available. In the dialog box that pops up, name your sales Tax. Make sure Tax Rate is set to 0%.
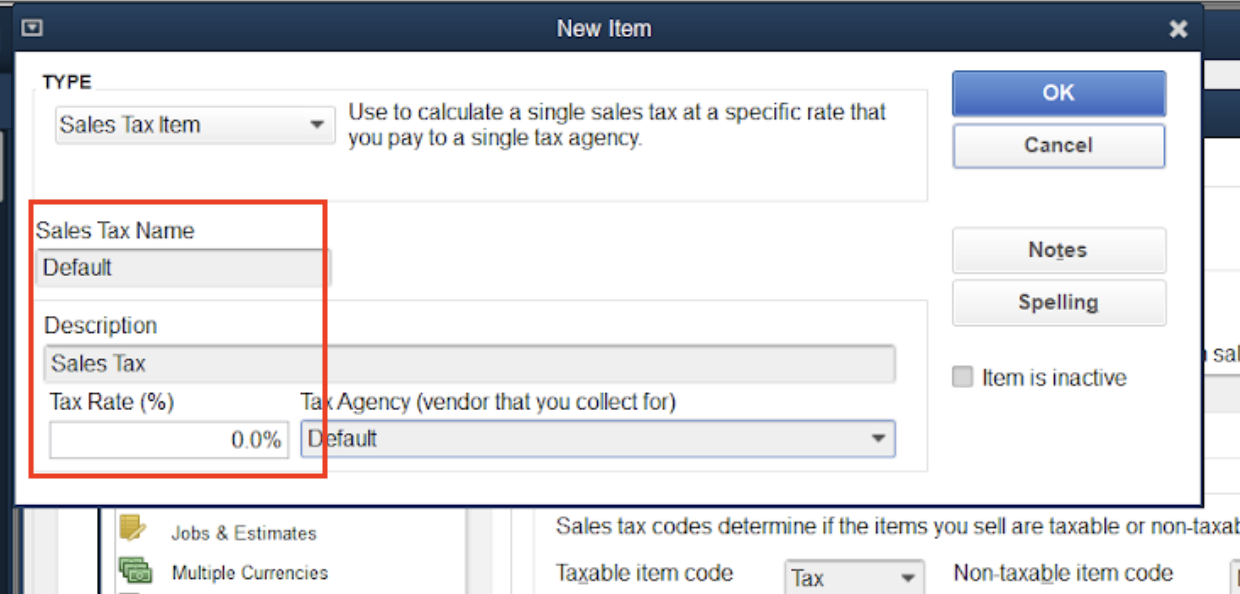
This tax rate of 0% will be applied to all transactions pulled, and will not conflict with the sales tax collected via Poynt.
Items & Inventory
The next thing to sync up is your catalog information. Pull up Company Preferences under Items & Inventory link on the left hand side. Make sure Inventory and purchase orders are active is checked (the first option). This will help record your sales and refunds appropriately.
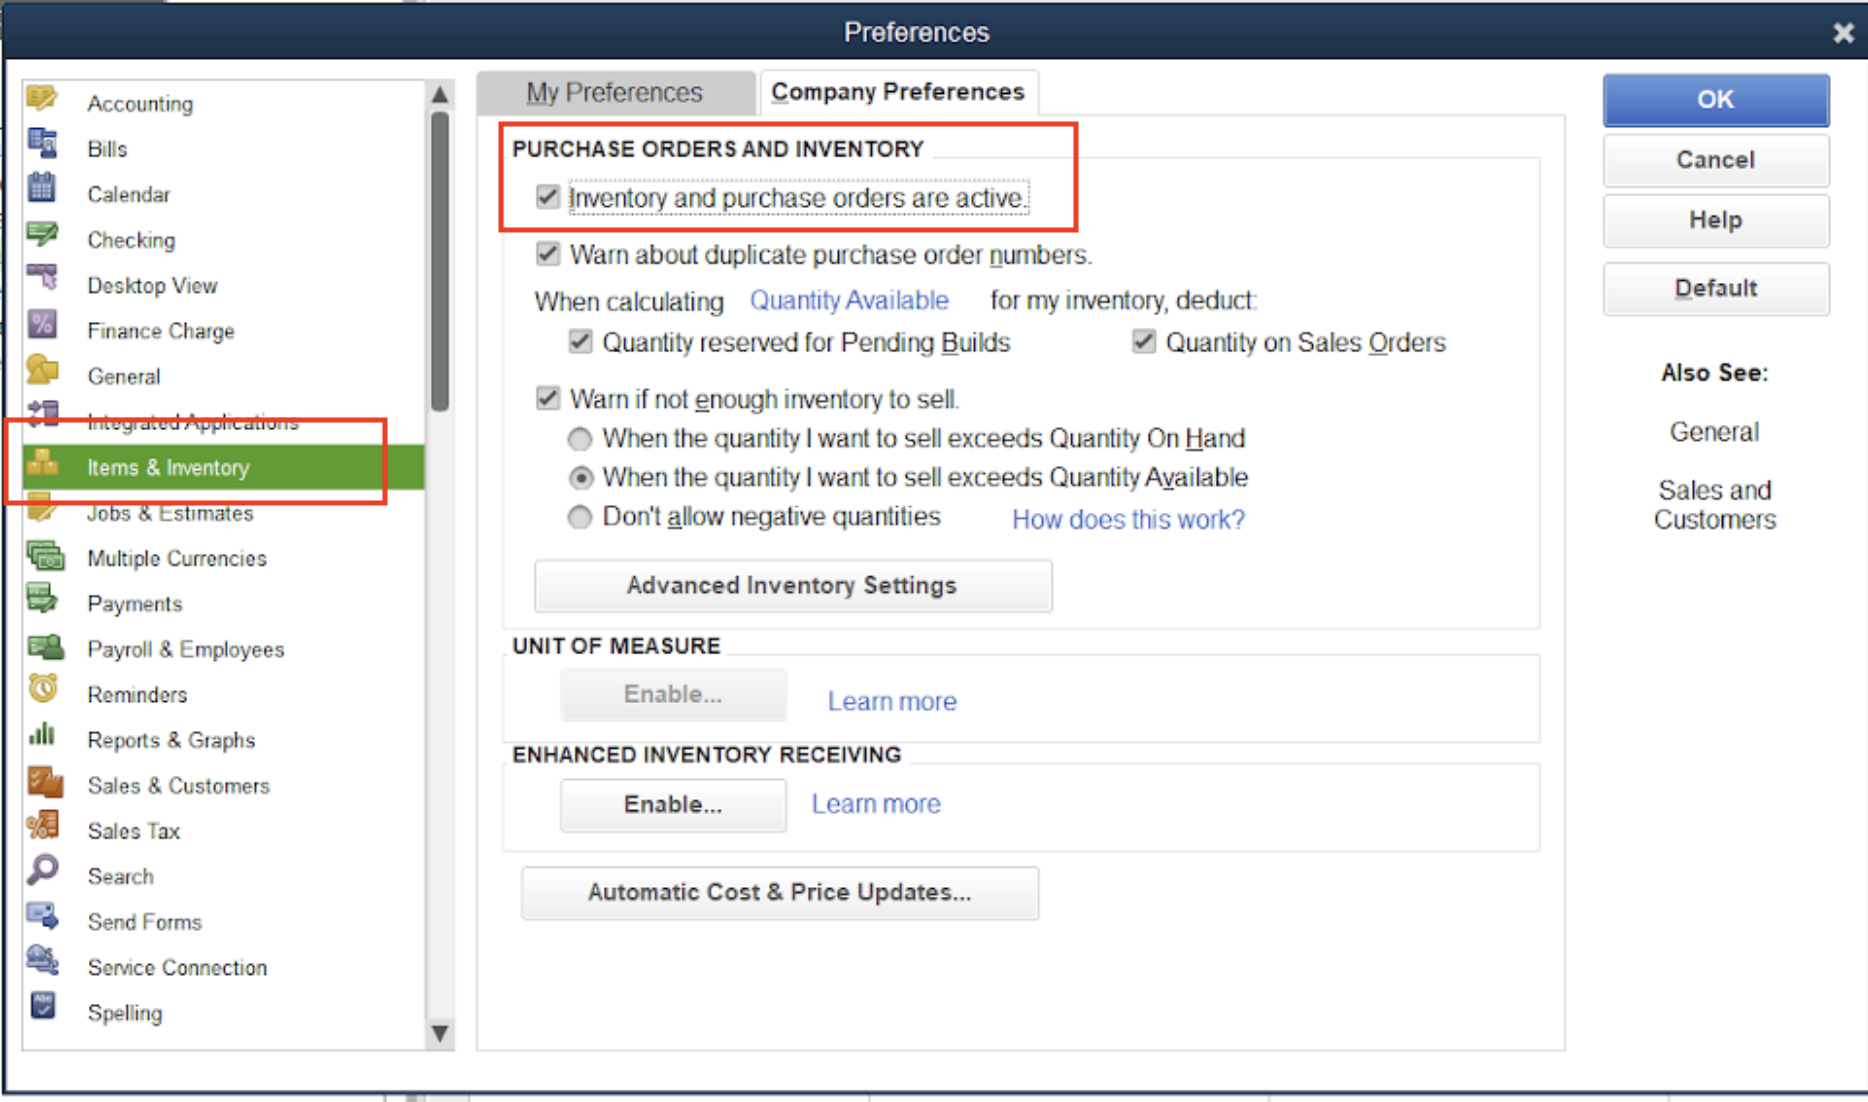
Save the changes you have just made. Now it's time to move onto downloading the web connector.
Downloading the Web Connector
Back in Poynt.net, click on Download QBWC file.

This will automatically download the web connector file to your computer. To launch it, in the Quickbooks Desktop application, choose Update Web Services under File.
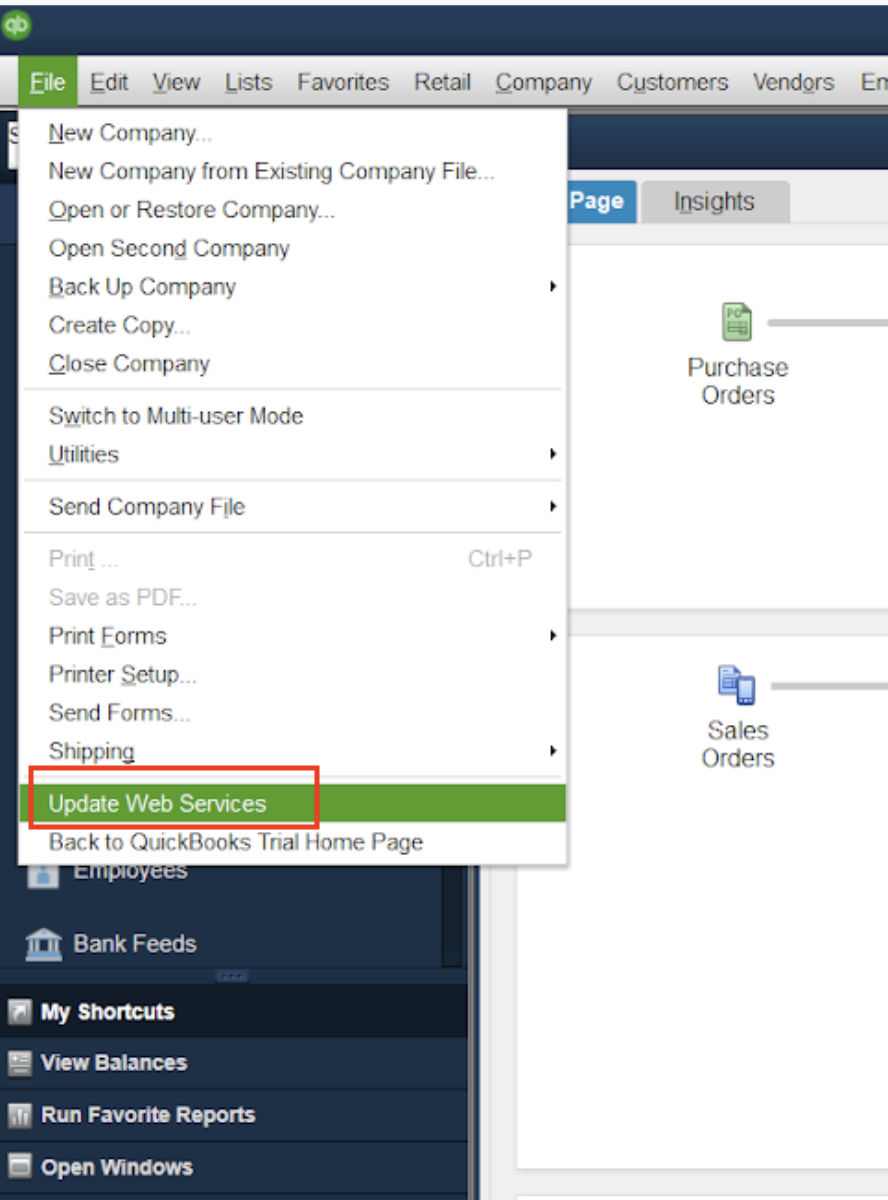
Click on Add an Application in the box that pops up in the next screen.

This will then lead us into uploading the web connector to the Desktop application.
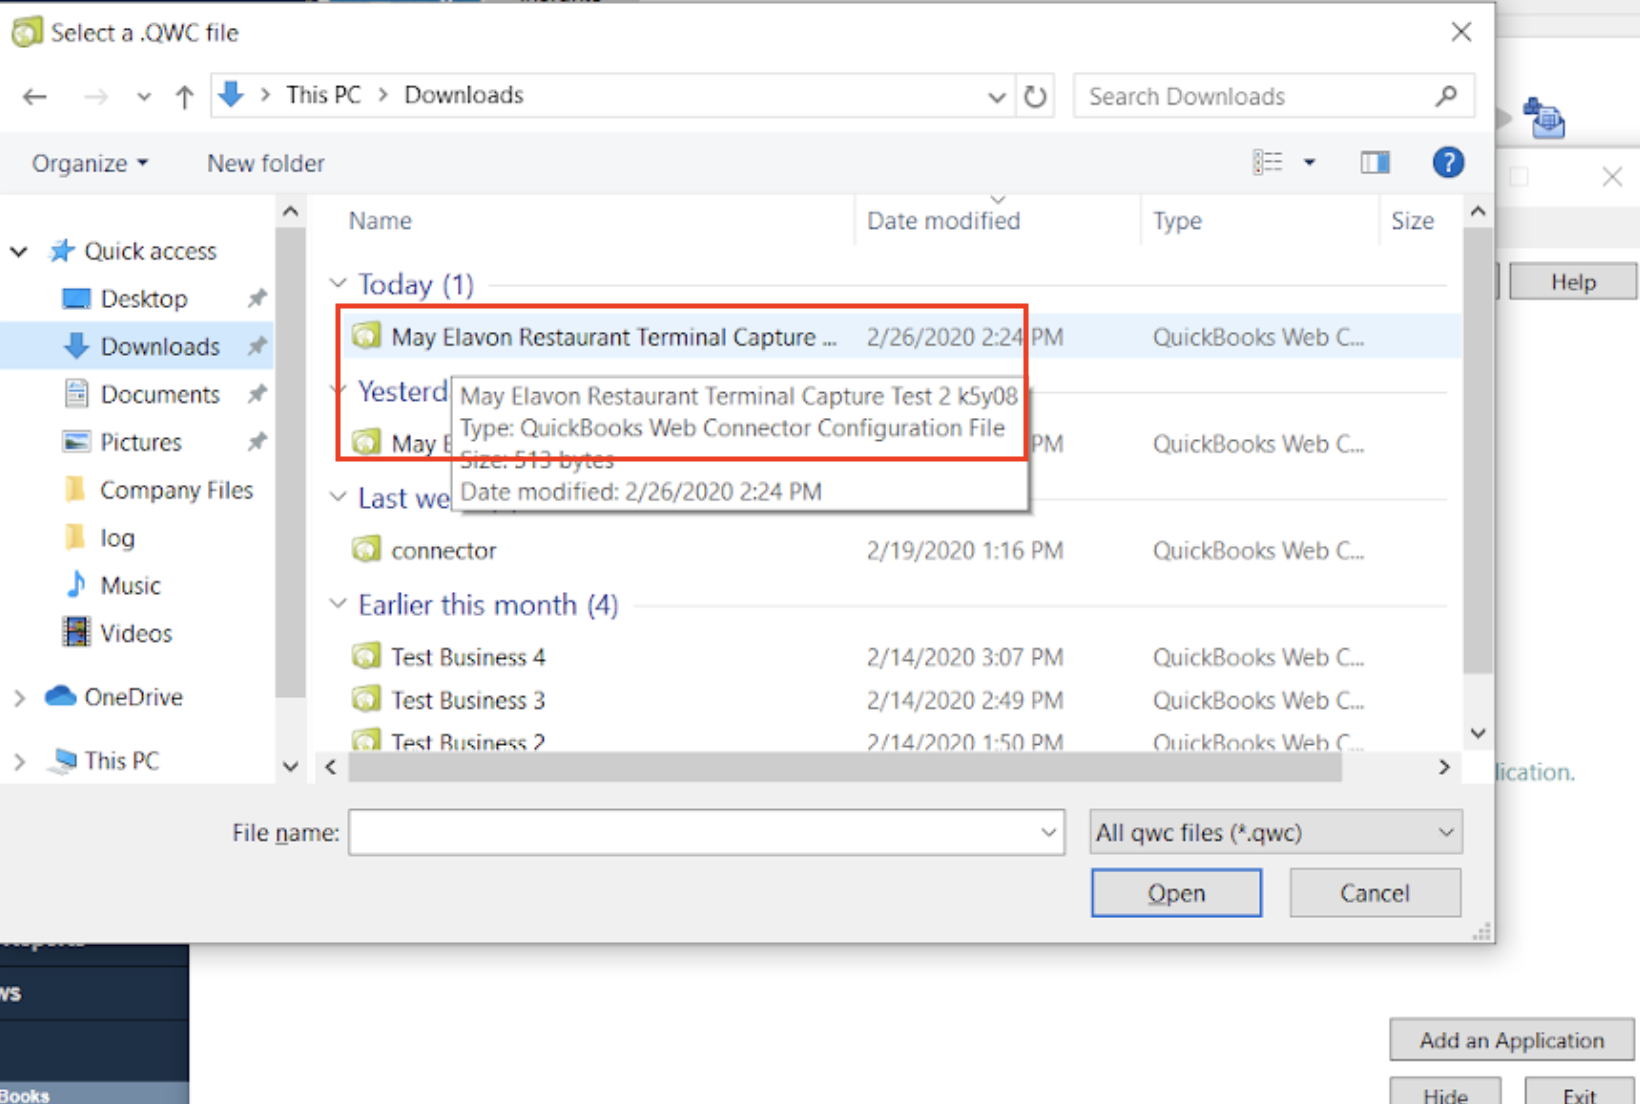
Uploading the Web Connector to Desktop application
This step allows you to connect the web connector to the Desktop application. In your Downloads folder, find the file that was downloaded in the initial step and launch it. It will typically contain the name of your business in it.
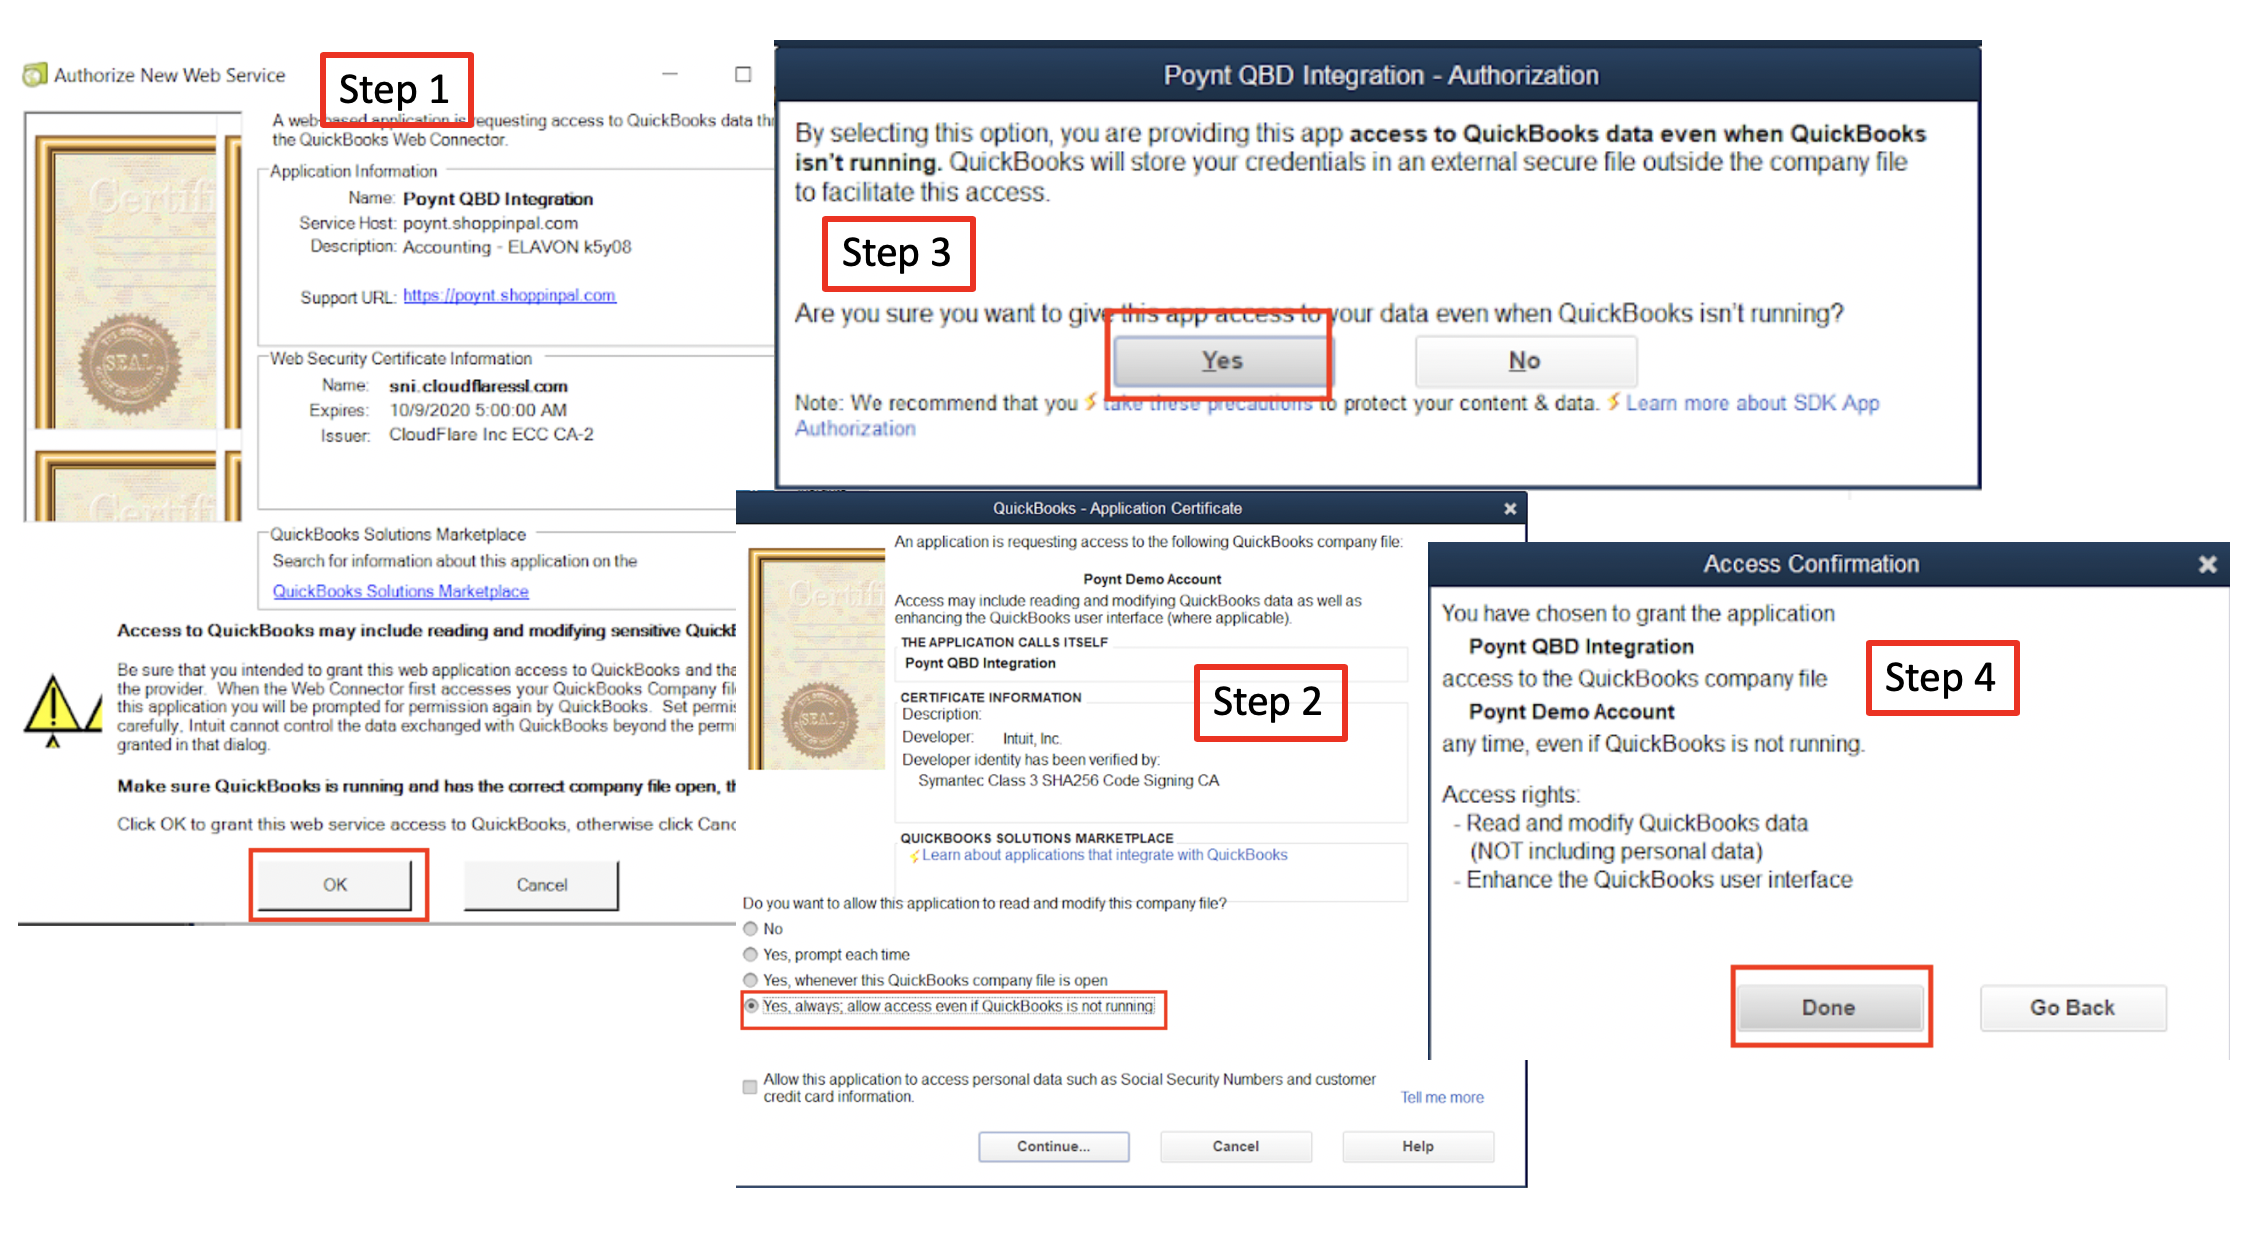
Once launched, you will be prompted to authorize the web service and access to QuickBooks data. Be sure to allow access even if QuickBooks isn't running (Step 2). This will ensure constant sync of data between Poynt and QuickBooks.
Configure & Test Sync
Now that we have set up the web connector, it's time to test and configure the sync between the two systems.
In Poynt.net, you will see a password generated. Copy and paste it in the web connector screen. Once you tab out of it, you'll be prompted to save it. Click Yes.
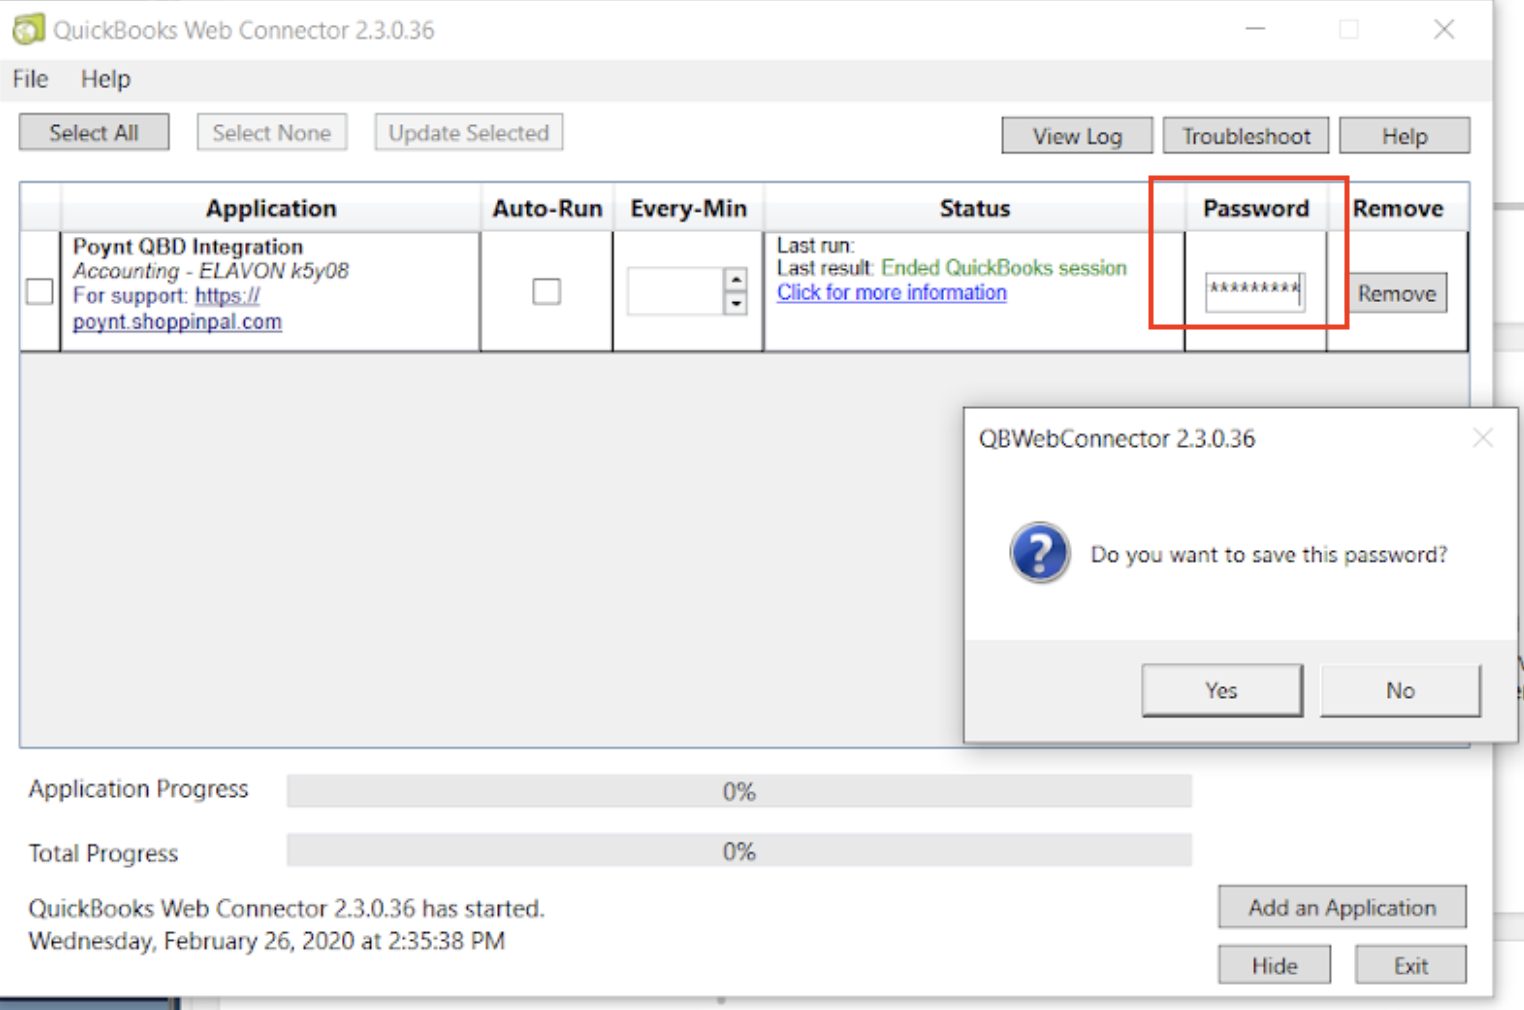
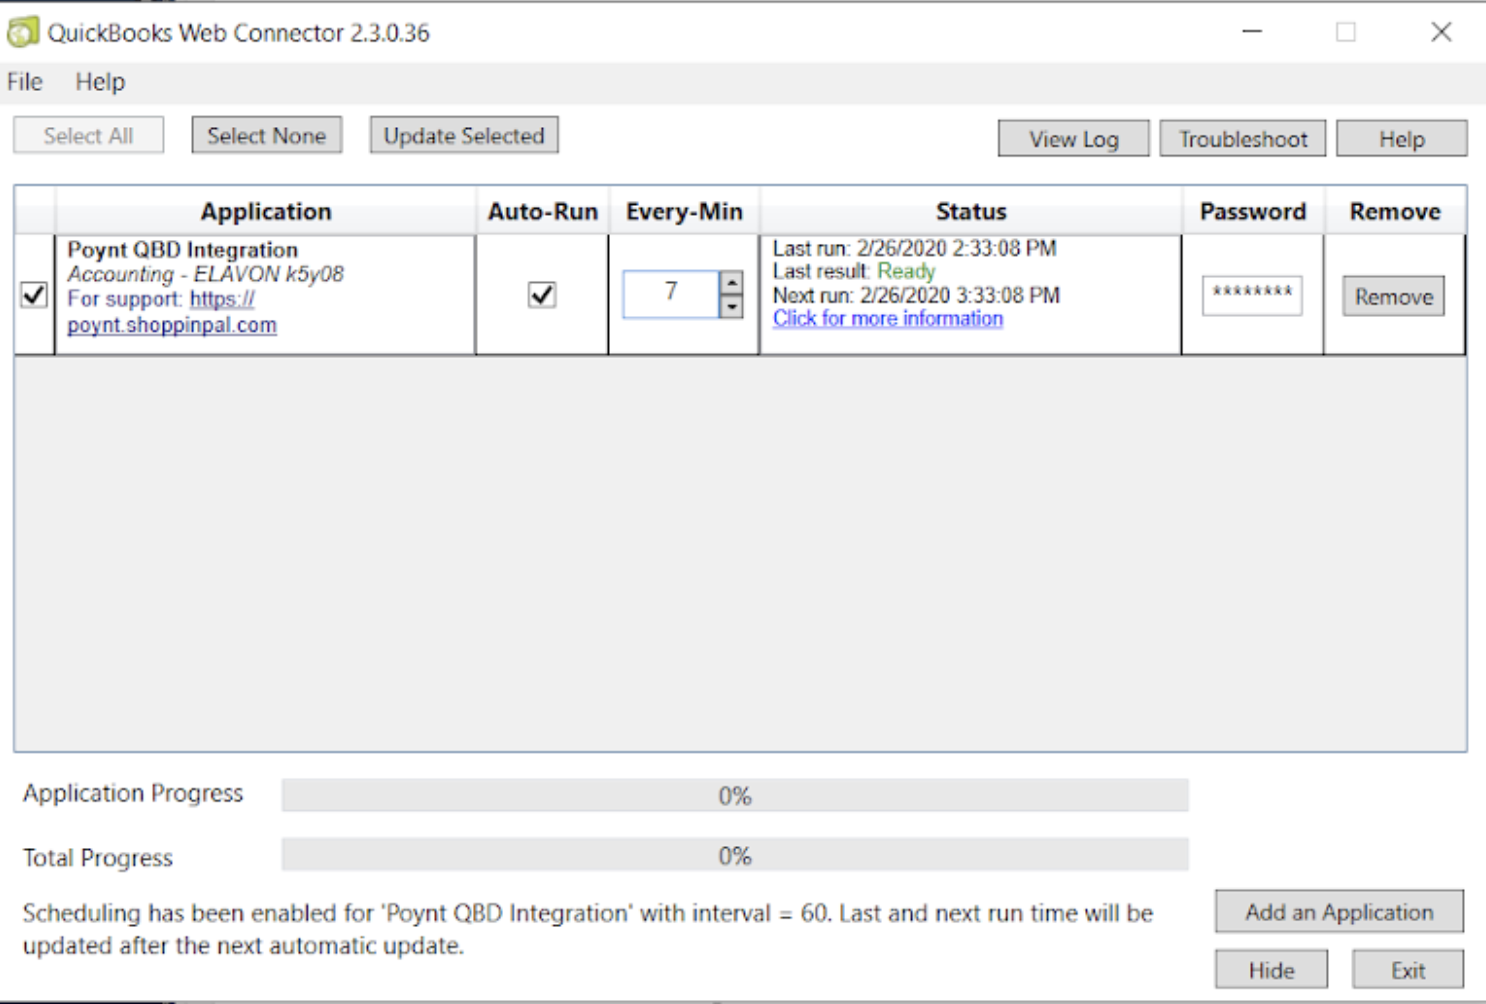
Once the password has been saved, you can enter in the remaining information. Click on box next to the application, and click on auto-run. We recommend setting the sync to run every 7-10 minutes.
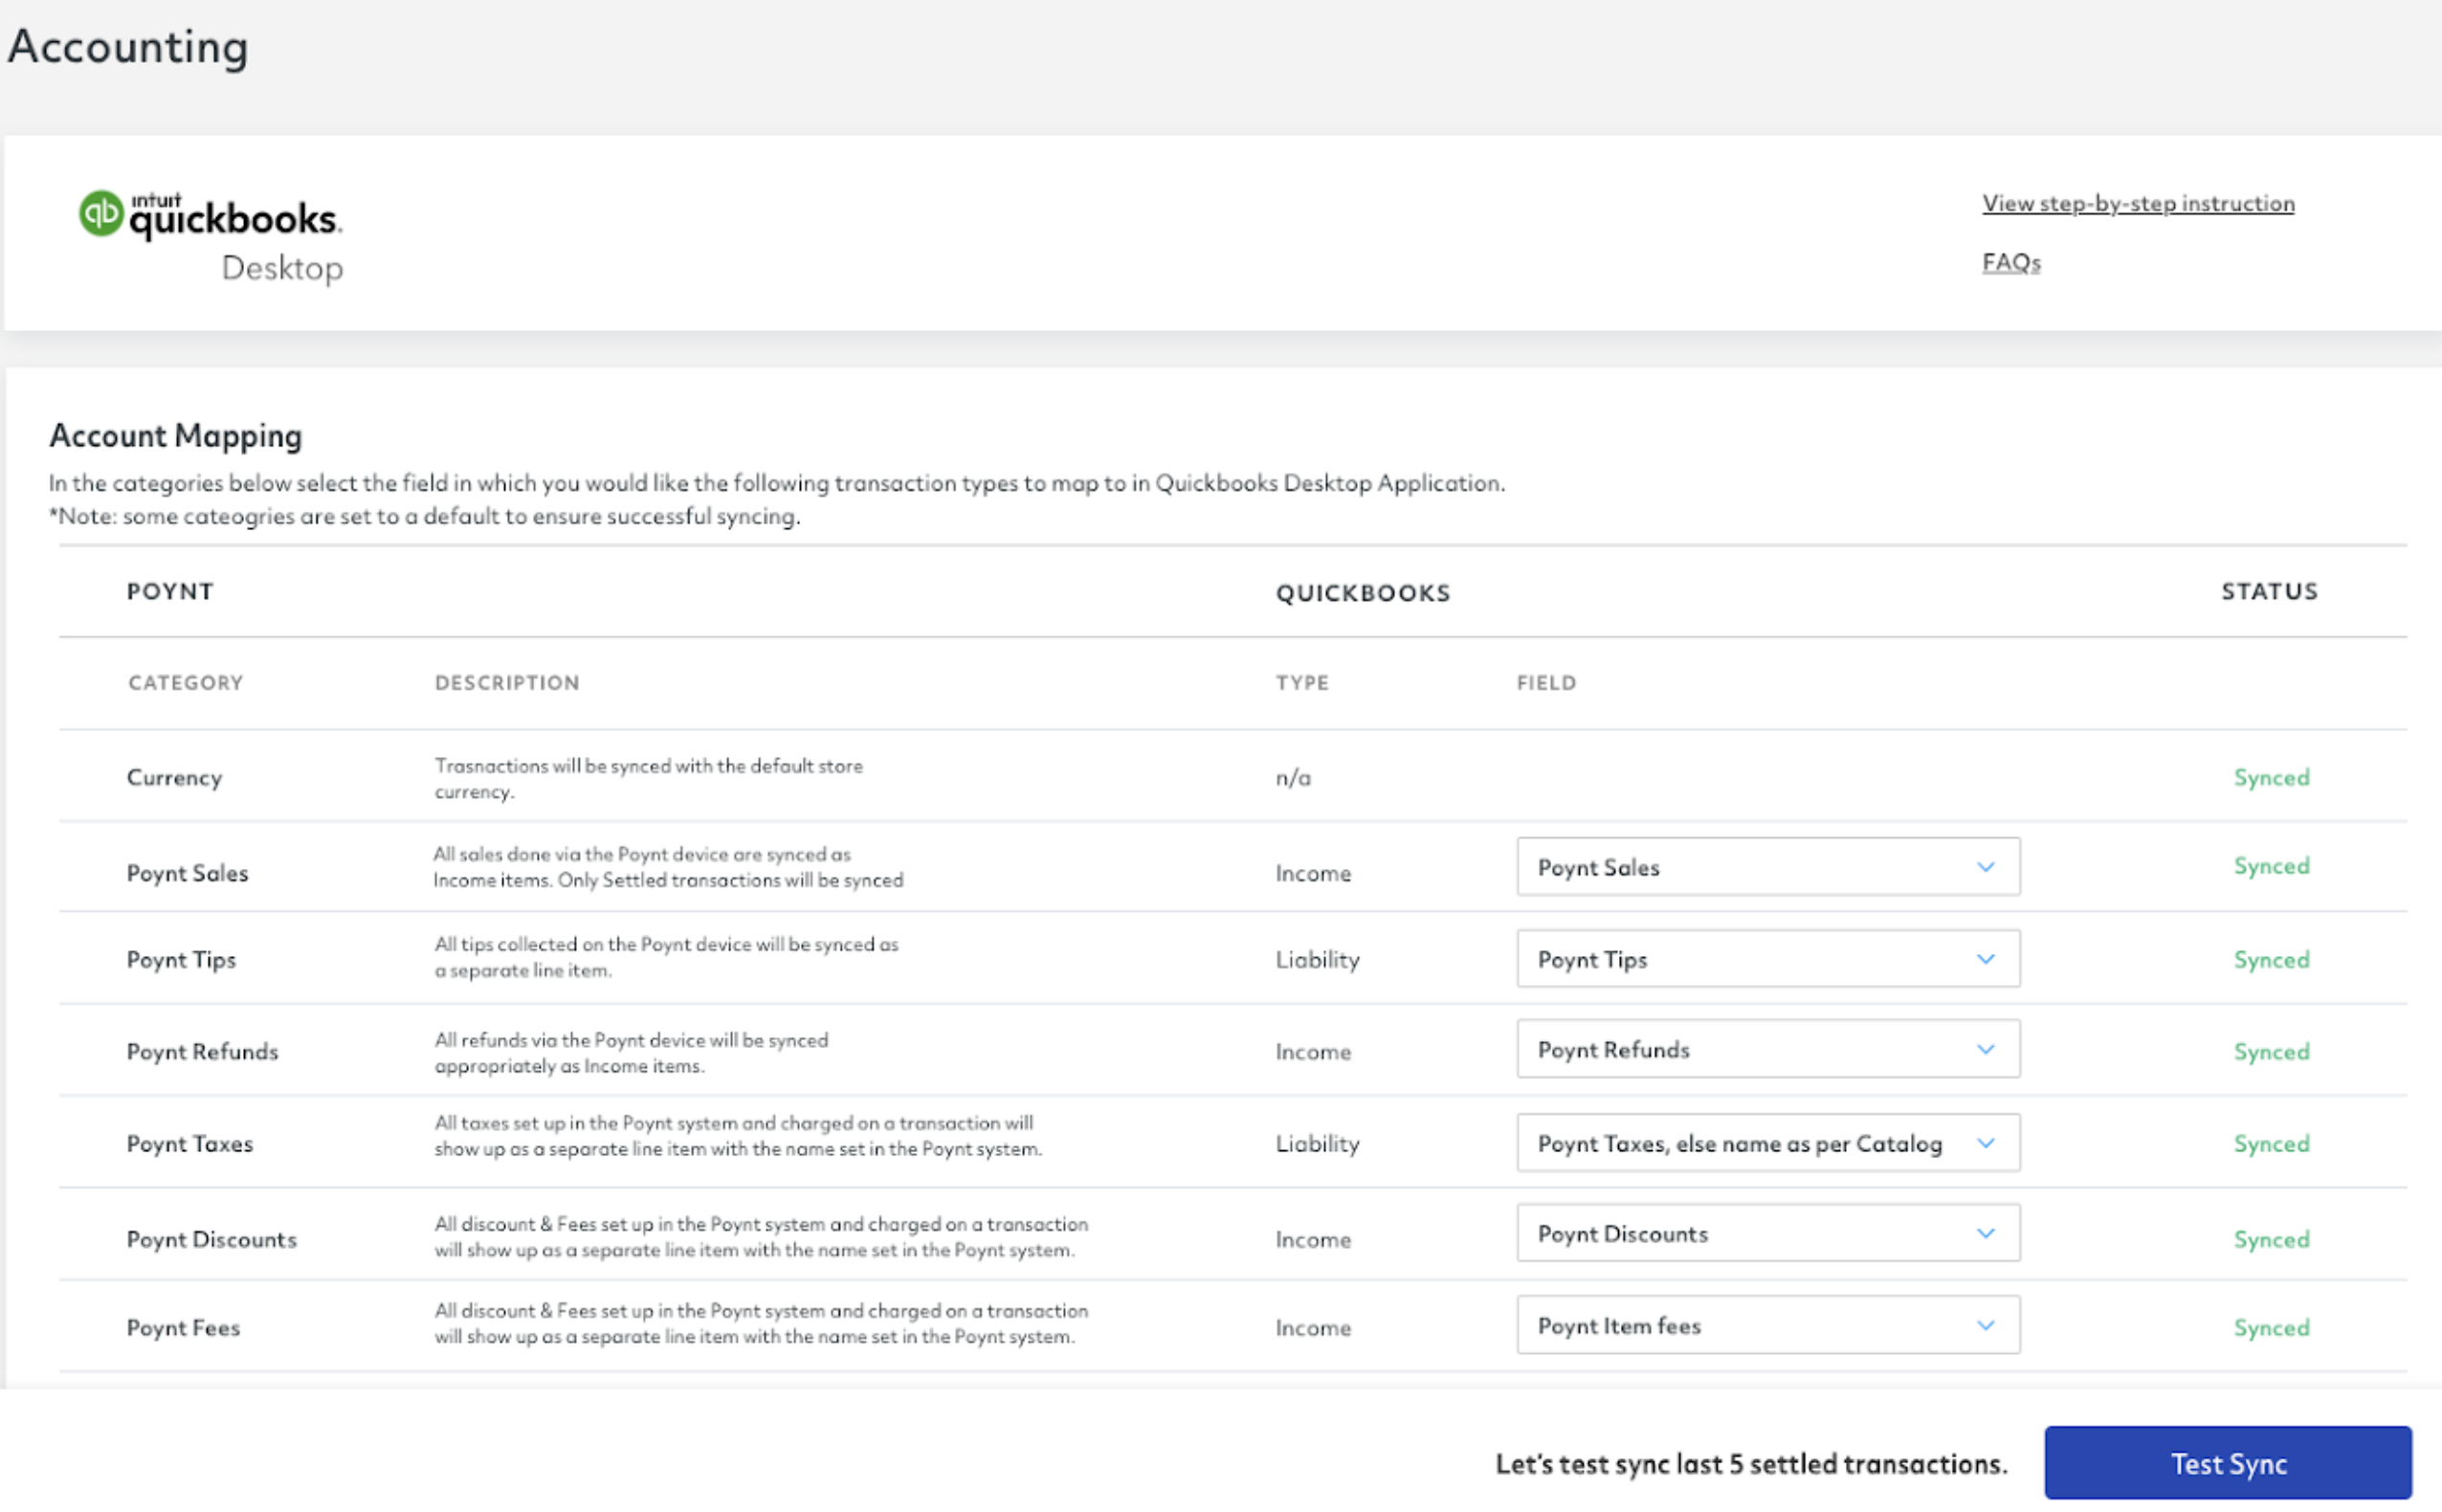
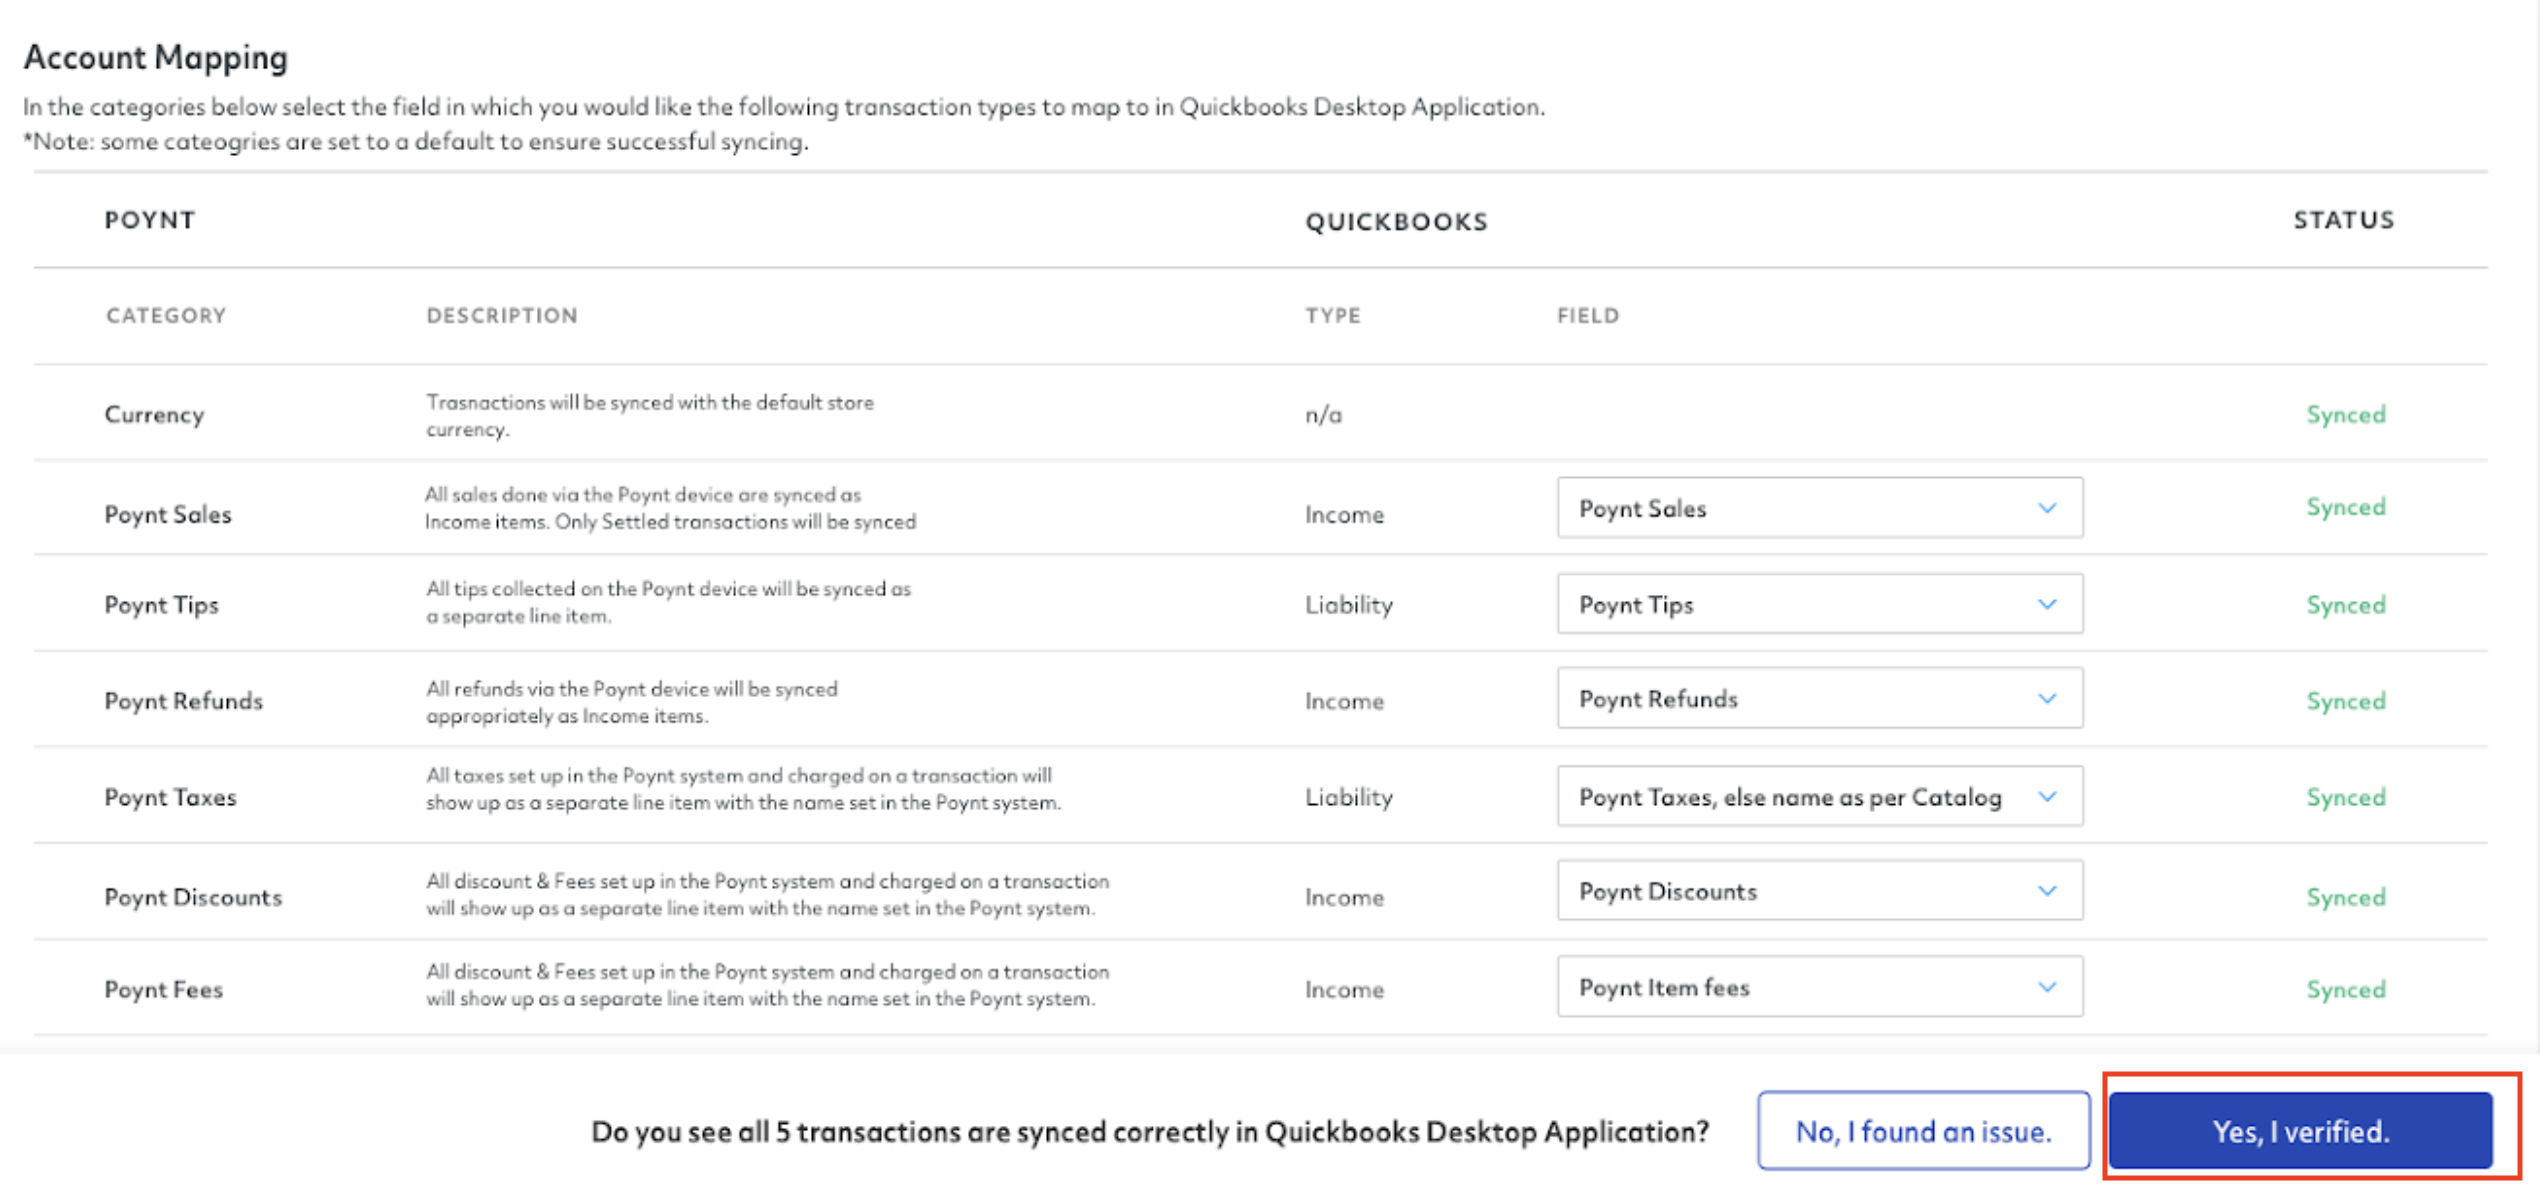
Back in Poynt.net, you'll be asked to review the Account Mapping. This breaks down the categories in Poynt and their description and how it relates to the types and categories in Quickbooks.
Here you will also be asked to do a test sync. This will confirm that the last 5 settled transactions have been synced and show up in Quickbooks.
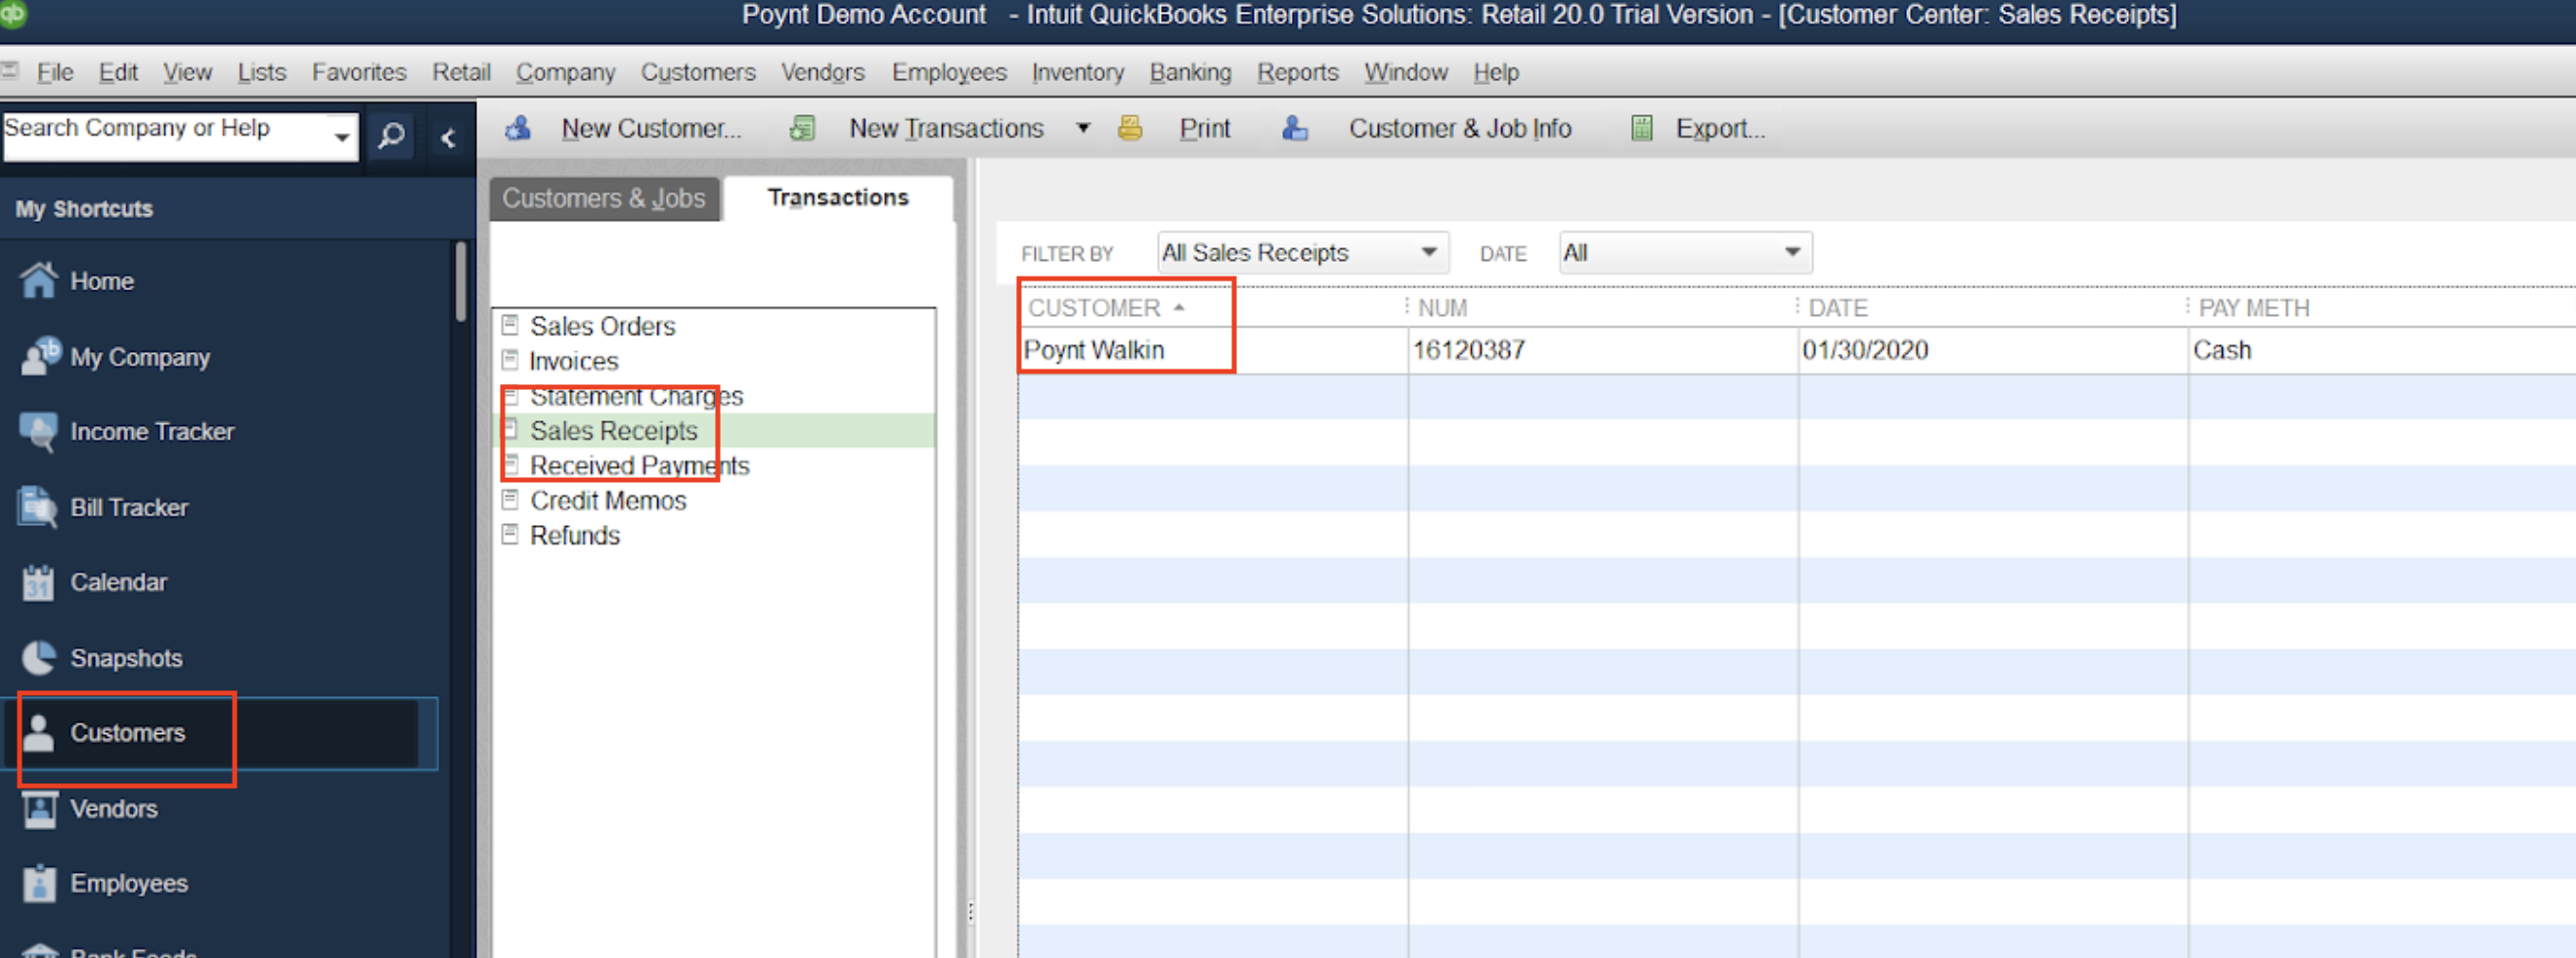
To confirm the sync worked and transactions are showing up in QuickBooks, check under the Customers tab in the QuickBooks Desktop application. If you see Poynt Walkin under Sales Receipts, you'll know the integration is set up correctly.
Back in Poynt.net, confirm that you've verified the sync and there were no issues.
Once verified, you can then set up an initial sync to pull in all your transactions. On the next screen, you can choose the date to start pulling in your transactions.
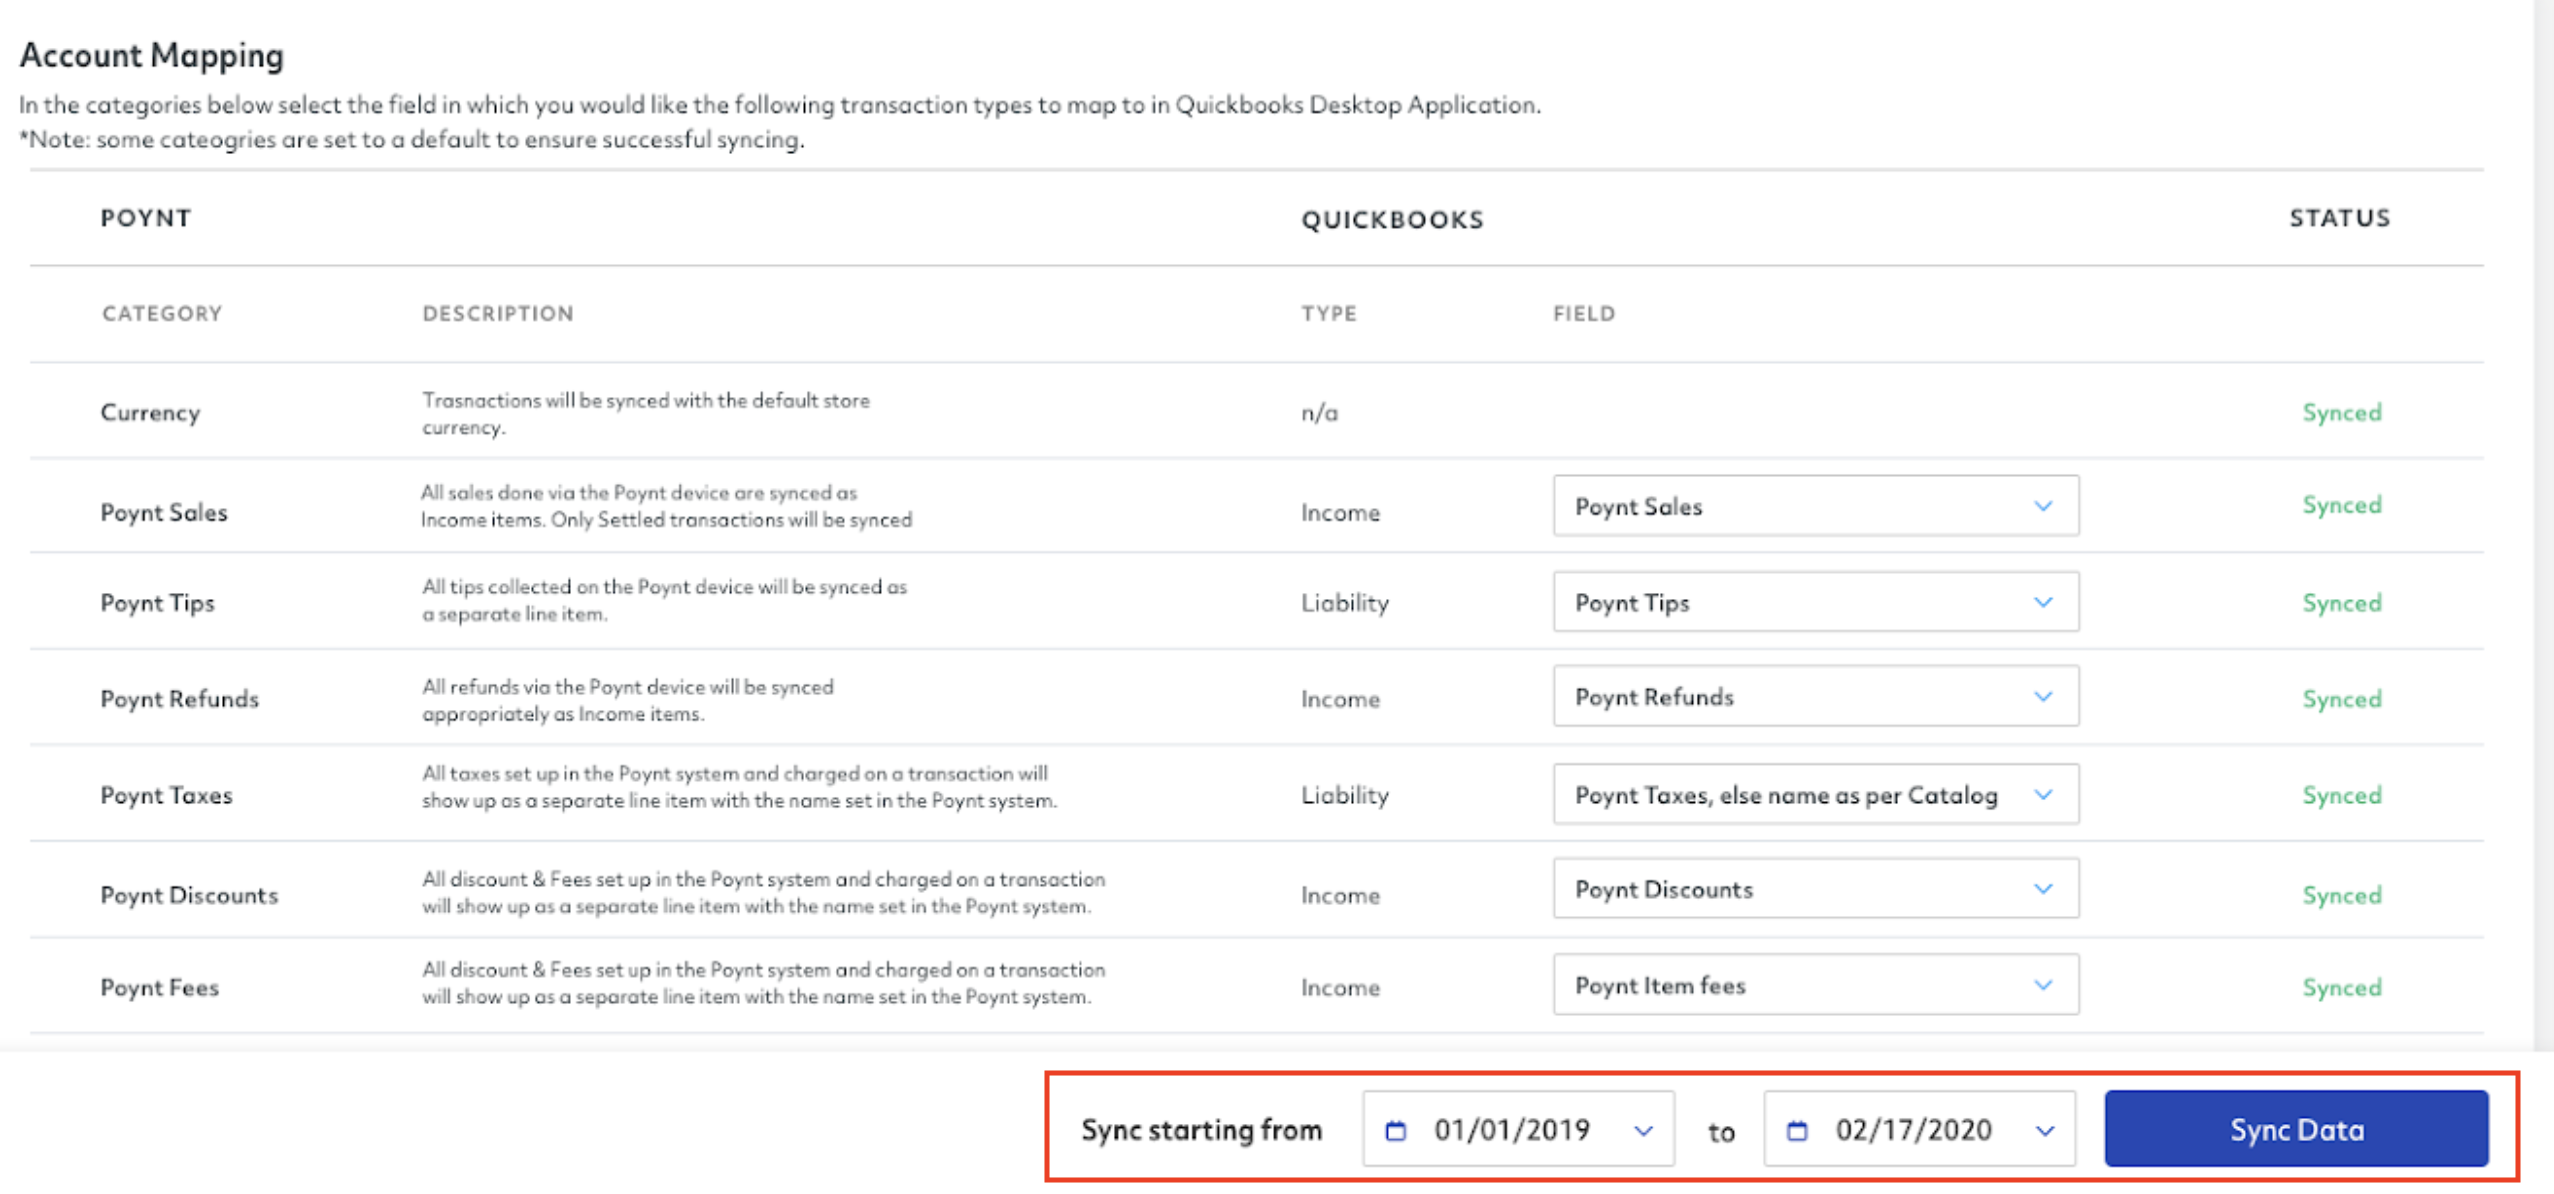 This will take anywhere from a few seconds to minutes based on the timeframe you're syncing the transactions.
Congratulations! You have just synced your QuickBooks Desktop and Poynt accounts. From now on, all your transactions will be synced automatically after you settle them. You can see the status of your syncs in Poynt.net.
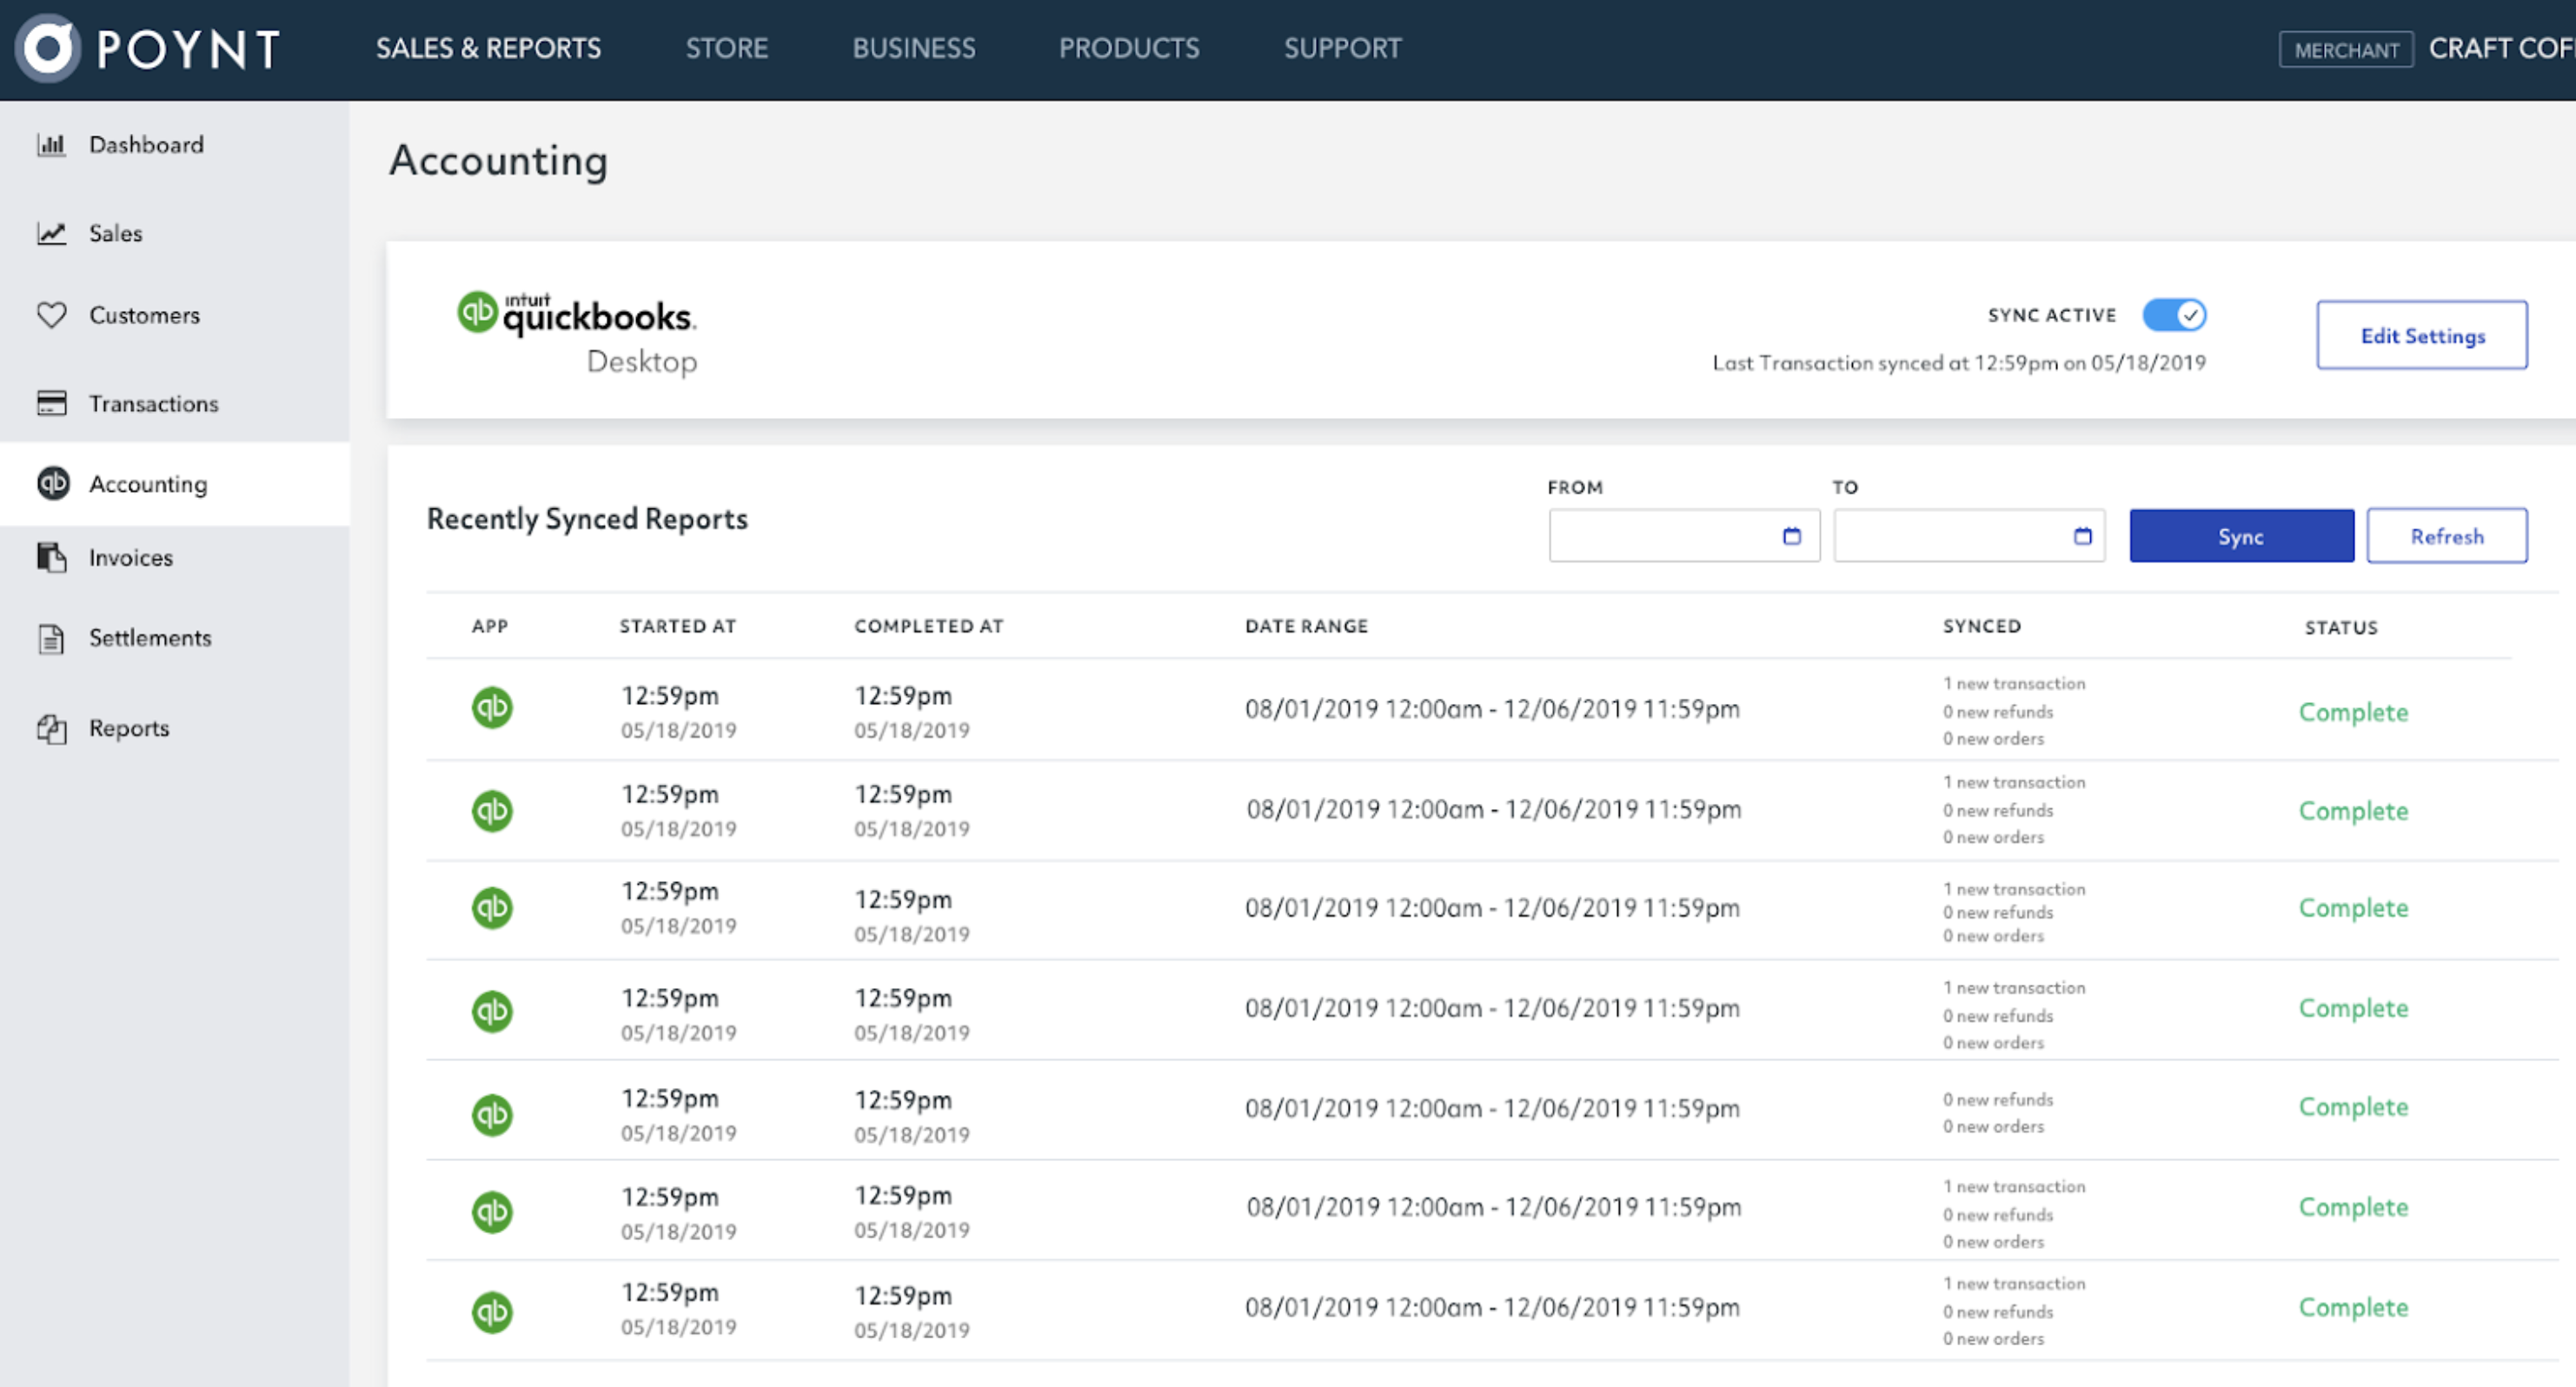
Poynt transactions will be updated in QuickBooks in 10-minute intervals.
Refer to our FAQ page or reach out to support@poynt.com if you have any questions.